Grow for Flavor

Gardening Tips

by Sandy SwegelChioggia Beets

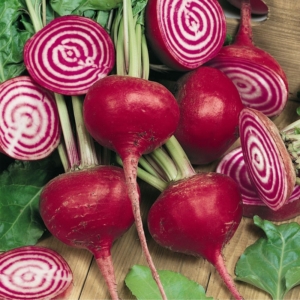
If you read just one gardening book this year, I have the perfect book for you. It’s a British gardening book and while growing conditions in merry old England aren’t anything like growing in hot arid Colorado, the advice here transcends climate. It’s about how to get the most flavor and nutrients by “how” you grow.

“Grow for Flavor: Tips and tricks to supercharge the flavor of homegrown harvests” doesn’t just repeat the advice on how to grow organically that is now found in many books or all over the internet. Author James Wong of the Royal Horticultural Society takes growing edibles to the next level by referencing scientific studies on how nutrient content and flavor molecules increase according to growing conditions and cooking methods.

Beets are one example.

If you want more antioxidants, roasting beets doubles their antioxidant levels compared to eating them raw.

If you want sweeter beets, sow them extra early. Sowing beets in cooler conditions leads to increased sweetness and more intense color.

If you aren’t fond of ‘earthy-tasting beets’ it’s the organic compound geosmin that gives that flavor. You can harvest early because young beets haven’t developed as much geosmin. Or you can put vinegar on the beets as my great grandparents did because the geosmin is degraded by acid.


If you juice beets for their cardiovascular benefits, the substances you want more of are nitrate and betalains. To get more of those, sow a mid-summer crop and fertilize with nitrogen to hike cardiovascular benefits by 300%

Another way to hike health benefits is to skimp on the water, Lack of water or ‘drought stress’ increases phytonutrients by 86% and makes beets richer in zinc and iron.

All this info is from just one page of the book so you can see why I love it. And I love my local librarian who procures such unusual books for our local library where I can read them for free!
Photo credits
http://www.blog.imperfectproduce.com/blog-1/2016/6/15/the-history-of-the-beet

Get A Head Start on Leeks

Get a head start on leeks

Heirloom Vegetable Seeds

by Sandy SwegelAmerican Flag Leek

Organic leeks were $3.99 a pound in my grocery store this week. I love leeks because they add a more rich and complex flavor to soups and sauces than onions do. They are more expensive than onions but just as easy to grow. The only challenge for gardeners in areas with winter is that leeks have a long growing season and it’s not as easy to find leek seedlings for sale come planting time. In January, you can get a head start on leeks as this is an ideal time to start some seedlings to transplant this spring.


The ideal germination conditions for leek seeds are about 70 degrees in moist soil. They will germinate in cooler temperatures but may take a few more weeks to emerge.

Even though the seeds are small, germinate them in containers at least four inches deep rather than in a very shallow tray. We gently push the seeds about half an inch deep into the light potting mix. The seedlings don’t need individual cells so you can grow them in one big container. Their roots will intertwine but easily tease apart without breaking come planting time.


Once the leeks are growing they will continue to need light but easily handle cooler conditions if you need your indoor lights for something else. An unheated cold frame or a makeshift hoop house works great.

Come planting time, we plant the baby seedlings into six inch deep trenches (we want lots of long white stems). For now, just get those seeds started. The only thing to remember is not to let the soil dry out.

I always grow more leeks than I’m going to eat and leave them in the garden to flower. The leek flowers are beautiful and attract butterflies and bees!

Gifts FOR the Garden

Gardening Tips

by Sandy Swegel

Growing up in the South, we always had a wrapped gift under the tree just in case we needed an extra gift. This was in part a combination of Southern graciousness and straight-out guilt. What if someone brought us a gift and we didn’t get one for them? Or what if someone brought a guest to Christmas and we felt sad that everyone was opening presents except that person. The extra gift was just perfect to make the holidays smooth and happy for everyone.

This year I’m thinking I need gifts under the tree for the one who gives me so many gifts but I don’t have anything for them. The Earth. The Garden. Gaia. Mother Nature. Whatever name you use.

I was reflecting on the many lists of “Gifts from the Garden” like jellies and preserves, or flower arrangements, or just the pine cones I use instead of bows in gift wrapping. And I thought of all the food the earth gave me. And the daily gift of earthly beauty.

Nature provides naturally for herself so I’m not sure what to give her. Other cultures have traditional gifts in their spiritual rituals. Native Americans offer tobacco or burnt sage, cedar or sweetgrass. Some Hindu traditions offer rice and ghee in fire rituals.

What can we modern Americans offer? A shamanic friend tells me the gift itself isn’t as important as the intention behind the gift. My intention is gratitude and acknowledging that my relationship with Nature is two-way…not just us receiving but also us giving. I haven’t decided yet what to give, but here are some of the gifts I’m considering:

Gifts For the Garden

A Gift for the birds. A feeder for the tiny birds that live in the tree across the street. Or a birdbath heater to provide water when the temperatures are far below freezing in January. The nearest lake or creek or ditch is over a mile away.


A Little Bag of Leaves. This is a symbolic gift to represent all the leaves I left unraked this year in out-of-the-way places….behind the shed, under the deck, in the garden beds…to provide winter homes for the crickets and ladybugs and all the beneficial insects…and even the aphids.

A Bigger Compost Bucket. I love to compost but sometimes in winter, it’s easier just to let things go down the disposal or put it in the City Yard Waste container. It’s still getting recycled, but the garden that gives me so much would probably appreciate extra food for its microbes and earthworms.

A Heart-shaped Stone. A friend collects these while hiking. She has at least twenty rocks in natural heart shapes that she’s run across over the years. She puts them under a tree to remind the earth how much she loves it and appreciates it.

A Little Pair of Shoes. Something for dolls or some discarded kids’ shoes. This would be a reminder to me to walk more often and leave the car at home.

You get the idea. What gift would you like to give Nature in Appreciation this year?

Stop the Powdery Mildew Cycle this Fall

Gardening Tips

by Sandy Swegel

Powdery mildew had a grand time in my garden this year. I often have a nonchalant attitude to it growing on a few leaves and don’t mind a little bit. But it started early this year on roses, then showed up on the bee balms and finished out the season inundating the sweet peas and squashes. By the time I paid attention, it was out of control.

But now it’s Fall and my inner lazy gardener says…ah well this season is over. Next year it will be different. But if we want to make progress against disease in our gardens, now is the time to act.


Do you Want Less Disease in your garden next year? Then take these steps now:

In the Vegetable Garden
As your squash and cucumbers and pea plants are dying back, remove those leaves and put them in the trash. Not in the compost pile. Don’t let them overwinter and deal with it in the Spring. Fungus and disease spores are sitting passively on the backs of those leaves, just waiting for rebirth next Spring. They do not reliably die in home compost piles. Powdery mildew will survive the winter by forming minute fruiting bodies called cleistothecia And tomatoes? I put the whole plants in the trash after frost. There are just too many diseases on them to risk.

In the perennial beds, leaves infected with powdery mildew like rose or phlox or bee balm often drop before Fall. Before the big tree leaf fall, I use the blower to blow the diseased leaves out of the bed and PUT THEM IN THE TRASH.

This vigorous sanitation is a good idea for all pests too. If you had bean beetles…get rid of those leaves that might have next year’s eggs.

But don’t be too clean.
That’s the important lesson here. In the non-diseased parts of the garden, ladybugs and lacewings and lots of beneficial insects are going to lay eggs and overwinter. We want them. I learned last year especially to let willow leaves be…there were dozens of beneficial babies at the base of willow plants last spring.


And next year…be attentive to the powdery mildew. I now promise to treat early and often with something gentle but effective such as horticultural oil or a baking soda. I lost a lot of production in my vegetables this year because I let the powdery mildew have its way. And the roses and phlox really took a hit. I’ll do better next year. I promise.

Photos:
ipm.ucanr.edu/PMG/PESTNOTES/pn7406.html
startorganic.org/tips-for-treating-powdery-mildew/

Tomatoes in the Heat

Tips for Gardening in the Heat

by Sandy Swegel

My neighbor is panicking and frantically watering all her plants and trees that have droopy wilting leaves. The leaves weren’t getting any better and she feared there was some horrid disease killing everything. But there isn’t some disease…the plants are just stressed by our heat wave with temperatures in the 90s and above. One way plants cope with heat is to let their leaves droop or fold so that they aren’t losing so much water from the leaf surface.


Still, plants coping or not, a heat wave means you are getting few tomatoes. Plants quit setting fruit when the temps are above 92 or so no matter how many pollinators you have. So what can you do? When temperatures are a little lower, July is the time when I usually recommend a good fertilizing to keep the tomatoes at production. But in the heat, tomatoes are just struggling to live and fertilizing may just add to the stress.

What can you do for your heat-stressed plants?

Make sure you keep your watering consistent. You don’t need to drown the plants. No amount of water is going to compensate for temperature.

Mulch any exposed soil exposed to direct sun. Some tomato plants have already shaded the entire surface with leaves, but if there is garden soil getting hit by full sun, put some mulch or grass clippings or old leaves over the soil to keep it from baking in the sun.

If it looks like the heat wave will last quite a while, try to shade your tomatoes. The most effective shading blocks the hot afternoon sun. You can try hoops with shade cloth or throw some row cover over the plants. One frugal local farmer stretches old bedsheets on T-posts on the western side of the plants. Any protection helps until the temperatures lower again. The shade also will help protect the fruit from sunburn.

Photos and information:
http://reaganite71.blogspot.com/2013/07/helping-your-tomatoes-survive-brutal.html
http://www.organicswgardening.com/article4.html
http://squarefoot.creatingforum.com/t3224-watering-during-a-heat-wave

Time to Reboot the Veggie Garden

Gardening Tips

by Sandy Swegel

We ate the last of the Spring Peas this week. They were gnarly and kinda tough, but I savored the sweet Spring memories. Even though the peas were planted in a little shade and watered regularly, a pea plant can only take so many blistering hot days. Pooped-out peas are a sure sign that it’s time to start thinking about the Fall Garden. It seems slightly absurd since we still don’t have a single red tomato here in zone 5, but if I want a lush fall and winter garden, the time to reboot the spent Spring garden is now.

But it is July and it’s hot, so let’s start the fall garden in nice easy baby steps. These week’s plan is simple:

1. Pull out the finished pea plants. Pull out the weeds. Scratch in some fresh compost and keep the area watered for a few days as the soil settles down.
2. Plant some seeds. Keep the patch well moistened (or throw some row cover over to keep the water from evaporating so fast.
3. Have something cold to drink and flip through your seed cache or favorite seed website to plan something new and different the next time a little patch of soil is ready for replanting.

Some excellent July planting choices:

Leafy greens: arugula, Asian greens, collards, more kale or chard
Cool-season herbs like cilantro and dill
Root crops you want to enjoy after frosts like carrots and beets
Rapini (Broccoli raab)

Don’t stress yourself in the heat….just plant that one little patch that’s just growing weeds now and reap the rewards in September.

Photos:
http://www.popsugar.com/fitness/Healthy-Recipes-Winter-Vegetables-Fruits-21357784#photo-21357809

A Working Garden Club

Finding a Garden Community

by Sandy Swegel

There are lots of garden clubs around. I personally belong to three and follow another two email-only groups online. When I first started gardening as an adult, I didn’t think I’d ever be a garden-club-kinda girl. Growing up in a Southern Big City, garden clubs to me meant you had to wear your best dress and go to a lovely tea with people of a certain social class in a beautifully manicured rose garden. That was just my own prejudices showing through because the love of gardening knows no class lines. However, I didn’t think I’d ever get my fingernails clean enough to go to one of those parties. With age and experience comes some wisdom and now I do go to one of those formal groups with officers and Robert’s Rules of order and I admire the community of members who have known each other for decades and who are so wise about local gardening.

I belong to another scruffier group that is especially interested in “culinary gardening” – gardens with lots of edibles. We mostly meet through email because there are quite a few market farmers and community garden volunteers so people don’t have time to meet with all the work they have to do…but any questions you ever have can be answered on our email list. We also order seeds and roots and greenhouse supplies together in bulk to save a lot of money. Every once in a while I meet someone who says they belong to this group and I have to ask their email address before I recognize them. We do have a heck of a delicious holiday party once the season ends.

A third occasional club I meet with has one primary task…to maintain a public rose garden a few times a year. So we are a kind of working group. We don’t all know each other well, but we know and love our roses.

I was at a small town garden tour yesterday and met people from a different kind of gardening club. They are a small (fewer than ten members) club who is a real WORKING group. No sitting around chatting about plants or looking at slide shows for them. Regularly they meet in one member’s garden and work for a good two hours on a garden project of the member’s choice. Naturally, this is followed by cold drinks and good food. They have met for years and welcome anyone…as long as they are willing to work to their ability. I admire this group because their gardens and knowledge have steadily improved over the years but they have also become a close-knit community based on their love of the earth and growing plants. They share in each other’s lives too and tend each others’ gardens or bring supper if someone is sick. They freely welcome newcomers to their group…if they’re willing to work.


I’m fond of saying that gardening is like the new church. Good people with shared values coming together and supporting one another in many ways and having a good time. Everyone clearly loves plants but there’s not a lot of doctrine. (well not counting opinions on pesticides.)

If I ever moved to a new town, the first thing I’d do is join a garden club. That’s the way to make true blue friends AND get more free plants.

Photo credits
http://www.dailyherald.com/article/20160204/entlife/160209489/
http://www.shorelinetimes.com/articles/2013/04/09/opinion/doc516475b154574110166725.txt
https://vitalandwell.files.wordpress.com/2012/04/garden-club-kids-2012.jpg

Gardening to Save Your Life

Growing Food in Hard Times

by Sandy Swegel

My heart is breaking this week with the stories coming out of Venezuela of severe food shortages and 5000 ordinary people looting food warehouses on Wednesday because they and their families were starving. They are right to be desperate. At the end of April, the government announced it only had a 15-day inventory of food left. The president has suggested people should grow their own food and maybe keep some chickens. That’s not very likely in the ultra-urban capital city of 5.4 million people in Caracas.

Venezuela’s problems are mostly political and socioeconomic, exacerbated by the fact that they import most (65-80% depending on who is counting) of their food. Once an agricultural nation, they shifted most land to the easy money of oil production. Now as oil prices have dropped significantly, there’s no money left to pay to import food.


Which all led me to some serious questions.

Could I grow enough food to save my life if our groceries shelves went empty?

Do I know enough about growing food that I could teach desperate neighbors to grow their own food in small urban areas?

Assuming I couldn’t purchase seeds or fertilizer, could I really grow a zero import garden?

It is frustrating when there is news of famine and human beings starving in the world. Most of the time it’s political. Increasingly, climate change has brought on severe drought. We have all come to hate the evening news with the latest story of suffering in the world. What can we do?


We can educate ourselves more. We can learn to grow food really well. For me this year, I’m going to focus on learning more about growing high calorie and high protein foods. I’ve grown potatoes and onions a couple of times with mediocre production and figure it’s cheaper to buy those and use my garden for more kale. But a hungry community needs calories and needs protein.

My goals this year are to get better at growing potatoes and dry beans…foods for survival.

What can you learn this year in case one day you had to feed yourself and teach others?

If you need a place to start to learn, this book is a great way to start:

Gardening When It Counts: Growing Food in Hard Times

Photocredits
http://www.theatlantic.com/health/archive/2009/09/on-urban-farms-a-sense-of-place/26675/


Weeds Are Our Friends

Tips for Weeds

by Sandy Swegel 

Say what? Well, Spring weeds ARE my friends. August weeds not so much. But Spring is finally overcoming winter and the big leafy weeds are the proof.

So what’s to love about Spring Weeds? The most important thing is they are an abundant source of food for pollinators. They are also delightfully pretty if you don’t think of them as weeds. I especially love the wild mustards. Invasive in lawns and on bare garden soils, blue mustards’ very tiny blue flowers are everywhere and are an excellent food source for awakening bees. Bees can’t live on dandelions alone you know.

To a gardener, the best part about spring weeds is WEED TEA and COMPOST.

Weeds, especially the perennial ones like dock and thistle, are an excellent source of nutrients because of their deep tap roots. To capture these nutrients in a usable form, you have to break down the plant tissue. The easiest thing to do is just keep throwing the leaves on the compost pile. This time of year your compost bin has too many “browns” anyway with all the dead winter material. The “greens” of spring coupled with warm weather jump-starts your pile.

But if you want to really get all those nutrients available to your plants and soil, you’ll want to make some Weed Tea.

Weed Tea Recipe

Get a big container.  A Rubbermaid garbage can will work, or make a small batch in a 5-gallon bucket. Put in all the weeds you can gather. I throw in cut leaves and whole plants. Put this container someway far away from your back door where you can’t smell it!

Here’s what’s going in my bucket:
Yellow dock leaves…these are everywhere.
Pulled or dug thistles.
Comfrey if you have it….these are especially full of nitrogen, phosphorus and potassium.
Nettles. Wear gloves.
Crabgrass with clumps of dirt still attached.
Dandelions, salsify, prickly lettuce, even bindweed if it’s up already. Nothing’s going to survive this stew.
Pond scum.


Now fill your container with water at least 12 inches over the plant material. And let stand until it is a disgusting gooey stew of fermented and stinking rotted material. Stir weekly. That smell is anaerobic decomposition. If the weather is warm, this takes maybe 10 days or as long as 4 weeks if it’s cooler. That’s it. You’ve made the best fertilizer you will ever use. Capture the liquid to use to pour directly (I dilute about 1 part weed tea to 4 parts water) on your garden beds. Strain some and put it in a sprayer for foliar feeding. Hold your breath and throw the stinking mess of weed material on your compost pile.

My favorite use of weed tea is to use it as a foliar feed and watch the treated plants green up overnight. This is especially good on tomatoes.  Spring Weeds really are a gardener’s friend!

Photo credits

http://wildfoodgirl.com/2013/denver-mustard-mania/

http://permaculturenews.org/2013/12/06/simple-recipe-fertilizer-tea/


How To Deal with Troublesome Pests In Container Gardens

Pests Control Tips

by Angela Thomas04.20.16a

Many gardeners choose to grow plants in containers for the ease of planting and for the convenience of placing the containers anywhere they want. Maintaining healthy plants in a container garden is no different from plants in a garden.

However, container plants need more care. Taking care of them slightly differs from regular plants. They have limited soil volume and are subject to more stress than garden plants which requires constant monitoring for pests. If you’re looking to save time and the stress of having to find the pests that may of intruded into your garden. It could it be worth checking out the best home security camera deals on the market to make finding the pests and what they’ve left behind easier for you.

You must regularly inspect the foliage, bloom, and fruits to find out signs of infestation. You must also examine the underside of the leaves and stems as some insects hide in those places.
If the plants have any infected or dead leaves, you must immediately remove them. If you find few yellow leaves are on the bottom of the stem, do not worry as they naturally occur when the plants grow.

Mix a few drops of mild detergent in water and wash the foliage. Container plants will benefit from this if you repeat it every month.

If the infestation does not respond to soapy water, you may have to use commercial pesticides that are designed to control specific pests. These days manufacturers offer alternatives to chemical pesticides so visit the local store and buy the products if infestation continues. While using such products, you must always follow the instructions, and they must be kept out of reach of children.

To avoid pest infestations, do not reuse the soil especially if the plants were affected by bacteria. Even though the soil looks fine, it might be contaminated or have insect eggs which are hard to see. This infographic on natural pest control methods can give you the ideas to get it done on your own. However, if you would prefer to get some professional help, rather then do it by yourself, then you could always check out someone like pest control Des Moines.

04.20.16b

Clean containers will be helpful to prevent problems. When you are going to start a new planting, scrub the pots and containers using liquid detergent and water. To reuse an infested pot, soak it in a solution of one part household bleach to ten parts water for about an hour. Rinse all the pots thoroughly and dry them in sunlight before planting. Keep in mind that the area around the containers should also be clean as dirty surroundings is a way through which pests attack plants. After using the tools to treat the infested plant, thoroughly wash them, before you use it on other plants.

Healthy plants can fight off pests that attack them. So make sure you give the plants adequate sunlight, organic fertilizers, and water. There must be proper space between plants so that there will be enough air circulation. If pests infest a plant, keep them away from the rest of the plants because they will infest the healthy ones too.Many pests infect container grown plants especially spider mites. Stressed plants are most likely to be attacked by pests than healthy ones. So regularly monitor plants so that you will be able to detect problems in the early stages.

[http://i.imgur.com/RXdrB4W.jpg] (Plants in containers)

[http://i.imgur.com/QjYu9XV.jpg] (Cleaning container)