Natural Weed and Pest Control

Alternatives to Poisons

by Jessica of TheBeesWaggle.com

Honey Bee on Dandylion

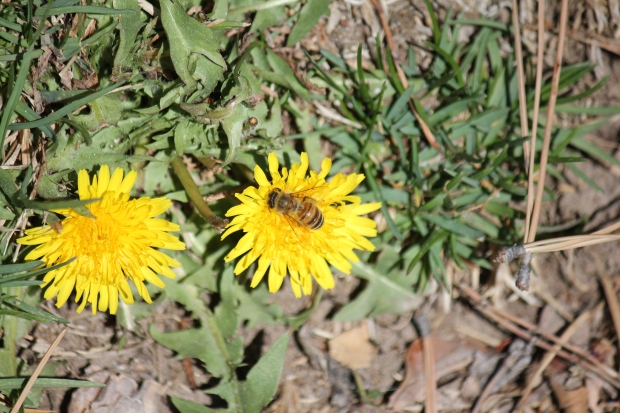
Weeds do have value to pollinators, as most produce blooms that carry highly nutritious contents for pollinators.  However, they can be overwhelming in their growing power, and we need ways to control them without poisoning the soil and the things that feed on them.  I would like to begin by saying I pull each and every weed that I do not want growing in specific places.  I never use chemicals, not even vinegar and salt.  I would like to urge you to do the same, but I am providing you with some choices that are nontoxic.

  1.  Boiling water.  Pouring boiling water over weeds cooks them, and kills them.  Water is only water, so it’s okay for it to get into the soil and groundwater.
  2. Spray straight White Vinegar on the leaves of weeds being careful not to go overboard.  Too much vinegar in the soil isn’t good for the pH of the soil so it will affect the balance of the existing underground ecosystem if it is applied excessively.
  3. Spray a mixture of salt and vinegar…and then maybe pull them, roast them, and eat them?  Just a joke.  The recipe is 1 cup of salt into 1 gallon of vinegar

Wasps, hornets, and yellow jackets are the other most popular topic of seasonal pests.  I don’t consider them much of a  pest because they eat other insects, which makes them a very important part of the food chain.  So, instead of finding ways to kill them, I find ways to coexist.  They do not like peppermint oil, lavender oil, or eucalyptus oil.  So, the best prevention is to spray a mixture of these oils with water around the areas you’d rather them not set up shop.  The recipe is as follows:  1 tsp of peppermint oil; 1/2 tsp lavender oil; 1/2 tsp eucalyptus oil into 2 cups of water.  Use a good spray bottle to apply this mixture anywhere you do not want them present.  I suggest daily application, and the smell is pleasant, at least I think so.

Bald Faced Hornet

Remember that every living thing has a purpose, so frugally controlling them is in our best interest! I hope you all are having a wonderful summer so far! Thank you for being part of this very important movement to save our bees!

Jessica

Here are a couple of links to steps to control pests using non-chemical controls and least toxic methods, and a link to a great video from BeyondPesticides.org website.

Manage Safe

Organic Land Managment Practical Tools and Techniques


Pollinators Support Biodiversity

Importance of Pollinators

by Jessica of The Bees Waggle

Biodiversity is the variety of life.  It showcases the relationships between all life forms on Earth.  It is the web of life, connecting all life on Earth in an interdependent web of function, purpose, and necessity.   It can be a protective mechanism against catastrophic failure of life.

Biodiversity provides:

A wide array of foods and materials, which contributes to the survival of all.  Examples include: medicines derived from plants; 7000 species of plants are also food sources for other species.

Genetic diversity, which defends against diseases and pests.

Example:  Monoculture crops are not diverse, genetically or otherwise,  and are thus susceptible to influxes of pests and disease, which is one reason why farmers of these crops are so dependent on chemicals to sustain crops. Planting hedgerows with a variety of plants encourages natural pest control for crops via predatory insects and birds.

Ecological services, which are functions performed by many species that result in sustaining life on Earth, and are a supported by biodiversity. Within each ecological service, there are many species at play.

Some examples of ecological services are:

Decomposition of waste

       Water purification

       Pest control

       Flood moderation

       Soil fertility

       Pollination

Adaptability to disturbances, which is achieved by a concerted effort of many life forms repairing the damage done by a natural disaster, or another form of disturbance.

Every piece of every ecosystem is important and each piece depends on the other pieces. We, as humans, are part of a planet-wide ecosystem, and we depend on many different systems for our survival.  One extremely important web we depend on is that of the pollinators.

Pollination supports biodiversity!  It is a mutually beneficial relationship between the pollinator and the pollinated. One without the other would be catastrophic. Pollination supports diversity of plants, as well as the animals that feed on those plants.  This beneficial relationship reaches broadly to birds, small mammals, large mammals, other insects, and us!  If this relationship were lost, many ecosystems would implode.

Pollinators contribute to biodiversity and life on Earth in ways that are significant to every ecosystem existing today.  Roughly 90 % of all flowering plant species are specialized for animal-assisted pollination!  7000 plant species are a form of food for other species.  Many of these flowering plants develop food only as a result of visiting pollinators, and this food supports the lives of countless species, including humans!  The disappearance of pollinators would inflict catastrophic consequences on the entire planet.

The diversity of pollinators alone is staggering!  There are 20,000 bee species accounted for on Earth, and there are likely more. This number does not account for the hundreds of thousands of species of flies, moths, butterflies, birds, bats, and beetles who also pollinate flowering plants.

Our pollinators are struggling.  Some populations of butterflies have declined as much as 90%!  Honeybee colony losses are at an all time high!  What do you think that means for our native bee species?  I can tell you it isn’t good.  The struggle is due to: loss of habitat, lack of food, and pesticide use.  

The fact that pollinators are broadly struggling threatens the balance of biodiversity, and life on Earth!

You can help by doing the following: add back habitat (shelter, food, and water), plant flowering plants, and please stop the use of all pesticides (including: insecticides, fungicides, and herbicides).  

Hummingbird Love

Gardening Tips

By Sandy Swegel

We, humans, are crazy in love with hummingbirds. I received so many emails and messages about hummingbirds this week, I have to pass on the things I’m learning.

Spring migration is happening all over the US and there are hundreds of citizen scientists who report their sightings. You can check your area to see if Ruby-throated hummingbirds have arrived. http://www.hummingbirds.net/map.html  This week they are showing up in Canada and at higher elevations. Hummingbirds showed up in Colorado about three weeks ago.

I learned we should keep an eye out for hummingbird nests. They are so tiny. The eggs are the size of jellybeans. The Denver Post newspaper had a whole article on how to recognize the nests so you don’t hurt the eggs when you are doing spring pruning.

Most hummingbird lovers find one feeder isn’t nearly enough. You should have more than one feeder so the birds don’t have to fight over it. Or a big feeder with multiple feeding stations. Some people go totally crazy and fill their yard with feeders. Sugar water isn’t the only food hummingbirds rely on in spring. They eat lots of nectar from flowers, pollen, bugs including mosquitoes, and even tree sap. But their metabolism is so high, they need to eat constantly.

The most important thing I learned about hummingbirds this week is that you have to wash out the feeders and change the water every few days. Old sugar-water grows mold which can kill the hummingbirds. Our neighborhood feeders get drained pretty quickly…but it’s still a good idea to rinse the feeder with vinegar water before refilling.

The most fun hummingbird thing I did this week was watching YouTube videos on hummingbird babies. Cuteness overload. I have quite a few flowers planted that hummingbirds like, but now I see that I need some feeders outside the window by the breakfast table!

The oddest thing I did for hummingbirds this week is to buy a new garden hat. My old hat was a bright orange-pink color, and hummingbirds would dive bomb my head thinking I guess that I was a big flower. I have a more subdued lavender hat now…and so far I’m safe.

I recommend highly putting up a few feeders yourself so you can enjoy the show!

Photo credits

Photo credit: http://www.thedenverchannel.com/news/local-news/hummingbirds-have-arrived-in-colorado-check-your-trees-and-shrubs-before-trimming

http://voices.nationalgeographic.com/2014/05/16/animals-nests-weird-animal-questions-science-birds/

How To Deal with Troublesome Pests In Container Gardens

Pests Control Tips

by Angela Thomas04.20.16a

Many gardeners choose to grow plants in containers for the ease of planting and for the convenience of placing the containers anywhere they want. Maintaining healthy plants in a container garden is no different from plants in a garden.

However, container plants need more care. Taking care of them slightly differs from regular plants. They have limited soil volume and are subject to more stress than garden plants which requires constant monitoring for pests. If you’re looking to save time and the stress of having to find the pests that may of intruded into your garden. It could it be worth checking out the best home security camera deals on the market to make finding the pests and what they’ve left behind easier for you.

You must regularly inspect the foliage, bloom, and fruits to find out signs of infestation. You must also examine the underside of the leaves and stems as some insects hide in those places.
If the plants have any infected or dead leaves, you must immediately remove them. If you find few yellow leaves are on the bottom of the stem, do not worry as they naturally occur when the plants grow.

Mix a few drops of mild detergent in water and wash the foliage. Container plants will benefit from this if you repeat it every month.

If the infestation does not respond to soapy water, you may have to use commercial pesticides that are designed to control specific pests. These days manufacturers offer alternatives to chemical pesticides so visit the local store and buy the products if infestation continues. While using such products, you must always follow the instructions, and they must be kept out of reach of children.

To avoid pest infestations, do not reuse the soil especially if the plants were affected by bacteria. Even though the soil looks fine, it might be contaminated or have insect eggs which are hard to see. This infographic on natural pest control methods can give you the ideas to get it done on your own. However, if you would prefer to get some professional help, rather then do it by yourself, then you could always check out someone like pest control Des Moines.

04.20.16b

Clean containers will be helpful to prevent problems. When you are going to start a new planting, scrub the pots and containers using liquid detergent and water. To reuse an infested pot, soak it in a solution of one part household bleach to ten parts water for about an hour. Rinse all the pots thoroughly and dry them in sunlight before planting. Keep in mind that the area around the containers should also be clean as dirty surroundings is a way through which pests attack plants. After using the tools to treat the infested plant, thoroughly wash them, before you use it on other plants.

Healthy plants can fight off pests that attack them. So make sure you give the plants adequate sunlight, organic fertilizers, and water. There must be proper space between plants so that there will be enough air circulation. If pests infest a plant, keep them away from the rest of the plants because they will infest the healthy ones too.Many pests infect container grown plants especially spider mites. Stressed plants are most likely to be attacked by pests than healthy ones. So regularly monitor plants so that you will be able to detect problems in the early stages.

[http://i.imgur.com/RXdrB4W.jpg] (Plants in containers)

[http://i.imgur.com/QjYu9XV.jpg] (Cleaning container)

Two Ways to Guarantee Your Outdoor Seeds Grow

Seed Starting

by Sandy SwegelPre-sprouting seeds

The next few weeks are crucial for new gardeners. Every year in Spring, first-time gardeners buy some seeds and dig up a garden on the first really warm weekend and sprinkle the seeds out. Then they wait. For some, within the month, weather conditions will be good and they’ll have their first garden seedlings and they will be totally hooked on the magic of gardening.

For others, something bad happens that the newbies don’t know about. They don’t realize they have to water. Or a couple of hot days come and burn the new seedlings to a crisp. Maybe the neighborhood crows watch you plant and come to eat every last pea. Sometimes the soil is cold and it’s just too early to germinate seeds. These newbie gardeners lose hope and say they just have a black thumb and give up gardening.

If you’ve had failures but are still willing to give a garden from seed a try, I have two techniques that virtually guarantee your seeds will germinate outdoors. These are especially good ideas if you’ve given up trying to grow some things because they never work for you. For years I just thought I was broccoli-impaired until I tried these hints.

First of course, you have to start your garden bed.

HOW TO START A GARDEN BED.

You can till and/or turn the soil by hand but you don’t have too if the soil is not solid concrete.
Dig out the weeds. Get the roots if you can.
Take a rake and make the soil level and a bit smoothed out.
Water soil with a soft sprayer if the soil is dry.
Sprinkle seed over the soil. How much seed and how far apart is written in the little print on the packet.
Pat the seed lightly with your hands so there is contact between the seed and the soil. Bury the seed slightly if the packet says so.

If you live in someplace humid and warm, that’s enough. Your seeds should come up.

If you live someplace dry or with fluctuating temperature or you’ve had failures in the past, try these two success techniques:

Sprouts

#1 ROW COVER

Lay a sheet of row cover loosely over the seeded bed. You want it nice and loose so the plants can grow and the row cover lifts with them. I use some heavy rocks to hold down the row cover so it doesn’t blow away. The row cover helps the seeds stay moist enough to germinate and raises the soil temperature a few degrees so the seeds germinate faster.

Water with the soft sprayer. Note….I water right on top of the row cover. You don’t have to lift it to water underneath often causing the seeds to float away. It’s permeable so the water makes its way through.

#2 PRE-SOAK AND PRE-GERMINATE the difficult seeds.

Pea sproutsSeeds like peas or carrots respond well if soak them in warm water in a bowl overnight, drain them, then plant. The soaking activates the enzymes that break the seed coat and speeds up germination. If it’s a seed you really have trouble with, you can put the seeds on a wet paper towel in a baggie and wait a few days until you see the sprouts.

These two shortcuts…pre-germination and row cover…work for me all the time. And I get better germination which means I get more plants per packet of seeds and save even more money.

Now go out and grow some food and flowers!


Photo credits:
http://daphnesdandelions.blogspot.com/2010_09_01_archive.html
http://learningandyearning.com/tag/pre-sprouting/

Growing for Chickens

What to grow for your chickens

By Sandy Swegel

Reading our Facebook posts lately on how yummy eggs from backyard chickens are got me thinking about what makes homegrown eggs taste so much better than store eggs.

A varied diet helps a lot. Commercial chickens pretty much get a straight corn-based diet with vitamins and minerals added in. Happy home chickens can still eat commercial food, but they usually get lots of food scraps too. That’s when the eggs start tasting better. When the chickens get lots of protein like bugs and worms, that’s when the eggs get really good.

Here’s what my chickens love:

Kitchen Scraps

Any and all scraps go to the chicken. Even meat if it is cooked. (The shocking secret I learned about chickens is that their favorite food is chicken….especially the scraps from fried chicken.) Chickens aren’t terribly smart in general, but they are savvy about food. If something is moldy or too full of pungent foods like onions, they just scratch it aside looking for bits of fruit or tomatoes or meat. Their favorite foods are things kids like. Noodles are a big hit. So are cherry tomatoes.

Weeds and Garden Waste

All the crab grass, dandelions, seed heads, dock leaves, grass clippings, etc go into the chicken run. They go for the greens and seeds first and push the other stuff around. Grass is apparently yummier in the Spring than in mid-summer when they just look at me and say “Meh.”

Bugs

This is the best secret to having delicious eggs….lots of proteins especially from living crawling things. All those kitchen scraps and weeds that don’t get eaten get raked into the corner and turn into compost with lots of earthworms. At some point in their random scratching, the chickens figure this out and turn the compost pile with great delight. Somehow plenty of earthworms manage to survive. I throw in extra bugs too: slugs, cabbage worms, box elder bugs, maggots, anything I don’t want in the garden. One other icky-to-think-about critter they really love to eat are mice.

Spent beer grains

Our local breweries put out their spent grains and hops for farmers and gardeners to recycle. These grains are usually a bit fermented which makes the chickens very very happy. The fermentation adds extra nutrition, happy, slightly drunken chickens make delicious eggs.

More greens

My chickens have to stay in a fenced run because of the large number of foxes and coyotes in our area. So I plant food all around the edges of the run so they can reach their heads through the fence to nibble but not actually destroy the plants by pulling them up. Currently growing are comfrey, chard (their favorite, I think they like the salt), kale, and wild grasses and dandelions (they like the flowers).

So plant for your chickens and they will reward you with the best-tasting eggs and lots of entertainment.

Photo credits:
http://www.urbanfoodgarden.org/main/composting/composting—compost-bins-in-chicken-run.htm

Kelp: A Gardener’s Best Friend

Why to Use Kelp in Your Garden

by Sandy Swegel

Our local garden club invited a rose expert from Jackson and Perkins to give us some winter inspiration this week. Rose growers are like tomato growers….they have their own little secrets and rituals to make their roses the best and the biggest. Our expert showed us pictures from his own garden that made me a believer in kelp. His plants treated with kelp and fertilizer were bigger and more robust than plants treated with just fertilizer If you are going to use soil amendments in your garden, kelp should be at the top of the list right after organic fertilizer.

So what does kelp offer?

Sea Minerals.
Kelp and other seaweeds are good sources of trace minerals that are often deficient in ordinary garden soil. So kelp is a good ingredient as a fertilizer…but not a substitute for your regular fertilizer.

Plant Growth Hormones.
OK, this is the real reason gardeners love kelp. Its natural plant growth hormones (cytokinins) stimulate extra growth in our plants and in our soil microbes. This is the “secret weapon” part of using kelp in your garden. Kelp stimulates roots, plant growth, flower production by virtue of the hormones even more than because of the vitamins and minerals.

Plant Health and Resilience.
Plants treated with kelp showed more drought resistance and bug resistance. Aphids, in particular, don’t like the taste of kelp and avoided kelp sprayed leaves. Anecdotally, I have found that a kelp foliage spray reduces powdery mildew.

How to Use Kelp

Kelp comes as kelp meal and as a liquid. An interesting thing about kelp is that when you apply kelp changes what kelp does for your plant. If you want sturdier roots, add kelp meal when planting to stimulate root growth. If you want more flowers on roses or tomatoes, apply it as a spray when your plants were budding. (Thanks researchers from the marijuana industry for these studies.) Some tomato growers use kelp weekly once tomatoes start to flower. If you are trying to improve your soil, apply meal or liquid to the soil once soil temperatures are above 60 or so when soil microbes are active. I like to use a weak kelp liquid spray weekly during hot spells in summer and spray all over the tops and undersides of leaves. It perks the plants up and gives the garden a lovely ocean smell. Plants absorb kelp better through leaves than through roots.

How Not to Use Kelp

More kelp isn’t better than small amounts of kelp. Don’t just throw it on your garden thinking more is better. Think about what effect you want. Do you want more tomatoes? Then applying kelp when the tomato is growing leaves but not making flowers yet will give you more leafy growth, not more tomatoes. On the other hand, a little kelp spray on your greens will increase the number and vitality of leaves.

Do Your Own Experiment
If you are going to add kelp to your repertoire, try a science experiment. Select a plant that you give kelp to and one a little further away that doesn’t get kelp. Do they behave differently?

Cabbage and Clover Husbandry

Cover Crop Seeds

by Sandy Swegel

St Patrick’s Day is this week…a traditional day for planting peas. But you know that….so get ready to plant your peas. This year I’m thinking about Ireland and two plants usually associated with Ireland: cabbage and clover (not necessarily the four-leaf variety.) A little internet browsing led to an interesting connection to these two plants. One…they both like to grow in cool humidity like Spring and Fall. Cabbage is a cool season crop. Two… old country wisdom and modern science show that cabbage and clover are excellent companion crops.

Books in England dating back to the 1700s recommend cabbage “Husbandry” the old word for farming. Cabbage was highly regarded because it lasted well as a stored food for winter and because cows and sheep that ate cabbage in the winter made sweeter milk than those that ate turnips. Standard practice in England in the olden days was to plant a clover cover crop and follow that with cabbage or potatoes. Turns out that cabbage that grows in clover or where clover had been grown and tilled under are larger and have significantly fewer pests included the cabbage looper. Cabbage moths are still the bane of cabbage growers. Modern no-till farmers have adopted this centuries-old wisdom to plant cabbage right into a field of clover.


Besides being good for cows and sheep, cabbage is healthy for us and a staple in many cuisines. I am particularly fond of the red cabbages because they are pretty! Here are a few tips to grow cabbage:

It’s a cool season crop.
That means you have to get it in early. Or plant it in mid-summer for fall harvest.

They do well from transplants.
Start seeds indoors or in a cold frame 8 weeks before last Spring frost. Then transplant it about 2-4 weeks before last Spring frost. Cabbage is a “heavy feeder” so you need good soil or extra fertilization and regular irrigation.

Watch out for pests.
Cutworms and cabbage loopers love cabbage too…but they are pretty easy to pick off if you stay after them. Little paper collars protect transplants from the cutworms. If you don’t like to pick off the worms, it is good organic control.

Cabbage makes great microgreens.

Cabbage germinates in about two days in your warm kitchen. Another superfood from the brassica family.


For more on the science of winter-sowing clover and cabbage and other brassicas
http://www.ctahr.hawaii.edu/oc/freepubs/pdf/IP-27.pdf
http://www.modernvictorygarden.com/apps/blog/show/2015631-in-praise-of-cabbages
http://microgardening.newearthmicrogreens.com/red-cabbage-microgreens-vitamins/

Planting Wildflowers

Grow a Wildflower Meadow!

by Sandy Swegel

This blog post is for anyone who wants to grow wildflowers.  It is especially dedicated to BBB Seeds’ friends at the Rockies Audubon Society who have an awesome program called Habitat Heroes that encourages “wildscaping” your garden with native plants that attract pollinators and birds and support wildlife even in an urban area.

  • Deciding What and Where to Grow

Look at the site where you want to grow a wildflower meadow or patch.  An ideal site would have sun and good drainage and not too many weeds. Nature seldom provides what we consider ideal. So the next step is choosing the right mix of wildflowers.  We help by providing mixes for unique conditions such as sites that are dry or sites that shady.

  • Prepare the Soil

TX-OK-1oz

Some don’ts:

  • Don’t deep till!

That’s the number one rule….unless you are planning a year ahead of time.  There are enormous numbers of weed seeds in any soil and tilling up the soil brings up all those weed seeds to the light and they start to grow.  You do have to deal with weeds and you will lightly till/scratch in a shallowly.  But this is time to leave the tiller in the garage.

  • Don’t use weed killer

Especially don’t use the weed killers for your lawn or those with pre-emergents that stop new seeds from germinating. Those will have long-lasting effects that will thwart your wildflower growing efforts.

  • Weeds:

You will have to deal with weeds especially if you have an area that is pretty barren of other vegetation.  People have good success with putting down black fabric or cardboard weeks ahead of time to suffocate the weeds.  For big hunkin’ weeds like dock, it’s good to get the shovel out. You can’t get all the weeds, but after you put your seeds out, you won’t be doing any weed-pulling for a while because you’ll accidentally pull the new wildflowers or disturb their young roots. Replacing weeds with wildflowers will be an ongoing process.

  • Scratch and Rake

You do need to break the soil and rake it smooth, but not more than 2-3 inches deep.  You want little crevices for the seeds to slip into so they have a cozy home.  I’ve had the best success by loosening that top couple inches of soil and waiting a couple of weeks for all the weeds to germinate. I then scratch up those weeds, rake again, and then put the wildflower seed out.

  • How Much To Plant

One ounce of seed (a small packet) plants about 100-150 square feet.  (eg 10 feet by 15 feet.)  Follow this rule of thumb.  Planting more than this makes the plants choke each other out.  Planting less gives weeds free run.

Expert Tip:  Mix some sand with the wildflower seed to make it easier to spread the tiny wildflower seeds evenly.  About four parts sand to one part seed.


  • When to Plant

If you live someplace mild and humid, you can plant almost anytime.  The rest of us either plant in the Spring (about one month before last frost date) or Fall.

  • Water

That’s the biggest challenge for many.  If you aren’t living in the above mentioned mild and humid area, you need to be sure the wildflowers get enough water.  One gardening buddy said her secret was to go out and seed the night before a big snowstorm and let the melting snow help.  I personally use row cover over the area to keep water from evaporating.  I also use a soft rain nozzle to hand water over everything.

Our website has a Resources Section with more detailed instructions on seeding wildflowers. https://bbbseed.com/wildflower-grass-tips/


That’s really it.

Pick an appropriate wildflower mix.

Get rid of the huge weeds and prepare the top couple inches of soil.

Plant.

Water.

Wait for Nature to do What She Does Best: Create beauty for you and food for all the wild creatures.


Before and After Pictures are some of my favorite things.  The Habitat Heroes program has awesome before and after pictures that will inspire you:

Photo Credit:

http://rockies.audubon.org/get-involved/habitat-hero-winners

A Parking lot median at the West View Rec Center in Westminster, CO, before and after

02.15.16 'Planting Wildflowers' WestViewRecCenter

02.15.16 'Planting Wildflowers' WestViewRecCenter2


Walla Walla Sweet Onions…You know you want them

Heirloom Vegetable Seeds

by Sandy Swegel

It doesn’t take much effort to convince us we should grow Walla Walla sweet onions. Think about thick slices hot from the grill. Or cold on our hot cheeseburger. Dream of oven-roasted whole onions. Or be one of those brave people who bite into the Walla Walla like it’s an apple.

Onions are really easy to grow so when I heard the Walla Walla Sweet Onion seed had arrived at BBB Seed for the first time, I rushed over. There’s only one problem for me with Walla Walls….their growing season is 125 days…a little longer than I can count on in Colorado. So I start the seeds indoors in February and transplant the seedlings in April.


The most important rule of growing onions is you have to use fresh seed. After a year or so, germination rates drop down to “almost none” so you do need new seeds each year.

Onions grow happily in decent soil. They can handle hot sun and they’ve forgiven me letting the weeds get a little overrun. There’s not too much guesswork as to when they are ripe…their tops fall over. So you can grow onions off in a corner of your garden without too much extra effort. Although quite labor intensive for farmers, onions are pretty cheap at the grocery so we don’t grow them so much to save money as to capture the awesome flavor of fresh homegrown Walla Wallas.


For more pictures and recipes, go to the website of the annual Walla Walla festival!
OR go to the festival in June!


Photo Credits:
http://www.sweetonions.org/

http://www.wiveswithknives.net/2010/08/02/potato-walla-walla-onion-and-gruyere-galette/
http://savorthebest.com/roasted-sweet-baby-walla-walla-onions/