CONTAINER GARDENING
Growing a Garden in a Container
Planning ahead-
Take a moment to look at the locations where you want to place your containers. Consider such things as sunlight (strength and time) and wind. If you have pots with sun/heat-loving plants, arrange them to shade your pots with those plants that need less sun and heat. Tall plants or plants that vine can be trellised to grow vertically and provide a natural barrier for tender plants. Make sure to anchor trellises and containers with tall plants, to keep them from getting blown over. If you plan to place your containers on a covered porch or balcony or any place that receives limited sunshine, you should select vegetables and flowers that don’t require as much. Leafy greens, snap peas, Chinese mustards, and kale will do quite well in these conditions, but tomatoes, and peppers, probably not.
When growing your garden in containers rather than a garden plot, it is just as important to choose varieties that will be able to reach maturity in your growing season. If you have a short growing season, check the maturity dates on the packages and plan to start some seedlings in the warmth of the indoors to get a jump on the growing season.
These varieties are not practical for container gardening due to their size or length of growing season (At the end is a list of vegetables/plants that will do well in containers.):
Watermelon and most cantaloupes (although there are some midget varieties that can do well)
Large Pumpkins and winter squash
Corn
Head cabbage (except as microgreens)
Mammoth sunflowers (except as sprouts or micro greens)
Beefsteak type tomatoes
Garlic bulbs/full sized Onions
Make sure to prepare your containers and pots properly, to give your veggies the best chance possible. You will be surprised by how much those little seedlings will expand, and there is as much growth below the soil as there is above the soil, so don’t squeeze them into tiny containers. Any type of vessel can be used, just keep in mind the size of the plants and the location. Terra cotta pots are inexpensive but dry out more quickly than others, metal tends to get quite hot in the sun, and plastic is versatile and lightweight.
………………………………………………………………………………..
Getting started-
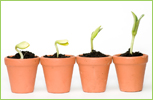
 For Container Gardening, start your long-season varieties, indoors, in good quality starting soil or soilless mixture. Seedlings should be kept consistently moist (not wet) and exposed to fairly strong light, sunlight, or florescent, for at least 10 – 12 hours each day as soon as sprouts appear. This will keep them from getting leggy and looking for light. Seedlings that are sown more closely together can show more vigor as their roots symbiotically help each other extract nutrients from the soil. As the first true leaves appear, choose the strongest seedling starts that you will need for your containers and clip off the remaining which gives the strong ones some space to expand. Transplant to pots and containers shortly after the first true leaves appear. When transplanting to your containers and pots, make sure to space the seedlings according to the package directions for each type of vegetable.
Here are some plants that do not like to be transplanted. Instead, start them in individual moss starter cubes or use homemade newspaper pots or toilet paper tubes that can just be set into your containers at the appropriate spacing.
Beans Squash Burnet
Chinese Cabbage Borage Chervil
Cucumbers Caraway Pumpkins
Melons Coriander Dill
Root crops (except beets, turnips, and celeriac)
Make sure that your container has drainage holes in the bottom. Place a couple of layers of newspaper in the bottom of the pot to keep soil from falling through the holes, then place a 1-inch layer of moss on top of the newspaper. If you don’t have a source for sphagnum moss, coarse gravel will work. Fill the container with good, rich pre-moistened, potting soil, leaving room at the top. Pat it down firmly to fill in the spaces but do not pack hard. Take your young transplants (holding by the leaves or root ball, not the tender stem) or degradable seedling pots, one at a time, placing each on the top of the soil. Spread out the roots, and sprinkle more pre-moistened soil over the roots, covering them completely. Use enough soil to bring the level up to just under the first leaves for most seedlings. Do not cover the crown on plants such as lettuce. The plant’s first leaves should be at the level of the top of the container. Pat the soil gently, firming it over the roots and young stems.
 Water your containers when the soil feels dry in the top few inches. Continuously wet soil suffocates the roots and encourages bacteria and fungi to grow. Usually, we water when we have time or are home, but watering when needed instead of on a schedule is usually best. Avoid wetting the leaves as much as possible. Try to use tepid water and if you are using chlorinated tap water, allow it to sit overnight exposed to air to dissipate the chlorine which can damage plants and kill beneficial soil bacteria.
Fertilize with low doses of good quality organic fertilizer every 7-10 days.
Don’t be shy about removing plants that are past prime or are beginning to bolt. Removing these will leave spaces where you can plant another round of short-season varieties and ones that prefer to mature in the cooler weather of fall. Lettuces and other leafy greens are good for this, maybe another round of snap peas, beets or radishes, arugula, and bunching onions. Mustards and kales and fennel love the cool days of fall
………………………………………………………………………………..
Design – Container Gardening can be beautiful
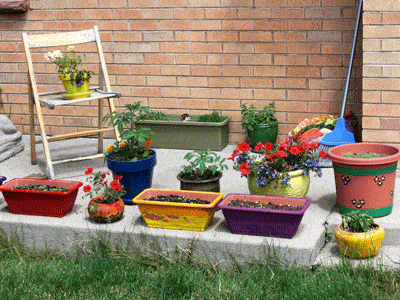
Create groupings with your pots and experiment with variations in height, by placing some containers on concrete blocks or other empty containers turned upside down. This adds visual appeal and at the same time maximizes the space available. Groupings also help to make the job of watering a bit easier. Pick a particularly spectacular container plant to be the visual focus and arrange other not-so-pretty container plants around.
Make your containers a bit more decorative by planting different varieties together in one pot. Use the spaces under taller plants to place smaller herbs and leafy greens. Some vegetables live in harmony with one another, some are actually beneficial to each other and some hate each other. Mix colors and textures and think about including edible flowers tucked in around the edges. See the article, Flavorful Flowers.  Check each variety on our website to see if your combinations will work together. Here are some examples:
• Lettuce does well with beets, bush beans, pole beans, cabbage, carrots, cucumbers, onions, radishes, and strawberries. You can also plant your lettuce at the base of young sunflowers for a little shade.
•Celery, dill, onions, and potatoes are great companion plants for cabbage. Planting clover with your cabbage will keep insects away and chamomile will improve the flavor. Cabbage does not like strawberries, tomatoes, peppers, eggplant, rue, grapes, or pole beans.
•Cauliflower is compatible with basil, beans, dill, garlic, hyssop, lettuce, mint, onion, rosemary, sage, and thyme. It does not like grapes and rue.
•Plant your peas with bush beans, pole beans, carrots, celery, cucumber, eggplant, parsley, radish, spinach, strawberry, sweet pepper, tomatoes and turnips. Keep your peas away from chives, and onions.
•Tomatoes grow well with asparagus, basil, beans, carrots, celery, chives, cucumber, garlic, head lettuce, marigold, mint, nasturtium, onion, parsley, peas, peppers and marigold. Basil will repel flies and mosquitoes from your tomato plants while also improving their growth and flavor. Beebalm, chives, and mint will improve the health and flavor of your tomatoes. Keep potatoes, fennel, dill, cabbage, and cauliflower away from your tomato plants.
………………………………………………………………………………..
VEGETABLES/PLANTS THAT DO WELL FOR CONTAINER GARDENING:
Beans (Pole and Bush types)
Direct sow into containers when night temperatures reach 60 degrees F, 6“ minimum soil depth, full sun, and harvest in mid-late summer, Provide a trellis or climbing structure
Beets – Direct sow into containers in early spring and late summer, 6” minimum soil depth, full sun to partial shade, harvest early summer and again in fall
Carrots (Nantes, Round, or Finger-type are best for containers) – Direct sow into containers when night temperatures reach 60 degrees F, 8” minimum soil depth, full sun, harvest in summer through fall.
Cucumbers (vine or bush-types) – Direct sow into containers when the day temperatures reach 70 degrees F or start indoors and transplant, 10” minimum soil depth, full sun, harvest in summer, Provide a trellis or climbing structure for vine-types.
Eggplant – Start inside 8 weeks before temperatures usually reach 80 degrees F for your area, then transplant to your container, 10” minimum soil depth, full sun, and harvest late summer.
Leafy Greens (Swiss chards, Collards, Kales, Mustards, Asian Greens, Pak Choy) – Direct sow into containers when the nighttime temperatures are above freezing, or, start indoors 3-4 weeks before and transplant, 8” minimum soil depth, full sun to partial shade, harvest late spring through winter.
Lettuces and Salad greens – Direct sow into containers after Spring’s last frost date, or start indoors 4 weeks before and transplant after hardening off when about 2 “ tall, sow seed again in early fall, 6” minimum soil depth, full sun to partial shade, harvest spring through early summer and again in fall.
Onions, Garlic, Leeks – Direct sow into containers after Spring’s last frost date, 6” minimum soil depth for bunching onions and young (green) garlic, 8” for Leeks, full sun, harvest summer to fall. Mounding soil up around the base of bunching onions and leeks will encourage long white stalks. Grow garlic in containers to use the green shoots and any small bulb growth.
Peas – Direct sow into containers when the soil is no longer frozen, Soaking the seeds overnight will speed up germination, use an inoculant (a beneficial bacteria that enables the roots to use the nitrogen pulled from the atmosphere and stored in nodules on the roots), especially when planting into containers with new potting soil. 8” minimum soil depth, full sun, harvest in late spring to early summer with secondary fall crops possible, Provide trellising for vine-types or cages to support bush-types.
Peppers – Plant seeds indoors, keeping at 80 degrees F for about 2 weeks, starting 10 weeks before nighttime temperatures remain above 55 degrees and daytime temps reach at least 70 degrees. Transplant into containers after hardening off, 8” minimum soil depth, full sun, and harvest in late summer.
Potatoes – Plant disease-free seed potatoes in a large container (30” deep, 20” across) filled 1/3 full of potting soil, 5-6 “ apart, and cover with 2 inches of soil, When plants are about 6” tall cover the bottom half with potting soil, continue doing this as the plant grows until reaching the top of the pot. Full sun, harvest summer to fall.
Radishes – Direct sow into containers when the soil is no longer frozen and every other week till late spring, 4” minimum soil depth, full sun to light shade, harvest all spring and second harvest in fall.
Spinach – Direct sow into containers when the soil is no longer frozen, replant first of August for fall, 6” minimum soil depth, full sun to partial shade, harvest in spring, early summer, and fall.
Squash (zucchini, yellow summer, yellow crookneck, patty pan, mini pumpkins) – Plant seeds indoors 2-3 weeks before the spring last frost date, transplant into sunny, warm containers, and cover with a row cover for several days, 10” minimum soil depth, full sun, harvest summer to early fall, pick when young and small, provide trellis and support for vines.
Tomatoes – Plant seeds indoors keeping them at 75 degrees F for about 2 weeks, starting 6-8 weeks before Spring’s last frost date, transplant at least once to another larger pot when they have 3 sets of true leaves burying them up to the first set of true leaves, keep in good light, 12” minimum soil depth, full sun, harvest late summer and fall.
Herbs – Herbs are mostly perfect plants for container gardens, being small and not fussy.
