Tag Archive for: Share

How to Share Your Plant Starts for Profit

Plant Starts

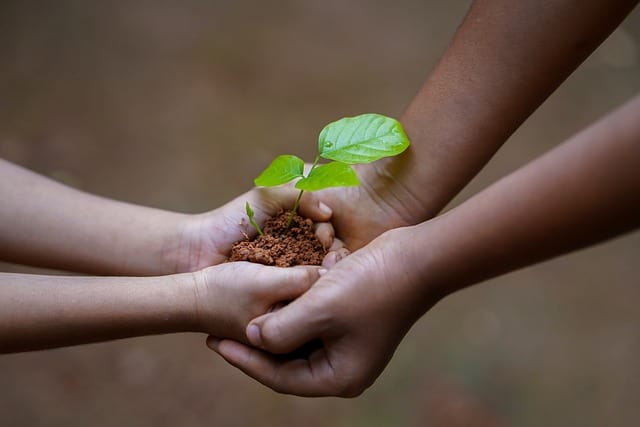
Image by Shameer Pk from Pixabay

by Sandy Swegel

Sharing plants is a simple joy in life. Sharing plants and making money, well that’s even better. Read on to learn how to share your plant starts for profit.

My happy group of gardening buddies first got to know each other because of our great avarice for more seeds. We had all joined a local gardening email list so we could talk more about plants and gardening, but the more we spoke with each other, the more seeds and plants we wanted. Every time someone mentioned a new variety of tomatoes or annual flowers or ground cover, we had to have one of those.

The first year, we decided to meet in person and share seed packets. Armed with dozens of recycled envelopes, we doled out tiny seeds to each other, taking home three Cherokee purple tomato seeds or six cosmos seeds. This quickly became confusing and chaotic and required so many tags in our seed trays. So the next year we decided to become more economical. We’d each buy a packet of seeds and grow out all the plants…and then swap our plant starts. We definitely got more plants than we would have grown on our own and we each had unusual varieties you can’t buy in stores.

But the third year of our avarice proved to be the year we figured out that we could get as many seeds as we wanted…and they practically paid for themselves.  All we had to do was start our seeds and sell 2-month-old plant starts to each other and to the other greedy gardeners who envied our ever more diverse gardens. We learned that anyone can sell healthy organic heirloom tomato starts, especially if you have pictures of last year’s garden.

You can try your own mini plant exchange and sale. We price our seedlings cheap ($1 or $2 at most). I can afford all the heirloom tomato plants I want if I just sell three seedlings for $1 from each seed packet. Throw in some herbs and flowers and soon the plants barely fit in the car. Our little group now has a giant plant sale every May where everyone brings their plants to sell to each other, but thanks to free advertising on Craigslist and neighborhood electric poles, we also sell our humble little plants to the public.

Avarice never ends, of course, and now we have to grow more plants so we can make money so we can afford backyard greenhouses. Last year our small group of about 12 home gardeners sold some $4000 worth of plants that they started in closets and on top of refrigerators just two months before. Not enough to get rich, but enough to buy more seeds, build hoop houses and season extenders, and have a load of precious organic sheep manure delivered to our gardens.

So enjoy your seed shopping and think about swapping some of the plants you start with others. We learned that while there is no end to avarice among gardeners, there is also no end to generosity. It is a great joy to have an abundance of little plants to share with friends and strangers.

4 Ways to Compost in Winter

Composting in Cold WeatherPhoto of hands holding fresh compost.

by Sandy Swegel

It snowed yesterday.  It’s going to snow again today.  This makes me so happy because it means I get a vacation from work.  My gardening business is a lot like a teacher’s schedule.  Work like crazy most of the year then I get a wonderful interlude to catch up on the rest of my life.  Working in the garden may come to an end during Colorado winters, but eating usually continues and we continue to make lots of food scraps that any gardener would hate to waste.

When I lived on acreage, I did all my food composting by sending it through the chickens.  The backyard chickens loved food scraps and eagerly ran around when I brought the compost bucket. Even if it was just onion scraps and things they didn’t like to eat, they relished scratching it around and mixing it with the coop bedding and poop. Spring compost in the making.

Without chickens, there are still ways that you can compost in winter and capture your kitchen scraps:

1. Use your regular compost bin

I empty mine to about ¼ full of compost in progress with lots of worms.  I fill it all the way to the top with dry leaves and sort of hollow out the center. The leaves don’t freeze solid and all winter I drop the scraps down the middle of the leaves.  The leaves provide some insulation and the food scraps and leaves at the bottom of the pile are warmed enough by the earth that a tiny bit of composting keeps happening even when temps get well below freezing. The earthworms are slow but still keep working and reproducing.

2. Compost in a protected sunny spot

Keep a plastic (black if possible) bin against the house on a sunny side.  I started with the bin half full of partially finished compost that hopefully has some worms already busy in it.   The center, next to the ground, will stay unfrozen so the worms will stay alive.  The compost probably won’t process much over the winter except on sunny days.  You may need to secure it against raccoons or other varmints.

3. Make a trench

This takes a bit of planning before the cold weather arrives, but produces amazing results and saves time and labor.  Dig a long trench right in the garden…about a foot deep and a foot wide.  Leave the soil heaped right next to the trench with a rake nearby.  I left the excavated dirt on the side of the trench. Every time the indoor compost bin was full, I just took it out to the garden and dumped it into the trench.  If things weren’t too frozen, I pulled some of the excavated dirt on top of the food scraps. If there was snow on the ground, I just put the scraps on top, and eventually, it fell into the trench.

This process attracts all the worms to the trench.  Some composting takes place in the Fall but most decomposition happens in early Spring.  By early May, when it’s time to plant tomatoes, the compost is broken down enough that I can transplant my tomatoes directly into the filled trench that is crawling with decomposers and happy earthworms.  If it was a very cold winter and the compost isn’t finished, just plant right next to the trench.  Some people like to compost in trenches all year.  They set up a three-year rotating system where they compost one year, plant the next and use the area as a walkway the third year.  Pretty clever!

4. Make a windrow

John, the Worm Man, Anderson in northern Colorado keeps his worms happy all winter by setting up short windrows of compost, food scraps, and worms.  He throws old carpet or tarps over the top.  Periodically, he lifts the carpet and puts new scraps on top of the piles.  The worms slow down in winter but keep working and reproducing.  For small households, just make a pile on the ground and cover it with a tarp.  The tarp keeps moisture and some heat in.  Just slip the food under the tarp.  Worms show up.   This doesn’t work so well if you have raccoon or mice and rat issues.

Photo of a windrow compost

Cover Crops

A cover crop is simply a dense planting of quick-growing plants that protect the soil and can provide many nutrients to the soil.  The most common cover crops are grasses/grains such as Winter Rye.  The other favorites are legumes such as clover, vetch, and peas that fix nitrogen in the soil. When the green cover crop plants are tilled into the soil it is called a “Green Manure” crop.  These terms are used alternately.  You can plant cover crops; during the growing season to keep weeds at bay, in the fall to overwinter adding nutrients and protecting the soil, or in the spring for areas where you will be planting later crops.

Why plant cover crops?

They hold the soil in place.  Providing protection from wind and water erosion.  The dense planting provides weed suppression.  Winter Rye actually has allelopathic properties that inhibit other plant growth.   Cover crops enrich the soil by nitrogen fixation from legume plant species and add organic material for helping the soil structure and providing food for beneficial microbes and worms.  Cover crops help to reduce garden insect pests by attracting beneficial insects and bees and bumblebees are attracted to the early blooms of some of the species.

Soil Protection:

Protecting the soil is very important.  Planting a cover crop is like a living mulch.  The roots hold the soil in place and penetrate deeply into the earth, bringing moisture, nutrients, and airway down into the depths.  The leaves shade the top of the soil keeping the top from desiccation from wind and sun, and allowing the microbes and earthworms to continue to enrich the soil.  Allowing annual cover crop species to just die in place and cover the soil aids in this process and during the winter helps to hold the snow on the soil.  It is important to mulch to cover the soil even if you are not using a cover crop.  Just use leaves, newspaper, or cardboard covered with burlap or netting to hold it down.  The worms love decaying leaves!

Weed suppression:

Cover crops help to combat weeds firstly by sheer numbers.  Cover crops need to be planted thickly.  Weeds love bare soil!  Planting a cover crop in the fall to till under in the spring is a good way to get ahead of the spring weeds.  Try to get a fall-planted cover crop for spring tilling in at least 1 month before killing frosts in the fall.  Use a spring-planted cover crop to combat weeds in areas between rows of crops or in orchards.  Cover crops are effective whether you till or not.  They can just be mowed off and in cold winter areas, most annual cover crops die on their own and are a good mulch in place even when dead.

Soil enrichment:

Clovers and legumes enrich the soil by taking up atmospheric nitrogen in nodules in their roots.  They are able to achieve this because they are a host to a bacterium, Rhizobium. The relationship between these plants and Rhizobium is symbiotic, meaning they are mutual beneficiaries.  The bacteria are fed by the plant and the plant is fed by the bacteria.  Plants cannot use nitrogen the way it exists in the atmosphere.  Rhizobium converts atmospheric nitrogen into a useful form for plants and animals to utilize.  Rhizobium takes up residence in the plant’s root system and forms nodules.  Clover and other legumes are susceptible to this type of bacterial “infection” and that is why these plants are great fertilizing plants.!

Want to know more?

Colorado State University – CMG Garden Notes #244

Hooray for Hummingbirds!

Important Pollinators

by Cheryl Soldati Clark

Hummingbirds may be cute little-winged creatures, but really they are tough as nails! These extremely important pollinators have the highest metabolic rate of any other animal on earth. They also have a high breathing rate, high heart rate and high body temperature. Their wings flap up to 90 times per second and their heart rate exceeds 1,200 beats per minute. In order to maintain their extremely high metabolism, hummingbirds have to eat up to 10-14 times their body weight in food every day for fuel. In preparation for migration, they have to eat twice this amount in order to fly thousands of miles.
A huge portion of a hummingbird’s diet consists of sugar that they acquire from flower nectar, tree sap and hummingbird feeders. They also have to eat plenty of insects and pollen for protein to build muscle. Hummingbirds cross-pollinate flowers while they are feeding on nectar because their heads become covered with pollen and they carry the pollen to the next bloom as they continue to feed. Several native plants rely on hummingbirds for pollination and would not be here today if it wasn’t for these efficient pollinators.
Hummingbirds are found in several different habitats, including wooded and forested areas, grasslands and desert environments. They also occur at altitudes ranging up to 14,000 feet in the South American Andes Mountains.
The male hummingbirds are usually brightly colored while the females are dull colored in order to camouflage them while nesting. Female hummingbirds rely on males for mating only and after that, they build the nest and raise their young as single parents. They have been known to fearlessly protect their young against large birds of prey, such as hawks and have even attacked humans that get too close to their nests. They usually lay up to two eggs which hatch within a few weeks. Hummingbirds can live 3-5 years in the wild, which varies by species, but making it through their first year of life is a challenge. Fledglings are particularly vulnerable between the time that they hatch and the time that they leave the nest. Larger species may live up to a decade.
In order to conserve energy at night, because they lack downy feathers to hold in body heat, hummingbirds enter a state of semi-hibernation called “torpor”. This allows them to lower their metabolic rate by almost 95% and also lower their body temperature to an almost hypothermic rate. During this time, hummingbirds perch on a branch and appear to be asleep. When the sun comes up and starts to warm the earth, it takes about 20 minutes, but the tiny birds will awake from their torpor state and start their feeding rituals.
Planting a lot of reds and purples in your garden and hanging hummingbird feeders around your yard will attract and help feed these little pollinator friends. In fact, BBB Seed has a Hummingbird Wildflower Mix specifically designed with these little guys in mind.  Please help to support these amazing creatures in your own backyard!  Pollinator Week is a reminder to support pollinators all year long!

Hummingbird Favorites:
• Penstemon• Columbine • Delphinium • Autumn Sage • Four O’clock (Mirabilis jalapa) • Scarlet Monkeyflower (Mimulus spp.) • Texas Sage (Salvia coccinea) • Chuparosa • Ocotillo • Tree Tobacco (Nicotiana glauca) • Baja Fairy (Calliandra californica) • Bottlebrush • Desert Willow • Indian paintbrush (Castilleja spp.) • Scarlet Gilia (Ipomopsis aggregata) • Lantana • Agave • Lily of the Nile

FUN LINKS:

How to make a Hummingbird Feeder with your Kids!

Video on Hummingbird Tongues

Hummingbird Coloring Pages for Children

Baby Hummingbirds

Quit Working so Hard This Fall

Garden Clean Up

by Sandy Swegel

The old adages say cleanliness and hard work are virtues. That may be true in your kitchen, but in the garden, a little sloth can save many lives and make your life a little easier.  Mother Nature isn’t just messy when she clutters up the Fall garden with leaves and debris….she’s making homes for her creatures.  Old dead leaves may look like clutter that needs to be tidied up, but it’s really nice rustic sustainable homes for many of a gardener’s best friends.

Here’s who is hiding in your garden this winter if you DON’T clean up.

Ladybugs in the garden beds next to the house.  Ladybugs want a nice sheltered home safe from wind and exposed soil. I most often find them under the leaves and dead flower stalks in the perennial garden.

Butterfly larvae (aka caterpillars) in leaf bundles. Sometimes in winter, you’ll see a couple of leaves looking stuck to a bush or tree or in a clump on the ground.  Often there’s a butterfly baby overwintering there.

Lacewing at the base of willows or in the old vegetable garden.  Insects don’t work very hard in the fall either.  Often they are eating happily on the aphids in your vegetable garden or your mini forest and just go through their life cycle right there.  They lay their eggs on the bottom of leaves and the leaves fall to the ground.  If you clean up too much, you’ll clean up all the beneficial insect’s eggs

Slugs in your hosta garden. Even slugs are a good thing to leave for the winter.  They will be plump food for baby birds next Spring.

The bottom line is don’t do a good job of cleaning up in the Fall.  Take away any very diseased leaves.  Clean up the thick mats of leaves on the lawn so they don’t encourage lawn fungus.  But leave the flower stalks with seeds and the leaves in the beds.  They insulate and protect plants and insects.

Another good reason to be a little lazy this Fall.

Photos: http://www.nashvilleparent.com/2013/07/fall-for-fun/http://antsbeesbutterfliesnature.blogspot.com/2009/11/overwintering-caterpillars.html

Why Won’t my Garden do What I Say?

Tips for Garden Frustration

by Sandy Swegel

That’s the kind of questions I’m hearing these days.  Why won’t my plant bloom?  Why aren’t my tomatoes red? Why does my garden look so bad? Why is my tree dying?  Let’s tackle a few of these questions so you can figure out why it seems your garden is disobedient?

Why won’t my pineapple sage bloom?  It’s so beautiful in the magazines. Salvia elegans or pineapple sage smells deliciously of pineapple and hummingbirds flock to it.  Alas, what I discovered after a season of coaxing and fertilizing is that it will never look so beautiful in Colorado as it does in the Sunset magazine pictures of California.  It’s one of those plants that bloom according to day length and short days to stimulate blooming.  So no matter what we do, it simply is not going to put out blooms till late August.  Since our first frost can be in September, this is a very unsatisfying plant to grow in a northern area with long summer days.

The second part of this question is “Why did all the other fancy hybrid flowers I bought in Spring quit blooming?”  Some may be day length sensitive like the pineapple sage.  Most have issues with our hot dry summer heat.  If you keep deadheading as soon as the weather starts to cool, the blooms will restart.  And there’s no changing Nature’s mind with more fertilizer or water.

“Why won’t my watermelon plants get big?” a friend asked over afternoon tea.  The answer to most questions is to put my finger in the soil. It was dry, dry, dry.  There was one drip tube on the plant but that’s not nearly enough for a watermelon which needs lots of water.  I looked up. The garden was right next to a big spruce tree. The tree was on the north side so the plant had lots of sun, but the sneaky tree roots ran all through the garden sucking up irrigation water. If you’re going to grow a plant with a name like “water” melon…you have to put a lot of water in the system.

The second most-asked question is “Why do I have so many weeds?” The answer is, alas, because you didn’t spend enough time in July keeping after them.  Who wants to weed in the heat of summer?  And summer weeds grow really fast and tall.  You can’t even blink.

The most-asked question, of course, is “Why won’t my tomatoes turn red?”  This year everybody has lots of green tomatoes but not nearly enough red tomatoes. The truthful answer is “D***d if I know. I wish mine would turn red.”  A Google search shows thousands of people ask this question.  People who answer have all kinds of pet theories about leaves and fertilizer and pruning the plant etc. I’m just learning to wait and making a note to grow more early tomatoes next year.

Nature just doesn’t work the way we want sometimes.

Photo Credit: http://eugenebirds.blogspot.com/2010_11_01_archive.html

Cool Off Fast! – Agua Fresca

Agua Fresca Recipe

by Sandy Swegel

My basic remedy for hot July days is to bend over and run the hose over my head, but a more attractive and effective way to cool off is to make an Agua Fresca (refreshing water), the great fruit or vegetable drink of Mexico and other southern regions. I’ve been making Agua Frescas all weekend.

The Agua Fresca I first enjoyed from my friend Alfredo’s family was cucumber and lime juice.  Then one day we had watermelon Agua Fresca and I was in heaven.  Both were very cooling and refreshing.  What intrigued me most is that these were two of the foods my acupuncturist recommended to me.  TCM (Traditional Chinese Medicine) has diagnoses of “heat” in the body.  I often get this diagnosis and my doctor suggests three vegetables/fruits that are especially cooling to the body from a TCM energetic point of view…not just temperature:  Cucumber, celery and watermelon.  Turns out that ancient wisdom from TCM is the same as ancient wisdom from Mexican families. “Gotta love it” as a friend says.

There are lots of recipes on the web, but the concept is simple:

Blender 6 cups water 1 pound of Fruit or vegetable:  cucumber, watermelon are traditional. Also try melon, raspberries, strawberries, celery, herbs like lemon balm or basil or mint. Sugar (to taste) 1/4  to 1/2 cup.  Lime to taste. Run the blender to pulverize the vegetables or fruit and lime.  Strain if needed. Pour over ice cubes and add mint or cucumber slice or lime slice garnish.

Variations: Slushy:  Use only half the water. Run the blender a second time filled with ice cubes to get a slushy drink. Sorbet:  Make an agua fresca and put it in the ice cream maker for 20 minutes to make sorbet. Alcohol:  Rum, tequila or vodka added make excellent drinks or sorbets!

Stay Cool and Be Happy.

Photo credits:

http://www.williams-sonoma.com/recipe/raspberry-mint-agua-fresca.html

Gardening as Winter Looms

How to Keep Up Gardening in the Winter

by Sandy Swegel

Nothing like the first deeply freezing temperatures followed by a warm day to get people in Zone 5 areas asking if the gardening season is really over if they can still tackle their garden to do lists even though winter looms with Thanksgiving is around the corner.  We have two conflicting impulses…the really good bulbs are on sale at our local garden center AND there’s an inch of snow and refrozen ice on the garden bed.

What does happen to our soil in winter? Once soil temperatures are in the forties, all the creatures and denizens of the soil put themselves to sleep through dormancy or through laying lots of eggs or spores that will hatch when temperatures are warmer.  Seeds stop germinating or else require weeks and weeks at low temperature to come up.  They’re smart…no point in germinating if sub-zero temperatures in another few weeks are going to kill young growth. So the soil goes into stasis until the temperatures warm.

Here are some of the questions I hear people asking as our soil begins its freeze:

Can I still plant bulbs? Can I transplant daylilies now? Yes, if you can pry the soil open and get water to the plant, there’s a good chance your bulbs will bloom and the daylily will be fine. Daffodils especially prefer getting planted earlier to have some time to make roots. Sometimes blooming is delayed the first season, but I have had good success in planting bulbs too late…especially if I throw in some compost in the hole and don’t plant too shallowly. I’ve also had years when the bulbs just ended up being frozen mush…so plant earlier next year.

Can I put in a cover crop? In Zone 5, it’s too late.  The temperatures are too cold for seed germination.  Put lots of mulched leaves over the soil to cover it.

Do I have to water? Ideally, you got the garden well watered sometime in Fall through rain or irrigation.  If not or if there are long dry sunny spells, you should winter water.

What do I do with my Fall greens that are freezing solid? Keep eating…they get better every day.  Spinach frozen at 8 am is delicious at room temperature.  If you cover greens with row cover or a cold frame or even throw big bags of leaves over the plants, you can keep harvesting easily through January or longer if you haven’t eaten them all.

Can I still use herbs? Yep, remember where your herbs are and you can put your hand through a foot of snow for snippings of intensely flavored frozen thyme or oregano leaves.

Can I still fertilize? You can, but the soil organisms won’t be processing it.  Organic fertilizer like alfalfa meal stay on the soil and will eventually be used when things warm up next Spring.

Is there something I should plant?  Winter hardy violas and pansies don’t mind a little snow and ice.  In a sunny location, they’ll keep throwing up blooms all winter long…a surprise of color in a white or brown winter-scape. Plant well hardened off plants and keep them watered.

For more details on the science of soil in winter, check out this article from the Bountea compost tea company. http://www.bountea.com/articles/lifeinwintersoil.html

Photo Credit:

http://indianapublicmedia.org/focusonflowers/year/;

Truffles – Orange Frost Fest

Pruning for Holiday Decorations

Collecting Holiday Decorations from Your Garden

by Sandy Swegel

I’m a big fan of multi-tasking so it’s natural that whenever there’s a garden chore to be done, I think about whether it might solve some other task that needs doing. In the Spring I schedule perennial weed digging so the roots can be thrown to the chickens for yummy spring greens.  In Summer I arrange to cut grass when I need the clippings to mulch the vegetable beds.  In Fall I pick up leaves when I need to insulate rose bushes and perennials.  One of the tasks I still want to do this year is “rejuvenation pruning” on shrubs or simple pruning on shrubs and trees that are poking me in the eye when I walk by or blocking the sidewalk.

Rejuvenation pruning is a great way to keep all your shrubs looking great.  Every year you simply cut back to the ground 1/4th to 1/3rd of the oldest branches in your bushes.  The shrub will put out new growth next spring to fill in and you’ll always have a self-rejuvenating plant.

So the multi-tasking solution here is to do some needed pruning on plants that happen to also look good, when cut, to use the pruning for holiday decorations.  Some of the plants I’ll be pruning for Thanksgiving or Christmas are:

Branches with Berries: Pyracantha (orange berries) or Hawthorn (red berries)…be careful about thorns Cotoneaster with red berries Coral berry or porcelain berry

Branches with an interesting structure: Harry Lauder or curly willow both make nice twisty branches.  Birch stems can have interesting bark.  Yellow and redtwig dogwoods add great color.  Even simple wild plum branches can be put in the center of a flower arrangement to hold the flowers up

Evergreens: Early winter is a great time to prune those Mugo pines or spruce trees that block the driveway. Juniper and cedar trimmings offer great aroma as well as evergreen color.

So once again, twice the work in half the time or something like that.  The bushes have old wood removed, the shrubs and trees have a better shape, and the house is decorated for free with dramatic gifts from nature, brought indoors.

Photo Credit: http://liveatvillages.com/blog/?p=334http://ikebanalessons.blogspot.com/2012/10/ikebana-class-1052012.html

Thanksgiving Decorations from the Garden

Collecting Fall Decor

by Sandy Swegel

One reason I first started gardening was so I could cut flowers to bring into the house or to bring as a gift to friends.  Almost all the flowers are finished in Colorado so it’s time to be more creative. There’s still lots to do to bring nature beautifully indoors and get thanksgiving decorations from the garden.

Decorate with Leaves. This one is obvious.  We had great color this year with our leaves.  Warm weather in September and October turned our trees and gardens very lush and colors are extra intense.  A Google search for decorating with leaves brought a zillion images of leaf mobiles and wreaths and candle holders and art cards. At our house, a neighbor’s seven-year-old came in and just put the big maple leaves she liked in a row down the table….a perfect fall runner.

A bowl of Jack Be Little Pumpkins

photo courtesy of Becky Hansen

Display the vegetables. It takes a long time to grow winter squash. Don’t just eat it.  Put it on display for a couple of weeks. In anticipation of Thanksgiving, I get out the big platters and artfully store those big bulky squash in plain view on the counter.  Instant art.

Use your prunings.  Cut spruce branches, pyracantha berries and other colorful or weirdly shaped stems make great decorations for your outdoor pots.

Make everything into candle holders.  Hollowed out squash and apples or overgrown beets.  Everything looks festive with a tea light!

Enjoy the color and bring the beauty indoors!

Photo credits:

 http://www.preen.com/articles/pots-for-fall-and-winter

http://organizeyourstuffnow.com/wordpress/6-fast-and-easy-ways-to-decorate-with-leaves

http://www.diy-enthusiasts.com/decorating-ideas/nature-fall-decorating-ideas-easy-diy/