Tag Archive for: Recipes
Sweet Corn – the Best Part of Summer
History of Sweet Corn and Recipes
By Engrid Winslow
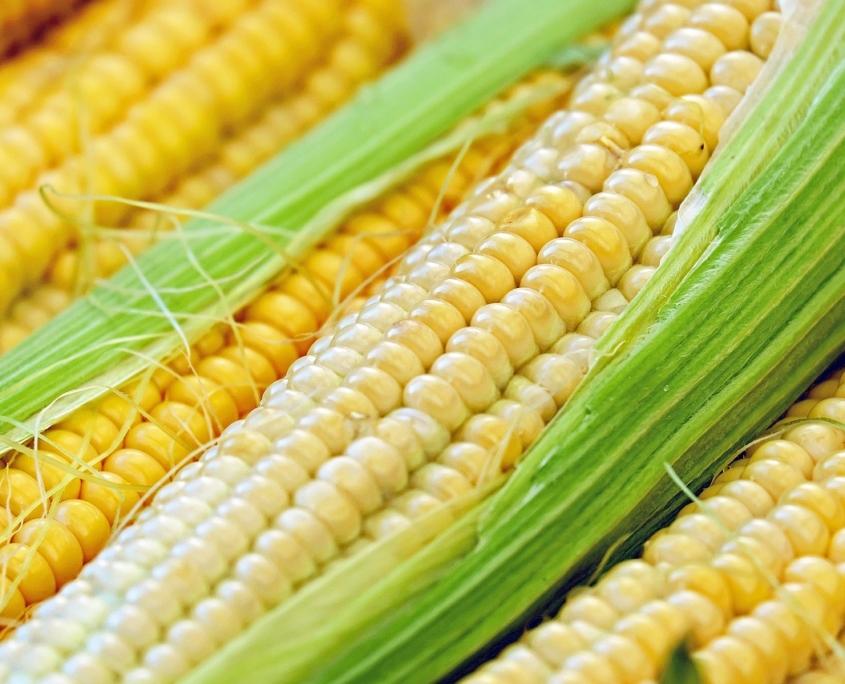
Image by Couleur from Pixabay
“The first ear of corn, eaten like a typewriter, means summer to me—intense, but fleeting.” ― Michael Anthony
There are two flavors of summer that I will unapologetically eat until bursting with absolutely no apologies because they haunt my food memories in the dead of winter. One is tomatoes fresh from the garden and the other is sweet corn.
Sweet corn is a vegetable that originated in the Americas and has spread worldwide. Originally referred to as maize the cultivation of corn was introduced in South America from Mexico in two waves: the first, more than 6000 years ago, spread through the Andes. Evidence of cultivation in Peru has been found dating to about 6700 years ago. The second wave, about 2000 years ago, spread corn through the lowlands of South America. Around 4,500 B.C., maize began to spread to the north; it was first cultivated in what is now the United States at several sites in New Mexico and Arizona, about 4,100 B.C.
During the first millennium AD, maize cultivation spread more widely in the areas north. In particular, the large-scale adoption of maize agriculture and consumption in eastern North America took place about A.D. 900. Native Americans cleared large forest and grassland areas for the new crop.
Corn is used in many foods including grits (in the South), polenta (in Italy), cornstarch, chowder, cornbread, cornflake cereal, hominy, popcorn, corn dogs, tamales and tortillas. But fresh sweet corn on the cob has to be the most popular and is a sure sign of summer.
Be sure to visit a farm stand that picks their corn daily and cook and eat it on the same day it was picked. The intensity of flavor will be at its peak and you won’t want to go back to the supermarket for corn ever again. Resist the urge to open the ears as that can cause the ears to dry out. Just feel for firm kernels and fill up your bag to overflowing with fresh, delicious sweet corn.
Last year a friend shared her secret to cooking corn easily and I now use this method exclusively. Instead of boiling a pot of water, shucking the corn and trying to remove all of the silk, use your microwave. Just pop un-shucked corn into the microwave for 4 minutes per ear, up to four ears at a time (16 minutes). Let cool slightly and then see how easily the shucks and silk come off the cooked ears. From there you can do all sorts of things with it. It’s easy to scrape off the kernels with a sharp knife and stash them in the freezer to bring back a taste of summer when you need it the most.
Here is one of my favorite ways to combine my two summer favorites – corn and tomatoes. It is delicious and you will want to make it as often as possible while these two summer vegetables are at their peak.
CORN AND TOMATO SALAD
Serves 2-4
Slice one pint of cherry tomatoes and salt generously (at least 1 teaspoon)
4 ears of corn, prepared as above and scraped from the cob
6-7 leaves of fresh basil, chiffonade
The key to this mixture is to set the salted tomatoes to the side for at least 30 minutes so that the tomatoes give up some of their juice and become slightly jammy. Add cooled corn and basil and enjoy. It keeps well and is one of the best things you will ever eat.
There are many add-ons you can do for this salad. It’s great with a few squeezes of lime juice, a drizzle of olive oil, or you can add chopped sweet onions, drained and rinsed black beans and cotija cheese for a great vegetarian taco or salsa fresca for fish tacos, a dip or topping on grilled fish or chicken. You can also substitute the cilantro, chopped parsley or thyme for the basil.
“A light wind swept over the corn, and all nature laughed in the sunshine. “ Anne Bronte

For The Love of Leeks
Heirloom Vegetable Seeds
By Engrid Winslow
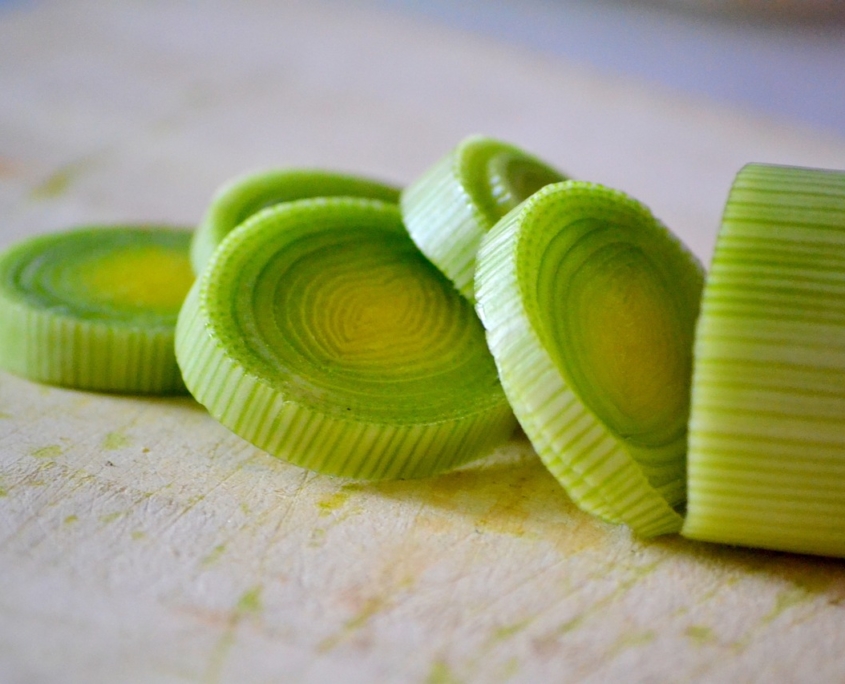
Image by Susann Wagner from Pixabay
“If you can mock a leek, you can eat a leek!” ― William Shakespeare, Henry V
Since you planted leeks in the spring, now is the time to pat yourself on the back and enjoy the harvest. One of the simplest ways to enjoy leeks is to sauté them in butter and olive oil with mild peppers. It is also a good idea to slice them thinly and freeze them for adding to soups and stews during the winter.
Leeks are related to onions as they are both in the Allium family) but have a much more mild flavor. The Hebrew Bible talks of leeks, and reports it as abundant in Egypt. Dried specimens have been discovered at archaeological sites in ancient Egypt along with wall carvings and drawings, which indicate that the leek was a part of the Egyptian diet from at least the second millennium BCE. Texts also show that it was grown in Mesopotamia from the beginning of the second millennium BCE. The leek was a favorite vegetable of the Roman Emperor Nero, who consumed it in soup or in oil, believing it beneficial to the quality of his voice.
Some of the most common uses of Leek are as an ingredient of cock-a-leekie soup, leek and potato soup, and vichyssoise, as well as plain leek soup. But here are a couple of other ways for you to enjoy your harvest of leeks:
LEEKS AND CHICKEN
Serves 4
4 TBL extra-virgin olive oil 4 medium leeks, white and tender green parts, thinly sliced
1 lb cremini mushrooms, sliced thinly 2 lbs boneless, skinless chicken breasts, cut in 2-inch pieces
¼ cup flour, plus 1 TBL more, if needed 3 cups chicken stock
1 tsp fresh thyme, leaves only 2 TBL nonfat plain Greek yogurt
4 tsp Dijon mustard 1/3 cup water
Salt and pepper
Heat 2 Tablespoons of oil in a skillet and add leeks, sauté for a few minutes until they begin to wilt, then add 1/3 cup of water and cover. Let the leeks steam for up to7 minutes until very soft and melted, stirring every minute. Add the mushrooms and season with salt and pepper. Cover and cook until the mushrooms are tender, about 5 minutes. Empty leeks and mushrooms into a separate bowl or plate.
Season chicken with salt and pepper and toss in ¼ cup of flour. Heat remaining oil in skillet and brown chicken until golden brown, add stock and thyme and simmer until chicken is just cooked through (about 1 more minute). Transfer chicken to bowl with vegetables.
Simmer the stock over moderate heat until reduced by half, 4-5 minutes. If the sauce is not thick enough, mix 1 tablespoon flour into vegetables and chicken. If too thick, add additional stock. Return vegetables and chicken to skillet and simmer until warmed through, about one minute. Blend yogurt and mustard together and stir into the stew. Season with salt and pepper, if needed and serve over rice.
Please Pass The Peas
History of Green Peas and Recipes
By Engrid Winslow
“How luscious lies the pea within the pod” – Emily Dickson wrote. I think most of us would agree that fresh peas are a hallmark of early summer produce and have us saying “please pass the peas”. The origin of peas is shrouded in mystery as it is a food plant so ancient that the earliest preserved specimens date from 9750 BCE in Thailand. Peas are legumes and of the family Fabaceae and is the third largest of the flowering plant families.
The ancient Greeks and Romans grew peas and hot pea soup was peddled in the streets of Athens while fried peas were sold to spectators instead of popcorn at the Coliseum in Rome. They were popular in England in the middle ages and there were to primary varieties – one was a field pea to be fed to animals and the other was called the “greene pea” and appeared often at the dinner table. The pea arrived in the Americas with Christopher Columbus and was part of the early colonist’s kitchen gardens.
Green Peas are easy to grow and can be succession planted to extend the harvest, they are delicious additions to salads, soups and eaten alone. The varieties are many, including shelling peas and sweet sugar snaps as well as the snow pea used in Asian cooking. “All the essentials of life,” according to Winston Churchill, are only four: hot baths, cold champagne, old brandy and new peas.
Here are a couple of classic recipes to help you enjoy the bounty of fresh peas and to make your family say “please pass the peas!”
CORNUCOPIA SALAD
Serves 4 as a Vegetarian Main Course
1 bunch torn arugula
1 bunch torn butterhead lettuce
½ lb sugar snap peas, string removed
1 cup cooked black beans
1 cup diced buffalo mozzarella
16-20 halved cherry tomatoes
Kernels from 2 ears of cooked corn
½ cup diced red bell pepper
For Vinaigrette:
2 TBL red wine vinegar 1 TBL Dijon mustard
2 TBL balsamic vinegar ½ tsp salt
2 TBL lime juice ½ tsp freshly ground black pepper
1 TBL lime zest 2 TBL chopped roasted red bell pepper
¼ cup minced red onion 6 TBL olive oil
2 TBL chopped fresh basil 6 TBL canola oil
1 TBL minced fresh parsley 2 TBL water
ENGLISH PEAS WITH PROSCIUTTO AND POTATOES
Serves 3 or 4
½ lb new potatoes, scrubbed and cut into ½ inch dice
3 oz. chopped prosciutto, pancetta or bacon
2 lbs shelled fresh English peas
½ small onion, finely chopped
1 small handful of fresh mint leaves
Extra virgin olive oil
Salt and freshly ground pepper, to taste
Put potatoes in a medium pot with water to cover by one inch and one tablespoon of salt. Bring to a boil and simmer gently for 10-12 minutes until potatoes are tender. Drain.
Heat a small glug of olive oil in a large skillet over medium heat and add onion and prosciutto and a pinch of salt. Sauté until onion is soft and fragrant and prosciutto has rendered some fat and is turning crisp around the edges, about 5 minutes.
Add the peas and potatoes and season generously with salt and pepper. Add 2 tablespoons of water to help steam cook the peas for another 4-5 minutes until they are tender and the flavors have come together.
Toss in the fresh mint and drizzle with a bit more olive oil and additional salt and pepper to taste. Then pass the peas!
Okra Is Not As Yucky As Some Might Think
History of Okra and Okra Recipes
By Engrid Winslow
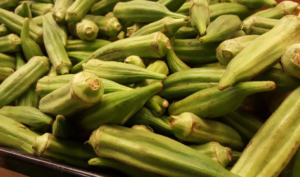
If you grew up in the South, as I did, you loved okra as an essential ingredient in gumbo. If you didn’t then you might think it is “slimy” but okay if coated in batter and deep-fried. Well, you have been treating this amazing vegetable all wrong. First of all, the plants are really pretty and the flowers are fabulous, looking a lot like a hibiscus bloom, and can be grown as a 3-4 foot tall annual flower. Try our Clemson Spineless Okra Recipes!
Okra probably originated somewhere around Ethiopia and was cultivated by the ancient Egyptians around the 12th century B.C. Its cultivation spread throughout North Africa, Arabia and the Middle East. The seed pods were eaten cooked, and the seeds were toasted and ground and used as a coffee substitute.
The plant spread around the shores of the Mediterranean Sea and eastward and was introduced to the Americas by ships plying the Atlantic slave trade in the mid-1600s when its presence was recorded in Brazil. It was further documented in Suriname in 1686. Okra may have been introduced to southeastern North America from Africa in the early 18th century. By 1748, it was being grown as far north as Philadelphia. Thomas Jefferson noted it was well established in Virginia by 1781.
It’s best to grow okra yourself if you can (or purchase them directly from a farmer) to ensure that the pods are fresh, tender and not overly large. Okra pods are best when harvested at 1-2 inches. Any larger than that and they are fibrous and not so tasty. The plants are easy to grow in most climates as long as they are planted after the danger of frost is past. They are prolific, grow quickly, and several plants can produce a handful or two of the pods nearly every day.
Store them in the vegetable bin of your refrigerator for up to 4 days until you have enough to prepare one of these great okra recipes. Okra is especially adept at soaking up surrounding flavors, making great for Indian and Asian dishes. Give okra a second chance and you might just be surprised.
One of the best ways to cook okra is to toss the pods with a little olive oil, salt and pepper and spread on a rimmed baking sheet. Roast at 400 degrees for 12- 15 minutes, shaking pan half-way through until the pods are lightly browned on the edges.
Pan-Fried Clemson Spineless Okra with Indian Spices
(Serves 4 as a side dish)
25-30 medium-sized okra pods, sliced 5 TBL butter
¼ tsp ground ginger ¼ tsp cumin
¼ tsp ground coriander salt and pepper to taste
Melt the butter in a skillet, Add okra and spices and sauté until okra is soft, 15-20 minutes. Season with salt and pepper before serving.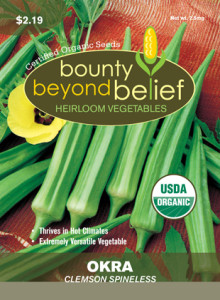
Picadilly Clemson Spineless Okra
(Serves 4-6 as a side dish)
2 Qt. fresh okra, chopped 1 medium onion, chopped
1 red bell pepper, chopped 1 1 lb. can of crushed or chopped tomatoes
¼ tsp sugar ¼ tsp olive oil
Salt and black pepper to taste
Sauté the onion and bell pepper in the olive oil for 4-5 minutes on medium heat, stirring frequently until softened. Add the tomatoes, okra, sugar, salt and pepper and cook, covered, over low heat for 45 minutes. Stir occasionally. Check and correct seasoning before serving. May be frozen.
Let’s Celebrate Pumpkins!
Year of the Pumpkin
by Heather Stone
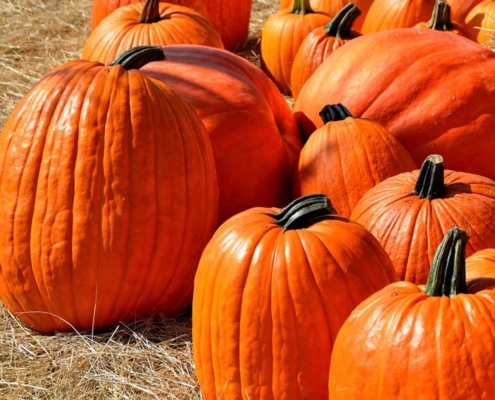
photo courtesy of Pexels – 160662
When you hear the word pumpkin what comes to mind first? Is it autumn, Halloween, jack-o-lanterns, pumpkin pie or pumpkin spice latte perhaps. There are so many things to love about pumpkins. They are fun to grow and fun to eat. This year the National Garden Bureau named 2019 The Year of the Pumpkin, so let’s celebrate the pumpkin. https://ngb.org/year-of-the-Pumpkin/
Pumpkins are part of the Cucurbitaceae family along with squash, cucumbers and melons. There are a wide selection of pumpkin varieties ranging in size from as little as 4 oz to some weighing over several thousand pounds. Just this past fall a New Hampshire man grew the largest pumpkin on record weighing in at 2,528 lbs. Now, that would make a lot of pumpkin pie.
Pumpkins are easy to grow. They can be started indoors or directly sown into warm (70 degrees), rich, fertile soil when all danger of frost has passed. Sow the seed into “hills” of 4-6 seeds and thin to the 2 strongest plants per hill. Make sure to give your pumpkins plenty of room to grow to get the best fruit. Depending on the variety you are growing, pumpkins need anywhere from 12 sq.ft. to 48 sq.ft. of growing space. Water your pumpkin seedlings regularly and fertilize throughout the growing season. When it comes time to harvest make sure to cut the pumpkins from the vine when the skin is hard and leave a 3” piece of the stem attached to decrease the chances of decay.
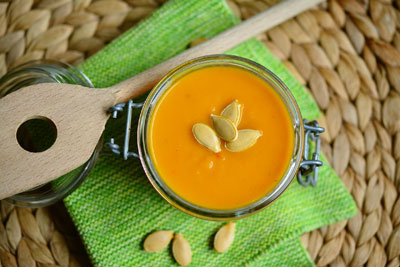
Photo courtesy of Pixabay -congerdesign
Pumpkins aren’t just fun to grow. They are fun to eat too! We use pumpkins to make soups, breads and pies. We put pumpkin in smoothies, yogurt and even pancakes. Check out some of these great pumpkin recipes. But the flesh of the pumpkin isn’t the only tasty part. Roasted pumpkin seeds make a great snack too. Pumpkin flesh is rich in vitamin A, potassium and beta carotene. The seeds are a good source of protein and are rich in minerals such as manganese, phosphorous, magnesium and zinc. Not all pumpkins are created equal. There are pumpkins for carving and decorating and there are pumpkins for eating. Look for pie pumpkins and cooking pumpkins for the best taste. Two of my favorites are Cinderella and Long Island Cheese, but there are countless choices.
So what kind of pumpkin will you grow this year?
PRAISE FOR THE LOWLY CABBAGE
Heirloom Vegetable Seeds
by Engrid Winslow
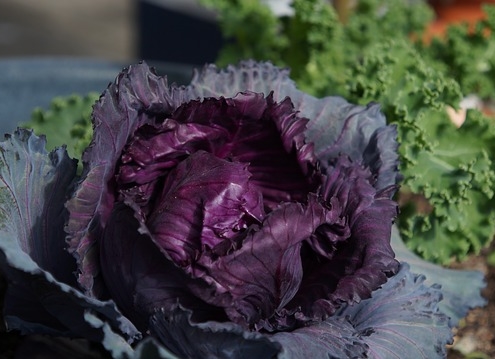
photo courtesy of pixabay – angelsover
Pity the lowly cabbage, which doesn’t get the love of its sexier brassica brothers and sisters such as Brussels sprouts, broccoli, cauliflower or kale. But this overlooked vegetable is plentiful and inexpensive at this type of year. Cabbage is also a breeze to grow and does great in cool spring and fall temperatures. They actually taste sweeter when exposed to light frosts as do other cool-season brassicas.
It comes in two types: European and Asian. The European types are white or green cabbage, red cabbage and savoy. The most popular Asian types are bok choy and Napa. Napa is an excellent choice for summer slaw when combined with grated carrots, red bell peppers and simple soy and rice-wine vinegar dressing with a touch of honey. Toss in some peanuts for crunch and/or cooked chicken to make it a complete meal. But today we are focusing on a couple of winter cabbage recipes.
If the taste of cabbage doesn’t convince you then maybe this will: cabbage is full of vitamin K and anthocyanins that help with mental function and concentration. These nutrients also prevent nerve damage, improving your defense against Alzheimer’s disease and dementia. Red cabbage has the highest amount of these power nutrients. Cabbage is an excellent source of vitamins C, B1, B2 and B6. It is also a very good source of manganese, dietary fiber, potassium, folate and copper. Additionally, cabbage is a good source of choline, phosphorus, magnesium, calcium, selenium, iron, pantothenic acid, protein and niacin.
This soup is adapted slightly from the wonderful cookbook: Six Seasons – A New Way with vegetables by Joshua McFadden which you might want to add to your cookbook library. https://www.amazon.com/Six-Seasons-New-Way-Vegetables
The red coleslaw is a family Easter favorite that is great as a side with ham and scalloped potatoes.
Two other favorite cookbooks for you to also consider are Brassicas by Laura B. Russell https://www.amazon.com/Brassicas-Healthiest-Vegetables-Cauliflower-Broccoli and The Book of Greens by Jenn Louis https://www.amazon.com/s?k=the+book+of+greens+by+jenn+louis&crid
Cabbage Recipes
COZY CABBAGE and FARRO SOUP
Serves 4
Notes: If you use savoy cabbage it will not take as long as green cabbage once it is added to the pot to steam.
- 1 pound cabbage, savoy or green
- Olive oil
- 1 medium onion, thinly sliced
- Kosher salt and freshly ground black pepper
- 3 garlic cloves, peeled and chopped finely
- 1 sprig of rosemary or thyme
- 1 tablespoon red wine or white wine vinegar
- 2/3 cup uncooked farro
- About 4 cups chicken or vegetable stock
- 1 tablespoon fresh lemon juice
- Shaved parmesan, to finish
- Cut out the cabbage core and finely chop it. Cut the leaves into fine shreds or about 1/8-inch ribbons. Heat 1/4 cup olive oil in a large pot or Dutch oven over medium heat. Add the onion and cabbage core, some salt and pepper, and cook, stirring frequently, until the onion starts to soften but is not yet browned, about 5 to 7 minutes. Add the garlic and cook another 3 to 5 minutes, until the garlic softens too. Add the shredded cabbage leaves and herb sprig. Reduce the heat to medium-low and cover the pot and let it steam a bit to soften the leaves, then toss the cabbage to combine with other ingredients. Cook, covered, until the cabbage is very sweet and tender, which may take 30 minutes or as little as 15 to 20 minutes, stirring occasionally.
Meanwhile, in a small skillet, heat 2 Tablespoons of olive oil over medium and add the uncooked farro. Toast it, stirring, for a few minutes, until half a shade darker.
When the cabbage is ready, stir in the vinegar. Taste and season with more salt and pepper. Add toasted farro and stock. Bring mixture to a low simmer and cook for 25 to 35 minutes, until farro is tender and all the flavors are married. The soup will be very thick, but if you’d prefer more liquid, add another 1/2 cup stock. Taste and adjust seasoning again. Stir in lemon juice.
Ladle into bowls and finish each with a drizzle of olive oil and a shower of parmesan, with more parmesan passed at the table.
Soup keeps well in the fridge for 3 days and for much longer in the freezer.
RED CABBAGE COLESLAW
Serves 4
Vinaigrette:
- ¼ cup extra virgin olive oil
- 2 teaspoons chopped, fresh tarragon
- ½ cup tarragon or apple cider vinegar
- 1 tsp dry white wine
- 1 tsp Dijon mustard
- 1 TBL honey
- Salt and pepper to taste
Put all in a blender and blend for 1 minute.
Toss with:
- 1 head shredded purple cabbage
- 1 cup golden raisins
- 1 tsp caraway seeds
The vinaigrette will keep for 5 days and after prepared, the salad will keep for two days in an airtight container.
Here is a recipe from our blog “The Dirt” for Spicy Tofu Tacos with Cabbage Slaw from the kitchen of Michael Scott
and more on planting Cabbage and other uses, here.
HERBAL SALVE FOR YOUR BEST FRIENDS PAWS

Photo of Cute fluffy dog compliments of M. Cosselman.
Herbal Salve for Paws
By Engrid Winslow
It’s clearly winter and we can tell because our skin gets drier and we use more lotions and balms to combat dry, chapped skin. But what about your dog? Winter means cold, ice and salted roads, all of which can dry out your furry friends’ paws. Did you know that there are herbs which are particularly healing for dogs and can be mixed into a salve? Here are a few ideas and the master recipe for turning them into a creamy topical application for your dog. If you didn’t save any of these from last year’s herb garden or have never grown them, this will give you some ideas for the next growing season. Also, there are herbal apothecaries in many towns or you can order the ingredients from https://www.rebeccasherbs.com/. You should gently massage the salve into the skin before your dog spends long periods outside. Also, these are safe on humans as well as dogs so when you apply it to your dog’s paw pads, you will get the benefit too.
Calendula
(Calendula officinalis) flowers are antimicrobial, antifungal, antibacterial and very healing. It is ideal for treating all skin irritations and wounds for humans and dogs. It can, however, be potentially toxic to cats, so refrain from sharing it with feline house members.
Chamomile
(Matricaria recutita, Chamaemelum nobile) flowers don’t just make a calming tea. It is also antibacterial and can help soothe irritated skin. Occasionally, a dog will have an allergic reaction so proceed with caution to be sure your pet is not one of those unlucky few.
Rosemary
(Rosemarinus officinalis) leaves, stems and flowers is a versatile herb for cooking as well as having anti-inflammatory and antifungal properties. It works well in treating abrasions and is antifungal.
Sage
(Salvia officinalis) leaves or flowers have both cleansing and antiseptic properties and are very healing. It is also a very safe herb as long as you take care for to use Artemisia (Artemisia spp.) sages.
Slippery Elm’s
(Ulmus fulva) inner bark is healing for topical wounds and soothes irritation. Rarely, a dog will have an allergic reaction so, once again, be in-tune with your dog and watch for any signs of itching sneezing or other allergy symptoms.
MASTER SALVE RECIPE
5 oz. coconut oil
3 ½ oz. powdered or finely ground herb from the list above
4 oz. beeswax
Heat the coconut oil and herb in the top part of a double boiler and let the water boil for 1 ½ hours to infuse the herb.
Strain the herb out of the oil with cheesecloth, squeezing out as much liquid as possible. Return to oil to the double boiler and add the beeswax. Heat over boiling water, stir frequently until the wax is melted and thoroughly combined.
Pour into small jars and allow to cool, then seal. If stored in the refrigerator, this herbal salve for paws will keep for at least two years.
Preserving Foods
Food Preservation
by Rebecca Hansen
Many of us have tried our hands at the new Victory Gardens and are getting back to our roots in our community’s Grow Local movements. With the flow of garden produce increasing each minute, we have donated excess to the local Community Food Share programs and, we are beginning to be mildly panicked at the thought of all of that fresh produce going to waste solely because we can’t use it fast enough.
With our neighbors slamming their doors when they see us heading their way with an armload of our best organically grown zucchinis we find ourselves wishing the bounty could be spread out over the year and last well beyond the late summer flush. More and more people are turning to home food preservation as a way to keep the bounty of their hard-earned, organic, heirloom, non-genetically modified gardens coming.
Now is the time to start your research, before the tidal wave of tomatoes sweeps you away. The number of food preservation methods is exciting and a bit daunting. Drying foods is one of the oldest methods of preserving foods. Also, canning, freezing, pickling, curing and smoking, and fermenting are ways to keep your pantry full during the winter.
What could be more fulfilling than pulling out a sparkling jar of homemade salsa when the snowflakes are flying to bring back warm memories of those beautiful heirloom tomatoes growing on the vine? CSU Extension has a couple of great publications on how to dry vegetables and fruits with all that you need to know about nutritional values, methods and safety precautions.
Also in the extension’s Nutrition, Health and Food Safety publications, are fact sheets on smoking and curing meats and making pickles and sauerkraut and preserving without sugar or salt for special diets. Check out the one on safe practices for community gardens for tips on ensuring safe food for all gardeners.
With all of our efforts to ensure that we each have gotten the most nutritious value from our fresh produce, it would be prudent to search for the newest scientific research into home food preservation methods. We want to eat healthy fruits and vegetables even when they are not in season. The USDA encourages us to use safe canning methods. Scientific developments have changed recommendations over time. Always use up-to-date methods and do not just rely on the practices of past generations. A great place to start is by exploring the National Center for Home Food Preservation website from the University of Georgia.
Publications and resources are available at the center’s website with useful tips for proper preservation techniques. Also, not to be missed is an awesome, free, online self-study course called;
- Preserving Food at Home: A Self-Study
- Principles of Home CanningIf you are new to canning you should definitely have this publication at hand.
Preserving homegrown food can be an economical and fulfilling way to enjoy quality, nutritional food from your garden all year long. So when your heirloom tomatoes, squash, onions, peppers, beans, garlic, beets, and turnips cover every surface in your home and garage and the refrigerator is brimming with more fragile produce, you will be fortified with the knowledge necessary to safely preserve the bounty for the time when the snowflakes will inevitably fly.
MAKE YOUR OWN SUET BALLS FOR BIRDS
Suet Ball Recipe
By Engrid Winslow
During the long cold winter months, fat is extremely important for many birds to survive. The species that especially love suet are woodpeckers and flickers, chickadees, wrens, goldfinches, juncos, cardinals, robins, jays, blackbirds and starlings. Be aware that raccoons, squirrels and mice are also attracted to suet balls so be prepared to use baffles or place mesh over the balls to deter them.
Suet is raw fat and has also been used to make candles and Christmas pudding. You can get it from your butcher and ask him to grind it for you. Then it needs to be melted and strained to remove any solids. If you want to avoid the “ick” factor, you can substitute l cup lard or shortening. The birds will eat it plain but many recipes call for adding seeds, dried fruit or even insects to the mix. Many pet food and birding stores sell pre-made suet cakes but it is so much more fun to make your own in various shapes and hang them outside. If you are getting only starlings, hang the balls with a mesh around all sides but the bottoms. This will make it possible for all of the woodpeckers to hang upside down and eat while the starlings are baffled and confused. Place them near where you already have feeders with plain birdseed and watch the fluttery show!
Here are some methods and recipes for making the suet cakes or balls:
1 cup crunchy peanut butter
1 cup lard
2 cups quick cook oats
2 cups cornmeal
1 cup flour
1/3 cup sugar
Melt the peanut butter and lard and add remaining ingredients and cool.
——————————————-
1 cup crunchy peanut butter
1cup shortening
1 cup flower
3 cups cornmeal
1 cup cracked corn
1 cup black oil sunflower seeds or mixed seeds
Melt the peanut butter and shortening, add remaining ingredients and cool.
————————————————
4 1/2 cups ground fresh suet
3/4 cup dried and finely ground bakery goods such as Whole-wheat or cracked-wheat bread or crackers
1/2 cup shelled sunflower seeds
1/4 cup millet
1/4 cup dried and chopped fruit such as cranberries, currants, raisins, or other berries
- Melt suet in a saucepan over low heat.
- Mix the rest of the ingredients together in a large bowl.
- Allow the suet to cool until slightly thickened, then strain and stir into the mixture in the bowl. Mix thoroughly.
- Pour or pack into forms or suet feeders or pack into pine cones.
———————————————————
1/2 lb. fresh ground suet
1/3 cup sunflower seed
2/3 cup wild bird seed mix
1/8 cup chopped peanuts
1/4 cup raisins
- Melt suet in a saucepan over low heat. Allow it to cool thoroughly, then reheat it.
- Mix the rest of the ingredients together in a large bowl.
- Allow the suet to cool until slightly thickened, then stir it into the mixture in the bowl. Mix thoroughly.
- Pour into pie pan or form, or pack into suet feeders.
Optional or substitute ingredients: millet (or other birdseed), cornmeal, cooked noodles, chopped berries, dried fruit.