Tag Archive for: Herbs
Anise Hyssop
Herb of the Year
By Heather Stone
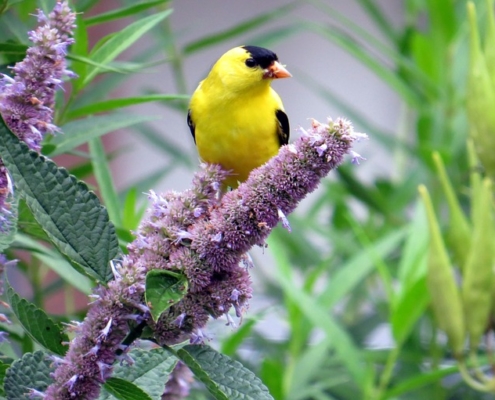
photo courtesy of pixabay
Every year since 1995 the International Herb Association has named an Herb of the Year. This year’s selection is Anise hyssop, Agastache foeniculum. This North American native wildflower has a lot to offer in the garden, the kitchen, the medicine chest and to the pollinators.
Anise hyssop is native to the Upper Midwest, Great Plains and into Canada. It’s found growing in prairies, dry upland forests, plains and fields from Northern Colorado to Wisconsin in the US and from Ontario to British Columbia in Canada. Anise hyssop is a member of the mint family. It grows best in full sun to part shade in dry to moderately moist soils with good drainage. This low maintenance perennial thrives in zones 4-9 reaching heights on average of 1-3’ tall by 1-3’ wide. Beautiful lavender flower spikes bloom in summer and with regular deadheading will continue until fall. The flowers are edible and make for a nice cut and dried flower. Both the flowers and the leaves can be added to baked goods or salads. My favorite way to use them is finely chopped in a fruit salad.
Anise hyssop is easily grown from seed and established plants will spread by rhizomes or will self-seed in the right growing conditions. It also transplants easily. Deer tend to leave this plant alone, but the same can’t be said for rabbits. Anise hyssop works well in the middle or back of the border and is at home in native, wildflower and herb gardens as well as in prairies and meadows. Great companions for anise hyssop include Black-eyed Susan, Purple Coneflower, Bee Balm and native grasses. Anise hyssop also looks fantastic in pots mixed with flowering annuals.
While the flowers of this plant have no scent, the leaves of anise hyssop smell and taste like licorice with notes of lemon, pine and sage. Native Americans found the scent uplifting and used the leaves to help treat depression. This was but one of many uses the Native Americans had for Anise Hyssop. It was also used externally as a poultice to treat wounds and burns and as a wash for itchy skin irritations such as poison ivy. Internally, it was used for treating diarrhea, fevers and coughs. Anise hyssops’ antibacterial, anti-inflammatory and expectorant properties make it an excellent herb for soothing coughs and relieving chest congestion. I find it to be especially effective in children. The best time to harvest leaves for use is just past full bloom when the oil content in the leaves is at the highest.
Anise hyssop is also a favorite plant of many pollinators. The lavender flowers are a good nectar source and highly attractive to bumblebees, native bees, honey bees, butterflies, hummingbirds and beetles. Goldfinches love to feed on the seed so make sure to leave some flowers standing in the garden at the season. So let’s celebrate 2019 by adding a plant or two of Anise Hyssop to the garden this year.
HERBAL SALVE FOR YOUR BEST FRIENDS PAWS

Photo of Cute fluffy dog compliments of M. Cosselman.
Herbal Salve for Paws
By Engrid Winslow
It’s clearly winter and we can tell because our skin gets drier and we use more lotions and balms to combat dry, chapped skin. But what about your dog? Winter means cold, ice and salted roads, all of which can dry out your furry friends’ paws. Did you know that there are herbs which are particularly healing for dogs and can be mixed into a salve? Here are a few ideas and the master recipe for turning them into a creamy topical application for your dog. If you didn’t save any of these from last year’s herb garden or have never grown them, this will give you some ideas for the next growing season. Also, there are herbal apothecaries in many towns or you can order the ingredients from https://www.rebeccasherbs.com/. You should gently massage the salve into the skin before your dog spends long periods outside. Also, these are safe on humans as well as dogs so when you apply it to your dog’s paw pads, you will get the benefit too.
Calendula
(Calendula officinalis) flowers are antimicrobial, antifungal, antibacterial and very healing. It is ideal for treating all skin irritations and wounds for humans and dogs. It can, however, be potentially toxic to cats, so refrain from sharing it with feline house members.
Chamomile
(Matricaria recutita, Chamaemelum nobile) flowers don’t just make a calming tea. It is also antibacterial and can help soothe irritated skin. Occasionally, a dog will have an allergic reaction so proceed with caution to be sure your pet is not one of those unlucky few.
Rosemary
(Rosemarinus officinalis) leaves, stems and flowers is a versatile herb for cooking as well as having anti-inflammatory and antifungal properties. It works well in treating abrasions and is antifungal.
Sage
(Salvia officinalis) leaves or flowers have both cleansing and antiseptic properties and are very healing. It is also a very safe herb as long as you take care for to use Artemisia (Artemisia spp.) sages.
Slippery Elm’s
(Ulmus fulva) inner bark is healing for topical wounds and soothes irritation. Rarely, a dog will have an allergic reaction so, once again, be in-tune with your dog and watch for any signs of itching sneezing or other allergy symptoms.
MASTER SALVE RECIPE
5 oz. coconut oil
3 ½ oz. powdered or finely ground herb from the list above
4 oz. beeswax
Heat the coconut oil and herb in the top part of a double boiler and let the water boil for 1 ½ hours to infuse the herb.
Strain the herb out of the oil with cheesecloth, squeezing out as much liquid as possible. Return to oil to the double boiler and add the beeswax. Heat over boiling water, stir frequently until the wax is melted and thoroughly combined.
Pour into small jars and allow to cool, then seal. If stored in the refrigerator, this herbal salve for paws will keep for at least two years.
Using Your Frozen Summer Bounty (Part 1 – PESTO)
Cooking with Pesto
by Engrid Winslow
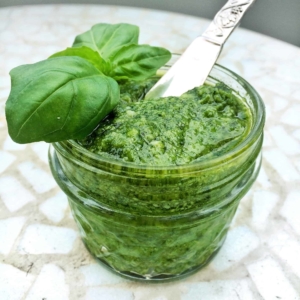
Photo courtesy of pixabay
Already the bounty of vegetables and herbs from the summer garden are becoming a distant memory. It’s time to dig into the freezer and start to use up some of those precious flavors in the cold winter months.
Let’s start with the delicious pesto(s) you made and froze back in June [Pesto Secrets] which is so useful in so many more ways than pasta. Pesto pairs particularly well with such winter delights as frozen roasted or sundried cherry tomatoes [Summer Harvest] and creamy mozzarella or burrata cheese so think of ways to include those items in some of the ideas listed below. But let’s look at some special spins on pesto.
* Stir into softly scrambled eggs, or drizzle on top of a frittata
* Mix with mayonnaise and use as an aioli on bread, in sandwiches or as a dip with vegetables
* Spread it on a sandwich – especially a hot pressed sandwich like a Panini or grilled cheese
* Substitute for tomato sauce on a pizza
* Drizzle on soups such as Minestrone or Pasta e Fagioli
* Mix into salad dressing
* Toss with roasted veggies from potatoes to broccoli to eggplant
* Serve with grilled steak, chicken, pork or even fish
* Stir into the filling for a quiche
* Add to chicken salad
* Put it in a quesadilla or on pita bread sandwiches
* Top a turkey burger with it
* Stir into mashed potatoes or cauliflower
* Mix it in with quinoa, rice or other grains
* Add it to meatball, burger or meatloaf mixtures
* Bake it into puff pastry with feta cheese and tomatoes
Here are a few others.
Let us know if you have other uses beyond pasta for the delicious pesto you made and froze this summer!
Preserving Herbs in Vinegar
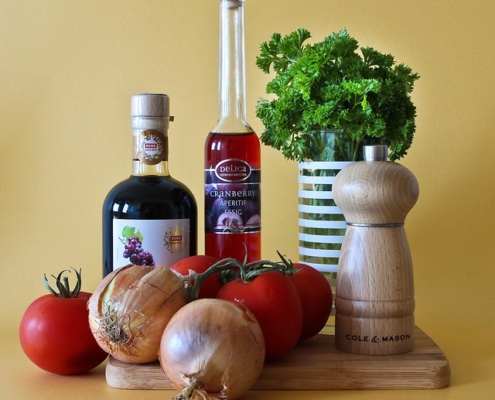
photo courtesy of Anelka / pixabay
Vinegar Infusing
By Heather Stone
Last week we talked about drying as an easy way to preserve your herb harvest. This week we are going to dive into infusing herbs in vinegar. There is lots of room for creativity when making infused vinegars. You can infuse single herbs, a combination of herbs, herbs with flowers and don’t forget fruit. The possibilities are endless.
The end product can be used in a number of ways including; salad dressings, marinades, rubs, sauces, beverages and more. Beautifully bottled vinegars also make great gifts.
- First, you will need to choose your vinegar. There are many varieties of vinegar including white, apple cider, rice, champagne and wine vinegars. Milder tasting vinegars are well suited for delicate herbs and flowers. Your more robust herbs do best in wine vinegar. Really it’s up to you and what you like best.
- Begin by sanitizing the jar or bottle you have chosen. For instructions- https://bit.ly/2nQfRng
- Wash and gently pat dry your herbs. Make sure you are using the best quality leaves and flowers, leaving behind those that are bruised, brown or have been nibbled on.
- Place three to four sprigs of fresh herbs or 3-4 tablespoons of dried herbs per pint of vinegar.
- Cover your container tightly with a non-metallic lid and place it in a cool, dark place to infuse. Allow it to steep for 2-4 weeks, giving it an occasional shake.
- Once your vinegar has reached your desired flavor, remove the herbs and place the vinegar into a sterilized jar or bottle. Don’t forget to label and date your vinegars! Stored in a cool, dark place your vinegar should last 4-5 months. Refrigerate for longer storage.
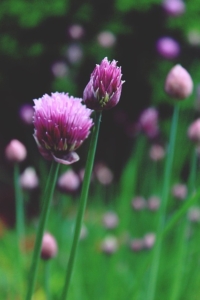
Photo courtesy of TanteTati / pixabay
Some of my favorites include:
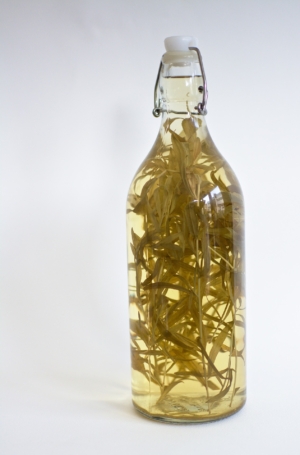
Photo courtesy of mammela / pixabay
French tarragon in apple cider vinegar
Chive blossoms in rice vinegar- the beautiful blossoms turn the vinegar a beautiful shade of pink
Violets in white wine vinegar- this vinegar turns an amazing shade of purple
Raspberries in cider vinegar
Parsley, thyme and sage in red wine vinegar
Check out these links for more ideas for flavor combinations.
https://theherbalacademy.com/making-herbal-vinegars/
http://www.frontiercoop.com/community/how-to/herbal-vinegars
https://nchfp.uga.edu/publications/uga/uga_flavored_vinegars.pdf
Drying: An Easy Way to Preserve Your Herbs
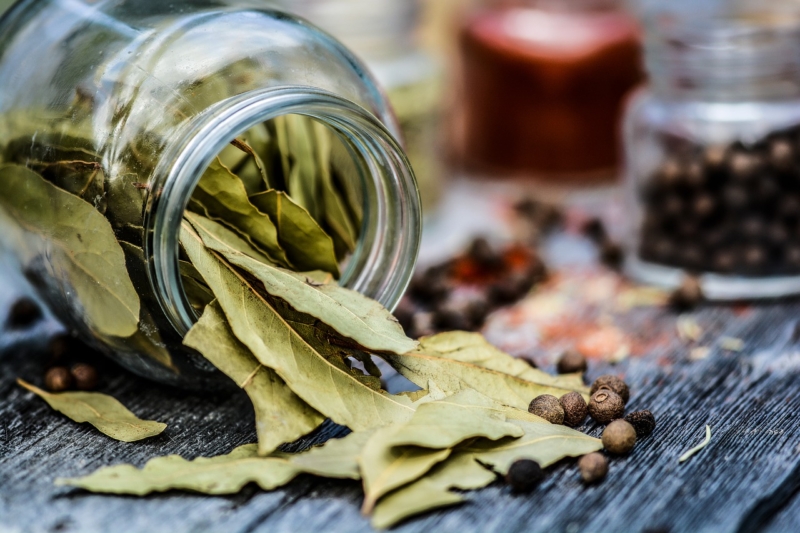
Photo courtesy of monicore / pixabay
Leaves
If you’re harvesting leaves, the best time to pick is before the plant begins to flower.
Flowers
If you’re harvesting flowers, harvest the blossoms just before they are in full bloom.
Seeds
If you’re harvesting seeds, the seeds should remain on the plant until they are fully mature and begin to dry.
Here are three easy methods for drying your newly harvested herbs.
Air drying
Air drying is the easiest method of drying herbs and can be done in several ways. One way is to air dry in bundles. First, gather the stems in a loose bundle. You want good air circulation throughout and around the bundle. Next, hang them stem side up in an area that is warm, dry, dust- free and out of direct sunlight. Finally, your herbs are ready when they are dry and
crumbly to the touch. This can take anywhere from four days or
up to two weeks if temperatures are on the cooler side.
Drying seeds? Place a paper bag loosely over the bundle to catch any seeds that might fall.
If you are working with a smaller quantity or have plants with delicate leaves or flowers you can place them on a drying rack or screen. This can be a piece of cheesecloth, a window screen or a brown paper bag with holes punched in it. Just like drying in bundles you want good air circulation and to keep the herbs warm, dry and out of direct sunlight.
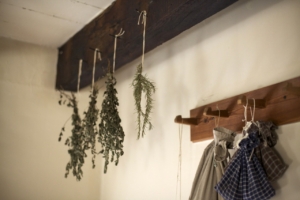
Photo courtesy of pixabay
Dehydrating
Using an electric food dehydrator is a great way to quickly dry your herbs, which can be helpful if you live in an area with high humidity. Keeping the dehydrator on the lowest temperature setting, follow the instructions on your dehydrator for how to place the leaves and recommended drying times.
Oven Drying
For oven drying, begin by placing individual leaves on a lined baking sheet. Set your oven to its lowest temperature and keep a close eye on them. You don’t want them to dry out too quickly.
Now that your herbs are thoroughly dry you want to store them properly to maintain their quality and taste. You can store your herbs in jars (glass or plastic) with tight-fitting lids or in well-sealed plastic bags. Make sure to label your containers with the herbs name and date. Keep your herbs in a cool, dark place to maintain freshness.
4 Tip for Keeping Your Basil Productive
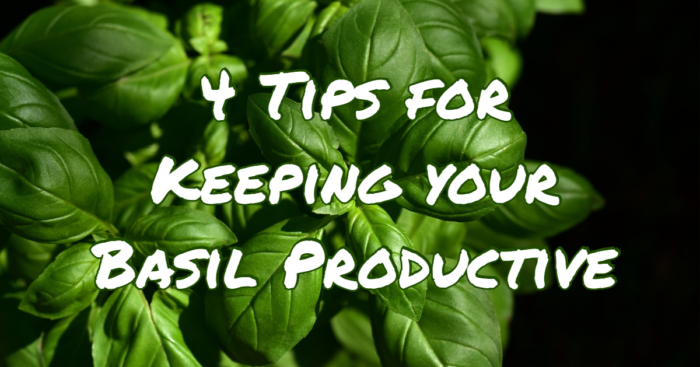
Taking Care of Your Basil
by Sam Doll
Fresh basil is one of the true treats of the garden. This sweet and savory herb can be used in anything from a fresh Caprese salad, a lovely pesto, or even chopped up as a flavor bomb on grilled meats and veggies!
However, it can be really hard to keep your basil productive, lush, and tasty throughout the summer. If you aren’t careful, your beautiful basil can become scraggly, short-lived, and bitter!
Don’t worry though. With these tips, whether it is classic sweet basil or spicy Thai basil you will have bushy, verdant basil all season long.
1. Sun is Basil’s Friend
Basil originated from subtropical areas of ancient India. Due to its roots, it loves a lot of sun and a lot of water. Make sure your basil is getting at least 6-8 hours of full sun every day. If you are keeping your basil in a container indoors, make sure that it is near a south-facing window.
Check out our guide to growing windowsill basil!
2. Water is Basil’s 2nd Best Friend
Basil likes to be well hydrated, so make sure that you are frequently watering and that the soil is well drained. There is no set schedule you should be watering during, just keep an eye on the soil and water when it first appears dry.
3. The More You Take, the More the Plant Gives
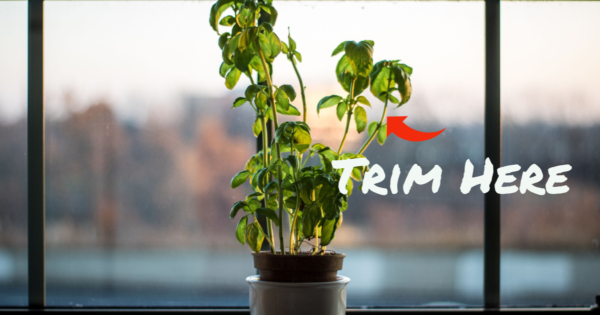
If left to its own devices, the basil plant will grow tall and spindly. Unfortunately, a tall skinny plant does not provide many leaves for you to munch on. To make the basil bushy and bountiful, you need to consistently prune and harvest from the plant.
The key to harvesting basil is to not just pick off the leaves. You want to cut or pinch off the leaves at the stem, right above a set of two leaves or nodes, like bellow. These nodes will create two separate branches, so make sure to leave at least one or two of these below the trim spot on the stem. If you keep this up every one to two weeks, you will have a massive, bushy basil plant by late summer!
Here is a helpful video guide to show you how to prune your basil
4. Flowers are Your Enemy
When a leafy plant decides to produce seeds, it is known as bolting. Bolting, which often happens when the weather turns hot, is when the plant expects a period of high heat and little water, so it tries to produce seeds as quickly as possible. You can tell when your plant is bolting because it will have a period of rapid growth and flower production.
Once a basil plant goes to seed, the plant will start to wither away, and the remaining foliage will turn bitter and can take on an anise, or liquorice, flavor. If you let your basil get away from you, this can reduce your harvest season by months.
The easiest way to manage this is to cut off or pinch off any flower structures as soon as they appear. This will prevent the plant from bolting and, like with pruning, it will encourage the plant to branch off from where you trimmed it, making your plant even more productive and bushy.
If you want to get a little wild, try our Lemon Basil! It’s great in summer dishes and cocktails!
Herbs for the Bees
Feeding Bees
by Sam Doll
Bees are responsible for at least one-third of our diet! Since these busy little creatures are so important to the food we eat, we thought it would be nice to spice up their diet (as well as ours) with some ideas to make a bee-friendly pollinator garden!
Here are a few herbs that you and the bees will love to eat this summer
Sage:
Great for giving that classic flavor to meats and, if you are daring, can be a great addition to some classic adult beverages (check out this Sage Bee’s Knees Cocktail). Sage is a hardy perennial that loves well-drained soil and lots of sunshine, which means it does great in a container. This herb also preserves its flavor past flowering, which means it can feed you and the bees at the same time!
Lemon Balm:
A perennial herb native to the Mediterranean, with a wonderfully gentle lemon scent in the mint family. The fragrant, inconspicuous but nectar-rich white flowers will attract honey bees. Leave the blooms for the bees for a couple of days, then trim them off to prevent self-sowing. Lemon Balm is often used as a flavoring in ice cream and lemon balm pesto and in herbal teas. Use the fresh leaves in chicken or fish dishes as well as with fruit and fruit juices. The same goes for any member of the mint family (peppermint, spearmint, and catnip included). Basil: Sweet, Thai, cinnamon, lemon, lime, purple, and Christmas are just a few of the basil varieties available to you. Basil is a versatile and easy to grow herb that originated in tropical Asia and has been cultivated for thousands of years. This warm-weather annual has a refreshing, aromatic flavor that makes it a classic ingredient of many Italian and Southeast Asian dishes. Try using it in a classic Thai basil Soup. Make sure to trim the flowers before they go to seed to prevent the flavor from changing.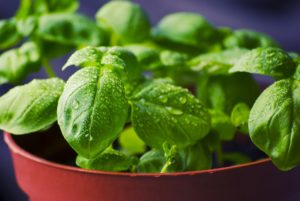
Thyme:
An easy-to-grow, drought-tolerant herb used to flavor food, as an antiseptic, and in essential oils. The leaves of this warm, pungent spice that can be used fresh or dried in many dishes, marinades, and sauces. For an easy dish, try this oven-roasted potatoes and carrots with thyme recipe. Thyme will attract both bees and butterflies!
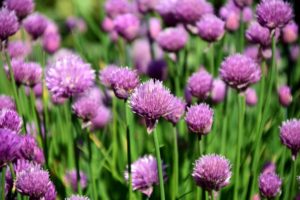
Chives:
The surprisingly beautiful chive blooms are as tasty to the bees as they are to us! The blossoms are oniony and spicy. They are often used to make chive blossom vinegar, which is often used in salad dressing, or just can be chopped up and added to any savory dish for some flavor and color!
Lavender:
The most timeless and versatile garden flower around, lavender flowers and leaves can be used in everything from homemade cosmetics to confections. It is especially nice to use in a simple, homemade sugar scrub. The blooms are perfect for attracting all the neighborhood honeybees.
Other great pollinator-friendly herbs are bee balm, chicory, dill, fennel, hyssop, and rosemary.
If you want to get your herb garden jump-started, check out our Essential Herb Garden Collection
Pesto Secrets
Heirloom Vegetable Seeds
From the kitchen of Engrid Winslow

Pesto is a “secret summer sauce” because it is so flavorful, adaptable and can be frozen to bring back summer memories during the dark of winter. Some of the best ways to use pesto are:
- Tossed into hot or cold pasta, add other veggies, chicken and/or shrimp
- Folded into scrambled eggs or as a filling for omelets
- Drizzled over grilled chicken, pork, lamb or fish
- Smeared onto ricotta-topped, toasted bread
- Swirled into mashed potatoes
- Drizzled on salads, roasted or grilled veggies
- A topping for pizza
- Spread onto sandwiches
The best tricks for getting the most flavor out of your pesto are: 1) toast nuts in an even layer in a skillet over medium heat or in a 350 degree oven for 5-10 minutes (be sure to check often to prevent burning them). You can keep leftover toasted nuts in the freezer so there are always some on hand.; (2) use a good quality extra virgin olive oil; 3) don’t overprocess the sauce – those flecks of texture are yummy; and 4) grate your cheese fresh by hand each time and mix it in at the end of processing.
Basic Basil Pesto Recipe
1/3 cup olive oil
1 ½ cups firmly packed fresh basil leaves
½ cup toasted pine nuts
2-4 cloves garlic, peeled
¾ cup freshly grated Parmigiana-Reggiano cheese
¼ tsp. kosher salt or fine sea salt
Optional: 2 tsp. lemon juice
Process all but cheese in a food processor, add additional olive oil if a thinner consistency is desired.
Endless variations
Try substituting any of the following for the basil:
Use flavored basil such as Cinnamon (also called Mexican Basil)
1 cup arugula, 1 cup mint
1 ½ cups spinach and ½ cup oregano
2 cups of baby greens, 2 Tbsp. thyme leaves
2 cups of broccoli raab
2 cups parsley (Italian flat leaf works best)
Substitute ½ of the basil with lemon balm
Use any of the following nuts in place of pine nuts:
Pecans (great with Parsley)
Hazelnuts (try with arugula and mint)
Walnuts (good with spinach)
Almonds (good with baby greens)
Swap out the Parmesan for Asiago or Manchego
Three Wild and Spicy reasons to grow Wild Arugula
Gardening Tips
by Sandy Swegel
Wild arugula is my favorite spring green of the week and this year it’s the first thing I’ve seeded out into the garden during our warm spell.
Similar to regular arugula, wild arugula has a “wilder” taste and thinner leaf. It looks quite like a mustard weed when young if you aren’t familiar with it. Definitely a cool season crop as once the temps get to 80 wild arugula can be quite bitter.
It is very easy to grow, as mustards often are, and can handle less than ideal soil and water. (Watch out…low water makes it even spicier.). I like to plant it somewhere it can establish itself as a perennial that I can just pick a few leaves now and then to add some zest to dinner. But a Spring garden patch is essential to get cups and cups of the greens to use in making pesto.
So here are my three favorite wild and spicy reasons to grow wild arugula.
SPRING SALADS
Arugula has a nutrient profile similar to other spring tonic herbs like dandelion and nettles, but I like the taste even better for salads or lightly steamed.
PESTO
Wild arugula pesto is an absolute favorite. Make it with garlic, olive oil, walnuts and Parmesan or goat cheese and you have a fantastic sauce for fettuccine noodles, topping for pizza or spread for appetizers.
POLLINATORS
Naturally, foods that are favorites of pollinators are favorites of mine. Once summer sets in, wild arugula bolts and sends up tall tiny spiky yellow flowers that pollinators love. I’ve seen all kinds of bees and butterflies snacking on the wild arugula flowers from summer through late fall. I also snack on them….I like the flavor of arugula flowers even better than the leaves.
Photo credits
https://www.dherbs.com/articles/featured-articles/wild-arugula-pesto/