Tag Archive for: Heirloom Vegetables

Quit Working so Hard This Fall

Garden Clean Up

by Sandy Swegel

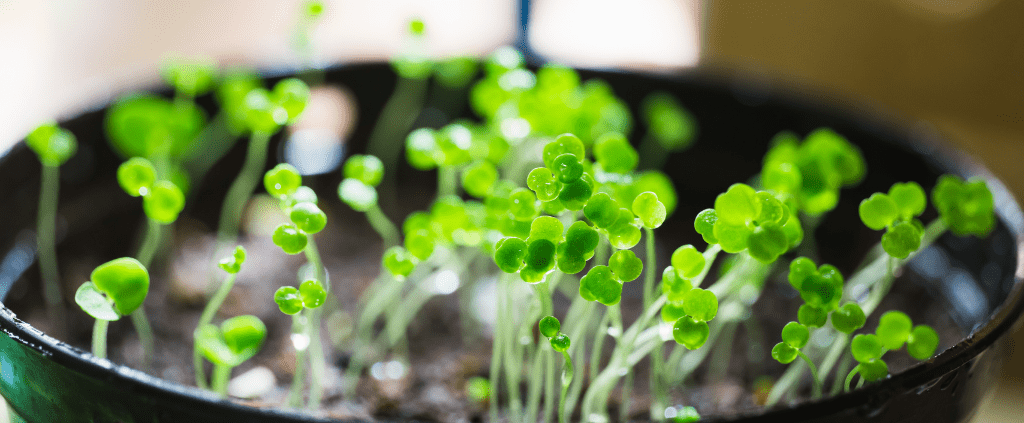
The old adages say cleanliness and hard work are virtues. That may be true in your kitchen, but in the garden, a little sloth can save many lives and make your life a little easier.  Mother Nature isn’t just messy when she clutters up the Fall garden with leaves and debris….she’s making homes for her creatures.  Old dead leaves may look like clutter that needs to be tidied up, but it’s really nice rustic sustainable homes for many of a gardener’s best friends.

Here’s who is hiding in your garden this winter if you DON’T clean up.

Ladybugs in the garden beds next to the house.  Ladybugs want a nice sheltered home safe from wind and exposed soil. I most often find them under the leaves and dead flower stalks in the perennial garden.

Butterfly larvae (aka caterpillars) in leaf bundles. Sometimes in winter, you’ll see a couple of leaves looking stuck to a bush or tree or in a clump on the ground.  Often there’s a butterfly baby overwintering there.

Lacewing at the base of willows or in the old vegetable garden.  Insects don’t work very hard in the fall either.  Often they are eating happily on the aphids in your vegetable garden or your mini forest and just go through their life cycle right there.  They lay their eggs on the bottom of leaves and the leaves fall to the ground.  If you clean up too much, you’ll clean up all the beneficial insect’s eggs

Slugs in your hosta garden. Even slugs are a good thing to leave for the winter.  They will be plump food for baby birds next Spring.

The bottom line is don’t do a good job of cleaning up in the Fall.  Take away any very diseased leaves.  Clean up the thick mats of leaves on the lawn so they don’t encourage lawn fungus.  But leave the flower stalks with seeds and the leaves in the beds.  They insulate and protect plants and insects.

Another good reason to be a little lazy this Fall.

Photos: http://www.nashvilleparent.com/2013/07/fall-for-fun/http://antsbeesbutterfliesnature.blogspot.com/2009/11/overwintering-caterpillars.html

Walla Walla Sweet Onions…You know you want them

Heirloom Vegetable Seeds

by Sandy Swegel

It doesn’t take much effort to convince us we should grow Walla Walla sweet onions. Think about thick slices hot from the grill. Or cold on our hot cheeseburger. Dream of oven-roasted whole onions. Or be one of those brave people who bite into the Walla Walla like it’s an apple.

Onions are really easy to grow so when I heard the Walla Walla Sweet Onion seed had arrived at BBB Seed for the first time, I rushed over. There’s only one problem for me with Walla Walls….their growing season is 125 days…a little longer than I can count on in Colorado. So I start the seeds indoors in February and transplant the seedlings in April.


The most important rule of growing onions is you have to use fresh seed. After a year or so, germination rates drop down to “almost none” so you do need new seeds each year.

Onions grow happily in decent soil. They can handle hot sun and they’ve forgiven me letting the weeds get a little overrun. There’s not too much guesswork as to when they are ripe…their tops fall over. So you can grow onions off in a corner of your garden without too much extra effort. Although quite labor intensive for farmers, onions are pretty cheap at the grocery so we don’t grow them so much to save money as to capture the awesome flavor of fresh homegrown Walla Wallas.


For more pictures and recipes, go to the website of the annual Walla Walla festival!
OR go to the festival in June!


Photo Credits:
http://www.sweetonions.org/

http://www.wiveswithknives.net/2010/08/02/potato-walla-walla-onion-and-gruyere-galette/
http://savorthebest.com/roasted-sweet-baby-walla-walla-onions/

How to Grow Watercress Indoors

Grow Watercress Indoors

How to Grow Watercress Indoors

by Sandy Swegel

Watercress is another one of those unassuming, almost weedy, plants that is a superfood for humans. In the brassica family of heirloom vegetables, watercress (Nasturtium officianale) is rich in vitamins, minerals (especially calcium) and sulfides. It’s not just for watercress sandwiches and tea. It is a great addition to salads as either sprouts or leaves, excellent juiced or added to juices and makes a lovely pureed spring soup. And pretty yummy just for nibbling.

Watercress is a great plant to start at the beginning of the growing season, but you can also grow watercress indoors during winter. We’ll teach you how.


Sprouts

Watercress sprouts easily and you can grow it in a jar just like you do alfalfa seeds. Its spicy kick is great on sandwiches and salads.

Plants

Seeds are pretty easy to germinate. The biggest challenge to grow watercress indoors is that it needs to always be moist, especially during germination. You can accomplish this by starting the seeds in a small pot of clean potting mix and then setting the pot in a saucer of water. Misting is great or put a plastic cover over the seed mix if your air is dry. Someplace slightly warm like the top of the frig is a great germination spot. They don’t need light to germinate.


Once the seeds are growing, you just need to be sure the plants are moist with fresh water. Think about their ideal natural habitat in Europe: slow-moving creek edges in bright shade. Some people grow them in water tanks with aerators if you want to get fancy.

One secret to tasty watercress is to keep the growing plant cool and out of hot sun and to harvest it before it flowers. After flowering, the leaves become more bitter.


To grow watercress indoors in late winter is such a promise of Spring. But it doesn’t need to be an indoor plant. After your weather warms to above freezing, you can plant your watercress outside if you have a place that stays pretty moist. (Learn more about Zones and Frost Dates). If you have a pond or fountain the watercress is thrilled living in a pot in about an inch or two of water along the edge. I’ve seen it in a shade pot with impatiens and it was pretty happy.

And once you have nice succulent leaves, watercress, slivers of cold cucumber and butter on thin white bread is actually pretty awesome.


Not sure what heirloom vegetables are or why you should grow them? Read more from Gardening Know How.

Cool Off Fast! – Agua Fresca

Agua Fresca Recipe

by Sandy Swegel

My basic remedy for hot July days is to bend over and run the hose over my head, but a more attractive and effective way to cool off is to make an Agua Fresca (refreshing water), the great fruit or vegetable drink of Mexico and other southern regions. I’ve been making Agua Frescas all weekend.

The Agua Fresca I first enjoyed from my friend Alfredo’s family was cucumber and lime juice.  Then one day we had watermelon Agua Fresca and I was in heaven.  Both were very cooling and refreshing.  What intrigued me most is that these were two of the foods my acupuncturist recommended to me.  TCM (Traditional Chinese Medicine) has diagnoses of “heat” in the body.  I often get this diagnosis and my doctor suggests three vegetables/fruits that are especially cooling to the body from a TCM energetic point of view…not just temperature:  Cucumber, celery and watermelon.  Turns out that ancient wisdom from TCM is the same as ancient wisdom from Mexican families. “Gotta love it” as a friend says.

There are lots of recipes on the web, but the concept is simple:

Blender 6 cups water 1 pound of Fruit or vegetable:  cucumber, watermelon are traditional. Also try melon, raspberries, strawberries, celery, herbs like lemon balm or basil or mint. Sugar (to taste) 1/4  to 1/2 cup.  Lime to taste. Run the blender to pulverize the vegetables or fruit and lime.  Strain if needed. Pour over ice cubes and add mint or cucumber slice or lime slice garnish.

Variations: Slushy:  Use only half the water. Run the blender a second time filled with ice cubes to get a slushy drink. Sorbet:  Make an agua fresca and put it in the ice cream maker for 20 minutes to make sorbet. Alcohol:  Rum, tequila or vodka added make excellent drinks or sorbets!

Stay Cool and Be Happy.

Photo credits:

http://www.williams-sonoma.com/recipe/raspberry-mint-agua-fresca.html

Pruning for Holiday Decorations

Collecting Holiday Decorations from Your Garden

by Sandy Swegel

I’m a big fan of multi-tasking so it’s natural that whenever there’s a garden chore to be done, I think about whether it might solve some other task that needs doing. In the Spring I schedule perennial weed digging so the roots can be thrown to the chickens for yummy spring greens.  In Summer I arrange to cut grass when I need the clippings to mulch the vegetable beds.  In Fall I pick up leaves when I need to insulate rose bushes and perennials.  One of the tasks I still want to do this year is “rejuvenation pruning” on shrubs or simple pruning on shrubs and trees that are poking me in the eye when I walk by or blocking the sidewalk.

Rejuvenation pruning is a great way to keep all your shrubs looking great.  Every year you simply cut back to the ground 1/4th to 1/3rd of the oldest branches in your bushes.  The shrub will put out new growth next spring to fill in and you’ll always have a self-rejuvenating plant.

So the multi-tasking solution here is to do some needed pruning on plants that happen to also look good, when cut, to use the pruning for holiday decorations.  Some of the plants I’ll be pruning for Thanksgiving or Christmas are:

Branches with Berries: Pyracantha (orange berries) or Hawthorn (red berries)…be careful about thorns Cotoneaster with red berries Coral berry or porcelain berry

Branches with an interesting structure: Harry Lauder or curly willow both make nice twisty branches.  Birch stems can have interesting bark.  Yellow and redtwig dogwoods add great color.  Even simple wild plum branches can be put in the center of a flower arrangement to hold the flowers up

Evergreens: Early winter is a great time to prune those Mugo pines or spruce trees that block the driveway. Juniper and cedar trimmings offer great aroma as well as evergreen color.

So once again, twice the work in half the time or something like that.  The bushes have old wood removed, the shrubs and trees have a better shape, and the house is decorated for free with dramatic gifts from nature, brought indoors.

Photo Credit: http://liveatvillages.com/blog/?p=334http://ikebanalessons.blogspot.com/2012/10/ikebana-class-1052012.html

Thanksgiving Decorations from the Garden

Collecting Fall Decor

by Sandy Swegel

One reason I first started gardening was so I could cut flowers to bring into the house or to bring as a gift to friends.  Almost all the flowers are finished in Colorado so it’s time to be more creative. There’s still lots to do to bring nature beautifully indoors and get thanksgiving decorations from the garden.

Decorate with Leaves. This one is obvious.  We had great color this year with our leaves.  Warm weather in September and October turned our trees and gardens very lush and colors are extra intense.  A Google search for decorating with leaves brought a zillion images of leaf mobiles and wreaths and candle holders and art cards. At our house, a neighbor’s seven-year-old came in and just put the big maple leaves she liked in a row down the table….a perfect fall runner.

A bowl of Jack Be Little Pumpkins

photo courtesy of Becky Hansen

Display the vegetables. It takes a long time to grow winter squash. Don’t just eat it.  Put it on display for a couple of weeks. In anticipation of Thanksgiving, I get out the big platters and artfully store those big bulky squash in plain view on the counter.  Instant art.

Use your prunings.  Cut spruce branches, pyracantha berries and other colorful or weirdly shaped stems make great decorations for your outdoor pots.

Make everything into candle holders.  Hollowed out squash and apples or overgrown beets.  Everything looks festive with a tea light!

Enjoy the color and bring the beauty indoors!

Photo credits:

 http://www.preen.com/articles/pots-for-fall-and-winter

http://organizeyourstuffnow.com/wordpress/6-fast-and-easy-ways-to-decorate-with-leaves

http://www.diy-enthusiasts.com/decorating-ideas/nature-fall-decorating-ideas-easy-diy/

Plant more peas

Plant more peas!

All About Planting Peas

by Sandy Swegel

Rev your garden engines folks.  Today is St. Patrick’s Day and the official start of pea season and there’s no need to wait.  You have jobs to do today — it’s time to plant more peas!

Make sure beds are weeded. Those mallows from last year are easy to spot….they’re the only green thing in parts of the beds.  But they weed easily this time of year. I lightly cultivate the top inch of the soil if I see lots of annual seeds starting. In my garden, every last larkspur seed that fell last year has germinated.  Cute…but not in the pea bed, please.

Put the Peas to Soak.  If your climate is high humidity, you may not need this step, but here in the arid foothills, I soak my peas overnight, rinse them tomorrow and then plant them.  Sometimes I even pre-sprout them (just like making mung bean sprouts) and plant them with the big white root already fattening up.

Put your trellis in place if you’re growing the kind of peas that need support.

Think about row cover. Decide if you want to use it to warm the peas and speed their growth.

Think about inoculant.  I’ve written about this before. Gardens that have grown happy peas before may not need inoculant but new raw beds with less than optimal soil would probably benefit.  If you forgot to buy it, you can always plant anyway and sprinkle the inoculant over the soil and water it in later.

Remember the flowers.  I’m so fond of peas for eating whether they are oriental peas  or snap peas or plain old shelling peas, that I forget about how beautiful and fragrant sweet peas are.  My neighbor plants sweet peas on trellises along the fence, at the base of vines, in a circle in the middle of the lettuce garden.  Her garden is so beautiful and fragrant come June that I get very jealous.  Time for me to plant more peas!

3 Veggies You Gotta Grow at Home

Heirloom Vegetable Seeds

by Sandy Swegel

These three veggies you gotta grow at home because they aren’t easy to find in grocery stores.  Even if you can buy them, they are so much better fresh out of the garden AND super easy to grow.

Broccoli Raab Rapini

This is a relative to big broccoli stalks. You get the same great taste and vitamins as the bigger broccoli except this is easier and faster to cook. You can buy raab in the grocery stores sometimes, but it’s often large and the leaves can be tougher. Clipped young out of the garden and sauteed with olive oil or in stir-fry, it’s tender and sweet.  And it’s easy to throw a little in your juicer without it overwhelming other vegetables.

Chioggia Beets

You can buy beets with greens attached, but again you don’t get the young tender sweet greens you can clip directly out of the garden that are great for stir-fry or slipped into a mixed salad.  Any beet would work, but the Chioggia have those super cool stripes that look great sliced very thin in a salad.

Anyone who has read this blog knows I’ve got a thing for peas. But the dwarf grey sugars reign above all the others.  First, the plant with its pretty pink flowers could pass for a sweet pea.  Second, even the leaves of this pea are tasty and you could grow these peas just for microgreens. Third, the young pod is sublime. Eaten young right off the plant it is sweet and tender. Grown a little more, it’s a great snack refrigerated or even to be used in the traditional way in a stir-fry.

Gardening is fun but also can take a lot of time and work. I like to grow food that I can’t just buy in the grocery store but is a delight when grown at home.


Photo Credits:http://www.karensgarden.net/ki_galleries/2009/PeaBlossom.jpg

http://green-artichoke.blogspot.com/2012/07/beet-and-lentil-salad.html


How to Grow Baby Kale

The Ins and Outs of Growing Kale

by Sandy Swegel

Mixed baby kales are the current darlings of the produce section…and in my refrigerator are Lacinato Kale, Organic Lacinato Kale, and Organic Red Russian Kale. Several companies now sell thrice-washed baby kales that are ready to use in salads, stir-fries, soups or juices.  As cute as these greens are, their prices are pretty steep…we pay $4 for five ounces and then there’s all that wasteful packaging.

You can easily grow your own baby kales (or any mixed greens). Here’s how market farmers do it:

The key is succession planting. 

About every three weeks, you should seed a patch of kale seeds fairly close together in intensive planting style. 

First Cutting
Once the leaves are about 4 inches high, use scissors or knife to cut them off about an inch above soil level.

Second Cutting
Let the patch you just cut off continue to grow as regular kale and you can harvest again in a month.  Cut those off again about an inch above soil.  The second cutting isn’t as tender as the first but still great for braising.

Third Cutting
Let the patch keep growing for the third cutting of mature kale.  Fertilize lightly.  The third cutting usually leaves the plant depleted and it’s time to pull those plants and reseed.

Because you kept making a new planting of kale every three weeks in a different section of your garden, you will regularly have both the tender young greens and mature leaves.

It’s that easy. Each packet of kale has over 200 seeds so this is a really thrifty way to get a lot of kale.  You can plant one kind of kale at a time, or mix red russian and lacinto together for a colorful mixture.

Eat more Kale! Yum.

Photo Credit and More info:
http://sixburnersue.com/cooking-fresh-eating-green/2013/03/new-at-the-grocery-store-baby-kale-10-ways-to-use-it/
http://www.fastcoexist.com/3016068/the-largest-urban-orchard-in-north-america-is-now-open-for-business


Starting your Perennials NOW

Seed Starting

by Sandy Swegel

It’s Time.

Even here in snowy Colorado, it’s time. Even if some weird polar vortex has kept you housebound and you’ve lost track of what day it is…it’s time. Time for starting your perennials. Spring really is on its way. 

One of the interesting aspects of a culturally liberal place like Colorado is that we’re very open-minded.  There’s somebody celebrating just about every religion’s and culture’s holiday now.  Two events this week remind me how human beings everywhere celebrate the hope for the return of Spring. First, there was a big Groundhog Day celebration for kids in one of our nature centers.  Our groundhog day is actually a big fake because true groundhogs don’t live here.  But we have a fine stuffed toy groundhog that is the center of a snowy celebration.  Our other event was a Celtic festival for Imbolc, a Gaelic festival centered around St. Brigid or the pagan goddess Brighid, depending on your point of view.   Both holidays are traditional days to forecast when Spring is coming.  Whether Spring is coming sooner or later is all the same to a gardener.  The point is that it is now the midpoint between Winter Solstice and Vernal Equinox and Spring is definitely on its way.

So you have two things to do:

First, you can start looking for the signs of Spring.  A snowdrop erupting in a warm spot. A weed or two starting to green up.  Keep your eyes open…you’ll see Spring if you look.

Second, you can start your perennial seeds.  It’s too soon for warm season crops like tomatoes, but a great time to start slow starting perennial flowers and herbs.   Perennials are often slower to germinate than annuals, but they are also more able to withstand cold temperatures.  So if I start the seeds now (or in the next few weeks), I’ll have plants ready to go outside in a protected spot by April…when I’ll need the space to start annuals.

The first week of February is the time I traditionally start perennial seeds indoors under lights.  My setup is pretty simple…a shop light dangling from a rod in my closet with a seed tray underneath. Here are the two kinds of seeds I’m starting this week:

Perennial Edibles
In the vegetable garden, herbs are the best perennials to start now. Think of winter hardy herbs: oregano, lavender, parsley, rosemary. It’s not the time for basil yet.

Wildflowers
Edibles are great, but one must never forget food for the soul—the beautiful wildflowers.  If you think to start perennial flowers might be difficult, take inspiration from an article in Fine Gardening magazine about 10 Perennials Easily Grown from Seed.     finegardening.com/design/articles/perennials-grown-from-seed.aspx

It might be frozen outside right now, but I look for Spring everywhere.  The Groundhog searches for his shadow….I’m watching my seed tray for the first tiny sprouts!

Photo Credits:
finegardening.com/design/articles/perennials-grown-from-seed.aspx