The Importance of Soil

by Engrid Winslow

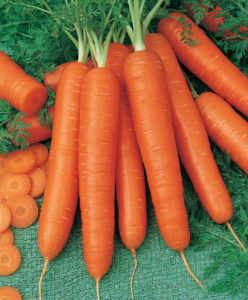
Let’s talk about getting your vegetable and flower beds ready for planting by preparing the soil. No matter how great your soil seems to be, your new plants will welcome a boost of vital nutrients. Tomatoes, onions, peppers and other vegetables are known as “heavy feeders”. This means they need (and therefore remove) lots of minerals from the soil they grow in. Without fertile soil, many plants will struggle to produce those tasty fruits and vegetables, and beautiful blooms.

5 Tips to Improve Your SoilHands full of rich soil.

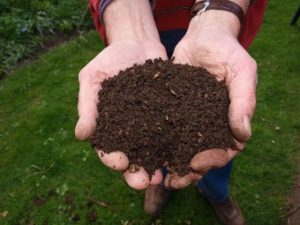
1. Add compost: Make your own or purchase a quality one such as mushroom compost. You may also like chicken manure based, beer industry bi-products or even dairy cow manure. Avoid compost made from curbside recycling (who knows what is really in there) or anything with steer manure, usually very high in salt. Spend a little extra on better quality and your garden will thank you with beautiful vegetables and flowers.

2. Use fertilizers: A mild, organic fertilizer is best and can range from fish emulsion to compost tea or kelp. Seek out a liquid fertilizer that is a balanced mix of nitrogen, phosphorus and potassium. Look for a label with low numbers for each of these 3 minerals. See below for an example (3-3-2).Age Old Fish and Seaweed Liquid Fertilizer

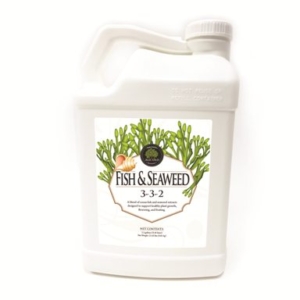
3. Cover the soil all year: Use mulch (shredded leaves are perfect) and cover crops when you are not growing vegetables. This will help keep weeds at bay and adds nutrients to the soil.

4. Rotate vegetables: Don’t grow the same vegetables in the same place every year, especially those “heavy feeders” (mentioned above). It’s best to give the soil a three-year break between them to avoid diseases and soil depletion. Remember that some crops (peas and beans in particular) actually add nutrients to the soil they are grown in.

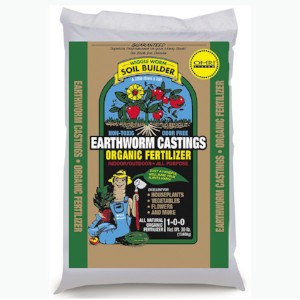
5. Encourage worms: Worm castings are expensive but have such great qualities that even a little bit is well worth it. The more you amend your soil over time, the better it becomes and somehow worms find their way to worthy soil.

A large bag of UNCO Industries Worm Castings.

Square Foot Gardening

Gardening in a Limited Space

by Greta Dupuis

Do you have limited space to grow your vegetables in?  Small yard, only one raised bed, or even just containers on a porch or deck?  Way back when (1981, in fact), PBS ran a series of shows with Mel Bartholomew which showcased how he divided a 12-foot x 12-foot plot of raised or in-ground vegetable gardens into squares. There were many different possibilities for square foot gardening in the size of these areas by making some of the squares either larger or smaller but the basic idea was to figure out how much room was needed for each type of plant and to adjust the squares accordingly.  For example, you might want more tomatoes and less lettuce or vice versa and would change the sizes of the squares to your personal preference. Some plants can be planted closer together which results in a more dense area of vegetables that maximizes space. The net result from gardening in this manner showed that the veggies were less expensive, used less water, took up less space, used fewer seeds and required less work on the gardener’s part as the squares were easier to reach and did not need as much weeding.  All in all, for gardeners with limited space, consider dividing your veggie beds into sections with your family’s favorites as you dream of all of those seed choices and plan your 2018 garden. The original book that started the revolution is still in print and there are several others with additional tips and tricks including one just for gardening in containers.

SUMMER HARVEST

Favorite Summer Vegetables

by Engrid Winslow

At last, the bounty of your summer garden is at its peak and you can gather all of those glorious tomatoes, peppers, eggplants, corn, chard, kale, summer squash, onions and other vegetables to enjoy at their freshest and most flavorful. But, ahem, some of us may plant more than we can eat in a day. Well, whether that is planned excess or not, here are a few tricks for preserving that bounty using just your freezer and pantry.

Onions –

When the tops flop over onto the ground it’s time to pull them out and let them dry out in the sun or inside in a cool, dry location. Some onions, such as cippolini, are great storage onions but for the ones that aren’t…Ever tried onion jam? How about bacon and onion jam. You can refrigerate them and use them up quickly or pop a few jars into the freezer for a festive addition to a holiday cheese platter. Here are the links to two delicious recipes you can try:

http://www.cookingchanneltv.com/recipes/onion-jam https://cooking.nytimes.com/recipes/1015978-bacon-onion-jam.

You’re welcome.


Corn –

Shuck as much as you can and then flash boil for about 2 minutes. Let cool and then scrape off the kernels into a large bowl and scoop out two cups into a plastic bag or container for freezing. Add them to that turkey soup you make after Thanksgiving every year along with some of the frozen shell peas you harvested and froze in the spring.

Tomatoes –

This technique works best with cherry tomatoes and is a little bit of trouble but OMG are these delicious. Add them to pizza, pasta, soups, sandwiches or serve on grilled bread as a quick crostini. The flavor of these will make you want to plant even more tomatoes next year. Heat oven to 200 degrees. Arrange cherry tomatoes on a lined, rimmed baking sheet, cut side up. Drizzle with olive oil and add a sprinkle of salt and pepper. Let them “oven dry” for up to 2 ½ hours, checking frequently at the two-hour mark. You can also do this with large tomatoes which will yield a “saucier” result.


Zucchini –

Use small, tender-skinned, deep green ones. Shred and steam for 1-2 minutes. Freeze in desired quantities for adding to slaw, pasta, soups or your famous zucchini bread.

Pesto Secrets

Heirloom Vegetable Seeds

From the kitchen of Engrid WinslowBasil

Pesto is a “secret summer sauce” because it is so flavorful, adaptable and can be frozen to bring back summer memories during the dark of winter.  Some of the best ways to use pesto are:

  • Tossed into hot or cold pasta, add other veggies, chicken and/or shrimp
  • Folded into scrambled eggs or as a filling for omelets
  • Drizzled over grilled chicken, pork, lamb or fish
  • Smeared onto ricotta-topped, toasted bread
  • Swirled into mashed potatoes
  • Drizzled on salads, roasted or grilled veggies
  • A topping for pizza
  • Spread onto sandwiches

The best tricks for getting the most flavor out of your pesto are: 1) toast nuts in an even layer in a skillet over medium heat or in a 350 degree oven for 5-10 minutes (be sure to check often to prevent burning them).  You can keep leftover toasted nuts in the freezer so there are always some on hand.; (2) use a good quality extra virgin olive oil; 3) don’t overprocess the sauce – those flecks of texture are yummy; and 4) grate your cheese fresh by hand each time and mix it in at the end of processing.

Basic Basil Pesto Recipe

1/3 cup olive oil

1 ½ cups firmly packed fresh basil leaves

½ cup toasted pine nuts

2-4 cloves garlic, peeled

¾ cup freshly grated Parmigiana-Reggiano cheese

¼ tsp. kosher salt or fine sea salt

Optional:  2 tsp. lemon juice

Process all but cheese in a food processor, add additional olive oil if a thinner consistency is desired.

Endless variations

Try substituting any of the following for the basil:

Use flavored basil such as Cinnamon (also called Mexican Basil)

1 cup arugula, 1 cup mint

1 ½ cups spinach and ½ cup oregano

2 cups of baby greens, 2 Tbsp. thyme leaves

2 cups of broccoli raab

2 cups parsley (Italian flat leaf works best)

Substitute ½ of the basil with lemon balm

Use any of the following nuts in place of pine nuts:

Pecans (great with Parsley)

Hazelnuts (try with arugula and mint)

Walnuts (good with spinach)

Almonds (good with baby greens)

Swap out the Parmesan for Asiago or Manchego


How to Get Rid of Weeds

Tips for Weeding

by Sandy Swegel

That’s the question I hear most often in Spring.

The question comes most often from my friends who are very smart and successful in busy lives.  Their garden is one aspect of their beautiful complicated lives but it’s always a challenge because it’s not easy to make nature conform to what you want with one big weekend cleanup.

So there was an animated discussion about the best digging tools and homemade vinegar solutions. Everyone wants to protect the earth and the bees but frankly feel they have failed when the same weeds overwhelm their garden every season.  You know the weeds I mean, the ones that have grown very tall when you walk into your yard in late June and see that they just went to seed, making thousands of new baby weeds.

At some point, someone asks me what my tool is as a professional gardener.  My friends never find my answers very entertaining, so they usually return to a discussion of their latest internet surefire natural weed killer.  Nevertheless, here is my answer from years of experience of dealing with weeds.


The best tool is diligence.  Weeds have a strong will to live and procreate.  You have to be vigilant for them and keep after them.

After setting a firm determination about what weeds are permissible and which aren’t, then here are some techniques.

Get them when they are little.

Right now in your gardens, there are thousands of tiny weed seedlings you could control with one stroke of your hand hoe.  Off with their heads:  tiny seedlings don’t survive if they loose their leaves. Learn what young weeds look like.  Bindweed babies are cute little heart shapes.


Learn to love them. 

Dandelions are the best example of a “weed” you can learn to love.  In moderation of course.

They are very cute…children love them.  They are one of the first foods of hungry bees each Spring.  You will have more time and less frustration in your garden if you don’t have to eradicate all the dandelions.


If you do decide to get rid of perennial weeds…be smart and determined.  Don’t just hack it up in frustration every Spring and let it grow and strengthen the rest of the year.  You can’t get nasty perennials all at once….but you can wear it down and weaken it.  I have a sharp hori-hori knife and dig out at least four inches of root.  If the weed reappears, I recognize it and dig a little deeper the next time.  Soon it will exhaust itself and give up.


Finally, have a cup of tea.

Or at least get the electric kettle out.  Boiling water or hotter steam does an excellent job in rocks and walkways,  especially when weeds are young. And it is very satisfying.


Photocredits

https://weedecology.css.cornell.edu/weed/weed.php?id=6

http://www.blikk.hu/eletmod/tippek/elleptek-a-kertjet-a-gazok-igy-szabadulhat-meg-toluk/f38r539


FarmHer

Women Farming Show

By Sandy Swegel


OMG, I found the best show to binge watch!  No not a zillion episodes of an old sitcom from my youth. FarmHer is an internet-based show about women farming!  There are beautiful landscapes of Midwestern farms and silly scenes of baby goats climbing all over the farmher.  Farmhers with good topsoil ground into the creases and wrinkles in their hands. Young urban farmhers in crowded cities.  This show is a delight and inspiration to anyone who has dreamed about farming or just growing a few vegetables in their yard.


Women have always been hard-working farmers.  No one female or male, old or young, lives on a farm without working…there’s just too much to be done. But women’s importance on the farm has often been hidden.  In my extended family, second cousins had a dairy farm in Wisconsin.  The family joke was that the husband spent all day sitting in the air-conditioned tractor with stereo while the wife grew all the family food, raised the chickens and the children, did all the preserving and the bookkeeping.


FarmHer is a nonprofit online community devoted to highlighting women in agriculture and helping them connect to each other and to their communities.  FarmHer especially does this with beautiful photos and video episodes and a blog.  You’ll love watching the dynamos who are growing your food.


New episodes come out Friday evenings at 8:30 C on RFD-TV.  https://www.farmher-episodes.com


Photocredits

https://farmher.com/

How to Pick a Pea

Heirloom Vegetable Tips

By: Sandy Swegel

How to pick a pea to grow, that is.

There are so many varieties of peas to choose from….which one shall we grow? Here are three peas with very good reasons to grow them.

For snow peas, the generally accepted superior variety is “Oregon Sugar Pod II.” Research trials have documented that Oregon Sugar Pod producers twice as many snow peas as other cultivars. And there’s a cool reason for that: Oregon Sugar Pods split and produce two peas at every growth node while other snow peas produce just one. And the “II” in Oregon Sugar Pod II? That refers to the fact that this evolution of the pea is disease resistant. So you get lots of peas and no powdery mildew.

Despite the obvious perfection of the Oregon Sugar Pod II, I also like to grow the Dwarf Grey Sugar. They taste about the same to me and I get lots of peas from the Dwarf Grey Sugar, but the real reason to have them is that they have purple flowers. All the other peas have white flowers. More Purple Flowers Please.

Finally, the third pea I’m enamored of is Sugar Ann…an heirloom edible Pod pea. No shucking or shelling…you eat the whole thing…pod and all. They are delicious steamed or sautéed but we rarely eat them that way. Any pea lover will attest: peas taste best fresh picked, while you’re still standing in the garden.

Do you want a secret to more peas in less space? Plant your peas (or thin) a little further apart—4 inches between plants. Research in Oklahoma showed those plants branch more and produce 23% more peas than plants 2 inches apart.

Whatever variety you choose…start them soon. All peas stop producing when the temperatures get up above 75 degrees.

Photo credit:

www.rodalesorganiclife.com/garden/snowpeas
theenchantedtree.blogspot.com/search?q=Pea
www.thekitchn.com/5-ways-to-eat-sugar-snap-peas-144936

New Agricultural Products

by Sandy Swegel

As a gardener I often say “Thank God.” The growing legality of growing marijuana has meant a proliferation of stores that sell amazing tools and new agricultural products that make gardening easier and cheaper. Despite living in Colorado, I’ve never been interested in smoking pot. Even as a decadent college student I thought “Why smoke when you can drink?” I helped a friend trim some of her high end organic marijuana grown outside and declined the offer for some of the product. But I am endlessly interested in marijuana growing techniques. I have three products that might not have been available if it weren’t for the early mmj growers.

My EZ Clone aeroponic plant propagator.
These used to cost $400 but I got mine for $50 off of craigslist from a guy in a souped-up muscle car who had had dreams of getting rich by growing clones but lost interest when that didn’t happen overnight. Now you can buy new cloners for much less than $100 from Amazon or Home Depot if you aren’t brave enough to venture into a grow shop. These simple machines spray warm mist on the roots of cuttings and cause hardwood and softwood cuttings to grow roots in a very short time—days! This is my favorite way to root shrubs, tomatoes, small fruit plants and even roses. Should work great for trees too. I can have well-rooted plants in just a couple of weeks.

My LED grow light.
The first indoor light I tried were the big sodium ones that provided enough light to take indoor plants all the way to bloom. That was amazing but also an energy hog. This year for indoor seed starting, I’m loving my Costco LED shop light that is half the size of my old shop lights, lightweight, and uses almost no electricity.


My liquid all natural growing supplements.
I still rely on kelp and Superthrive as growth stimulants, but the organic, natural fertilizer concentrates produce some of the best growth and production I’ve seen, especially in tomatoes. Lots of research went into getting ideal growth out of marijuana plants. Marijuana and tomatoes are quite similar in plant needs. If you can grow one, you can grow the other.

There’s nothing like old fashioned common sense for growing using compost and time-honored natural techniques. But a few high-tech products can make your garden spectacular.


Photo Credits:

https://bigbudsguide/best-nutrients-cannabis/


Three Wild and Spicy reasons to grow Wild Arugula

Gardening Tips

by Sandy Swegel

Wild arugula is my favorite spring green of the week and this year it’s the first thing I’ve seeded out into the garden during our warm spell.

Similar to regular arugula, wild arugula has a “wilder” taste and thinner leaf.  It looks quite like a mustard weed when young if you aren’t familiar with it.  Definitely a cool season crop as once the temps get to 80 wild arugula can be quite bitter.

It is very easy to grow, as mustards often are, and can handle less than ideal soil and water.  (Watch out…low water makes it even spicier.). I like to plant it somewhere it can establish itself as a perennial that I can just pick a few leaves now and then to add some zest to dinner.  But a Spring garden patch is essential to get cups and cups of the greens to use in making pesto.


So here are my three favorite wild and spicy reasons to grow wild arugula.

SPRING SALADS

Arugula has a nutrient profile similar to other spring tonic herbs like dandelion and nettles, but I like the taste even better for salads or lightly steamed.

PESTO

Wild arugula pesto is an absolute favorite.  Make it with garlic, olive oil, walnuts and Parmesan or goat cheese and you have a fantastic sauce for fettuccine noodles, topping for pizza or spread for appetizers.

POLLINATORS

Naturally, foods that are favorites of pollinators are favorites of mine.  Once summer sets in, wild arugula bolts and sends up tall tiny spiky yellow flowers that pollinators love.  I’ve seen all kinds of bees and butterflies snacking on the wild arugula flowers from summer through late fall.  I also snack on them….I like the flavor of arugula flowers even better than the leaves.


Photo credits

https://www.dherbs.com/articles/featured-articles/wild-arugula-pesto/

http://honest-food.net/arugula-pesto-recipe-pasta/

Wild Arugula; Delicious Low-Water Beauty

February Plant of the Month – Carrots

Plant of the Month

February 2017


Common Name:

Scarlet Nantes Carrot

Scientific Name:

Dacus carota var. sativus

Native Range:

Mediterranean Region

Hardiness Zone:

4 to 10

Days to Maturity:

65-75

General Description:

Scarlet Nantes Carrot is a standard market carrot that has a long, cylindrical shape and a rich reddish-orange color. The flavor is sweet and delicious. Roots are fine-grained, containing almost no core. High moisture content makes this variety perfect for juicing. Carrots can reach up to 7 inches long. To prevent diseases, rotate planting location every season.

Site Requirements:

  • Light: Full sun. Will tolerate very light shade.
  • Water: Moderate moisture. Crusted soil can suppress germinated sprouts.
  • Soil: Well-drained soil with organic matter. The area needs to be free of stones.

Seeding:

This cool-weather crop is easily over-planted due to its fine seeds. Sow seeds directly into loose soil in early spring 2-3 weeks before last frost date. Carrots are slow to germinate, emerging in 2-4 weeks. Cover seeds with a ¼ inch of soil—no more than ½ an inch. Lightly water seeds every day for best germination. Once sprouts emerge thinning is critical to reducing competition. Thin seedlings to 1/2 – 1-inch spacing. Best time for thinning is when soil is damp. Plant seeds every 2-3 weeks throughout midsummer for continuous harvest.

Harvest Time:

Start harvesting as soon as carrots have reached the desired size (up to 7 inches). Try pulling up one at a time to check the size. Watering the area before harvest can make pulling by hand easier. Harvest by mid-September to avoid pest damage.

Fun Facts:

  • Carrots are a great source of fiber, potassium and vitamin A.
  • Carrot greens can be used in soup stock, pesto, curries or tea.
  • Common pest: carrot rust fly
  • British gardeners plant sage around the area to repel the carrot fly