Saving Seeds

Saving Seeds from Heirloom VegetablesSaving seeds from heirloom vegetables.

What are “heirloom” vegetables? An heirloom vegetable is a non-hybrid, open-pollinated variety that has been passed down from generation to generation and, in some cases, can be traced back hundreds of years.  These seed lines have been carefully selected to maintain uniformity and consistency for germination.

Heirloom seeds become ‘heirloom’ because they exhibit exceptional traits desired by the gardener.  Often this means the plants are more colorful, flavorful, and unique, or have great germination and vigor.  Often the traits are location-dependent.  Meaning, seeds planted in one garden will not produce in the same manner in another location.  We encourage you to try heirloom seeds, see which have the qualities for your area to become your favorites and make them into your own very special seed line.  Seed saving from heirloom vegetables is easy and fun.

Gardeners have found that as seeds are selected and saved over many years, production is increased and the quality is improved, creating plants that will produce best for that locale and will resist diseases and pests of that locale.  Contributing to genetic diversity strengthens the ecosystem. Historically farmers and local gardeners have created and sustained this rich genetic heritage by learning to save their own seeds from varieties that perform best in their own mini-ecosystems.  The current trend toward mono-crops where only one seed type is used to produce a crop worldwide is eliminating the ability to be able to find genetic variations that will withstand emerging pathogens and climate changes.

Planting your crop:

Start with good Heirloom Seed varieties.  Keep in mind that to allow the plants to produce seed and to allow the seed to fully mature, you will have to allow for a longer growing season.  This can be done by starting plants indoors and arranging for protection from frost in the late season. You will grow some for food or flower harvest and some for seed production.  Fully mature seeds will be viable (able to germinate) and produce vigorous plants.  You may want to do some research on the different flower types for proper pollination techniques and plant with row/species separation in mind, to prevent cross-pollination.

You also may look into caging procedures to isolate species that are in flower at the same time.  By caging different plants on alternate days, you can take advantage of the pollinators to do the work without cross-pollinating your crop.  Cage one plant or group on one day and early the next day, before the bees wake, transfer your cage to a different plant or group.  Some crops are biennial and do not produce seed until the next year, so you will need to determine whether you should leave the roots in the ground over the winter or dig and store them.

There are many publications with detailed information on seed-saving and growing techniques for each species.  “Seed to Seed” by Suzanne Ashworth, 2002 by Seed Savers Exchange, Inc. is a good way to get started. Also, check out these easy instructions for seed saving, written by the International Seed Saving Institute, a non-profit established to teach seed saving.

Why save seeds:

When you grow crops using your own saved seeds from your best plants for next year’s crops, the seeds begin to adapt to the growing conditions (temperature, moisture levels, pests, diseases, and so forth) that exist in your garden.  This adaptation makes your garden stronger over time.  Seeds that are used to grow crops year after year have the opportunity to adapt to incremental climate changes.  As global temperatures change, these plants will have a better chance at survival and productivity.  A single plant from a single seed can produce dozens or hundreds of seeds, increasing your seed stock exponentially.  Sharing and exchanging seeds with other gardeners, community gardens or seed libraries helps to increase the diversity of everyone’s collections.

Harvesting and collecting seeds:

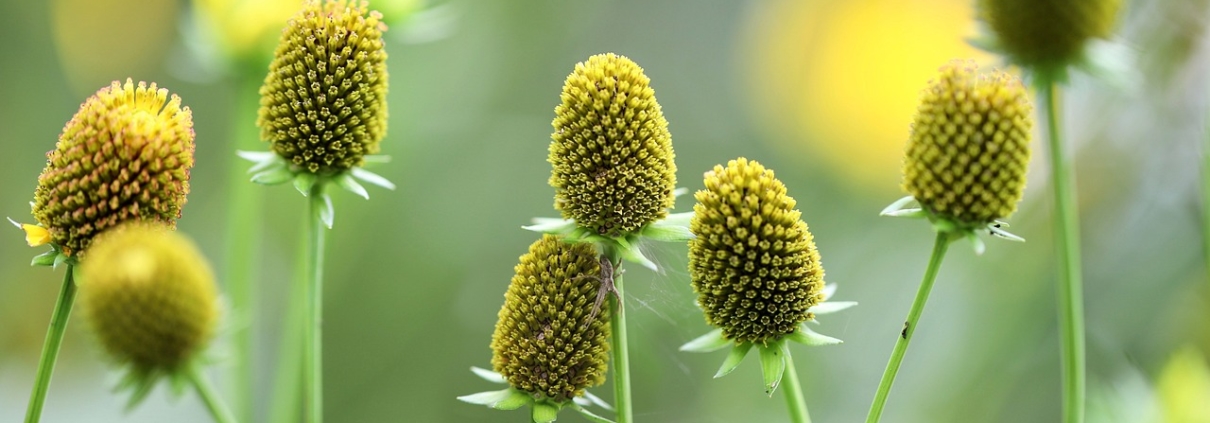
When saving seeds from heirloom vegetables, look for favorable characteristics such as; freeze and cold tolerance, heat tolerance, adaptability, winter hardiness, early maturation, vigor (strong germination, and growth), flavor, color, size, texture, etc. Also, look for desirable traits such as; vine or plant type, seed type, and specific disease resistance.  Plan to be ready to harvest the seed as they mature.

– Collecting dry seed:

It’s easy to save seeds from plants that produce pods, husks, and other dry casings such as peas, beans, and flowers.  The technique is called “dry processing” and is faster than collecting seed from fleshy, pulpy fruits such as tomatoes and cucumbers.  Seeds that are dry-processed can be allowed to dry right on the plants unless there is wet weather in the forecast.  Seeds often fall where they may, naturally, little by little.  Often the pods will pop open when you are not around to collect the seed and it will be lost.  Allow the seed pods to remain on the plant in the ground for as long as possible.  Usually, the seed will not continue to mature after the pods are cut from the plant. To collect the seeds easily as the seeds begin to mature, secure paper bags over the seed heads and attach them to the stems of the plants.  As they mature they will drop into the bags.

Separating the seeds from the chaff (dried pods and stems) is called threshing.  Commercial threshing is done by multitasking machines that can harvest, thresh, and winnow the seeds all at once.  For the home gardener, a bag, pillowcase, or small sack is all that’s necessary.  Put the seeds into the bag, secure the ends, and roll it around, lightly crushing and breaking up the pods a bit.  Be gentle so you don’t damage the seeds, but just loosen the chaff.  For tinier seeds, you can just put them on a board and crush them with your fingers.

Then you will need to winnow the chaff from the seeds.  Place the seeds in a bowl and gently blow on them to remove the lighter-weight chaff.  Swirl the seeds around and continue blowing gently until most of the chaff is removed.  Another option is to use a screen or sifter where the holes are smaller than the chaff to simply sift them apart.

– Collecting seeds from pulpy fruits:

Pick the best, most ripe (even to the point of over-ripe) tomato, pepper, cucumber, etc.  Choosing an over-ripe veggie will ensure the seed has fully developed.  If you wait for a frost or freeze before you pick the fruit or veggie, most of the seed will not be developed enough to be viable next year.

Cut open the fruit and scoop out the seeds or for small fruits like cherry tomatoes, simply squeeze the seeds out into a glass jar.   Add a little water and label the jar with the seed variety.  The seeds usually are surrounded by a gel that inhibits germination.   Leave for two to five days to begin fermenting. This will break down the seed coat while killing off many of the harmful bacteria and fungi lurking on the seeds.  Swirl the contents in the jar every day.

When the pulp floats to the top, the seeds are ready for cleaning.  Most of the seeds will have sunk to the bottom.  Carefully skim off the pulp then tip the liquid and seeds into a strainer. Wash the seeds under running water, using the back of a wooden spoon to carefully remove any remaining material stuck to the seeds.  Spread the seeds onto a paper towel to remove most of the water, then transfer them to a non-stick surface such as a dinner plate. Dry the seeds in a warm place out of direct sunlight. It will take two to three weeks for the seeds to completely dry out.

Make sure you label the seeds with their name and the date they were collected immediately after you have finished harvesting each variety.  Excellent record-keeping is your best friend when it comes to seed-saving.  It’s amazing how easy it is to mix up seed varieties!

How long do seeds last?

If you keep your seeds in a cool dry place, your seeds can last for years.  These things are seed killers: excess moisture, excess heat, light, and rodents.  Some seeds last easily for years. Others only last one year before the germination rate goes down.

Here is a chart from the Chicago Botanic Gardens on longevity in vegetable seeds as well as one from Iowa State University extension.

Seeds that have passed their prime for producing viable plants can be used to scatter as a cover crop, for bird seed, for eating, or for cooking (as in herb seeds).

Scattering mature seeds is one way to get more flowers.

2 Easy Ways to Have More Flowers Next Year

A fun guide on how to grow more flowers, easily!

The two methods include:

1. Sowing mature seeds

– Remove seed pods from spent and dried flowers.
– Break apart seed pod to release mature seeds.
– Scatter seeds and stir them into the soil surface.

2. Replanting new starts

– Locate new seedlings starting from established perennials.
– Carefully dig out these seedlings.
– Replant in a new location and water thoroughly.

How to make plants grow more flowers?

Someone somewhere has certainly declared “The more flowers, the better”. This is a sentiment I share with that “someone, somewhere”. I have two assignments for you if you’d like to set yourself up quickly and easily to have more flowers in your garden next year.

Your first assignment is to go stand in the part of your garden that has wildflower-y plants.  You’ll notice two things. The first thing is that there are lots of spent flowers and seed heads that need to be deadheaded. Everything from rudbeckia to dill to penstemon has mature seed heads. You can always collect these seeds and put them in little envelopes to save for spring or you can take my lazy way out and snip off the seed head and fling it in the general direction you’d like it to grow next year.

The second thing you will see is that flowering plants always seem to migrate to the edge of the garden bed and need some encouragement to move to the middle and back of the bed.  Keep flinging seeds knowing that some of them will germinate right where they fall…so fling them merrily for…

More flowers!

Your second assignment is to find a spring or early summer bloomer and stand in front of it.  A Columbine or Penstemon, Agastache, and Echinacea are good possibilities.  Often right at the feet of these now-finished beauties are dozens of little plants or even seedlings that have germinated in the past month and are growing next year’s plants.  I take my hori-hori knife and gently dig or carve out (we have lots of clay soil) a nice plug of soil that keeps the baby plant’s roots intact and put it where I’d like more plants.  If the plant is young and you didn’t disturb the roots much, there won’t be transplant shock…just a new perennial that will bloom next year.

In conclusion, whether you are flinging seeds or digging up plant plugs, you’ve saved yourself a lot of time and fussing with seed starting trays under lights and you’ve tricked Mother Nature into letting those perennials bloom next year.  New plants, more flowers – easy, quick, and free.  That’s my kind of gardening.

People also ask:

  • What are some tips for digging up and re-establishing plants in my garden?
    Make sure that the plant that you are going to dig up is well-watered and healthy.  Dig the new hole twice the width of the transplant and not any deeper than the rootball.  Dig around the base of the plant outside of the roots area.  Keep the root ball intact.
  • How and when do I transplant seedlings?
    Anytime after the seedlings have developed their second set of true leaves.
  • How do I  save and store flower seeds?
    Wait until the flowers have finished blooming and the seed pods have turned brown and dry.  Lay seed pods on paper towels to make sure they are thoroughly dry.  You can store the pods whole or remove the seeds from the pods.  Store harvested seeds that are well-dried in a cool place in a sealed glass jar.  A small desiccant packet can help eliminate any moisture in the jar.  Individual seed species can be stored in envelopes. Label and date the envelopes holding the seeds.  Plan to use within 1-2 years.
  • What are the dos and don’ts of deadheading flowers?
    Deadheading is the process of removing spent or faded flowers from the plant.  The plant begins putting its energy into producing seeds after the blooms fade.  To keep the plant’s energy directed towards blooming more flowers, remove the faded ones.  Don’t just remove the flower top, remove the entire stem back to the live stem.


Why Grow From Seed

Seed Starting

by Sandy Swegel

We all know it’s a good idea to grow from seed. Every winter I fantasize about the amazing garden I could have if I just got started earlier. And every year I somehow end up buying plants that I know I could have started on my own with a little more planning.

This year will be different she says. To strengthen my resolve and not fall into winter doldrums, here’s my list of Why Grow from Seed.

Native plants.

Native plants are better for pollinators, better for the environment, and more likely to survive and thrive in our yard.

No neonics

There’s only one way to be sure our plants haven’t been treated with pesticides that will hurt pollinators or poison your food. Grow it ourselves from seed. It’s also the best way to keep down unwanted pests like whitefly and thrips that thrive in crowded Big Ag type greenhouses and then come to live in our home gardens.

Diversity.

If we want a standard garden that looks like every other garden on the block, we buy plants where everybody else buys them. Beautiful but kinda conformist. Growing from seed gives us a nearly infinite palette of possibilities. I love having a garden where someone stops and asks “What is That amazing flower?”

More Flowers.

This is the obvious Number One reason to grow from seed. For just a couple bucks we get dozens or hundreds or thousands of plants. The gardeners at the Denver Botanic Gardens often let some reseeding annuals seed themselves all over until their acreage. Last year snapdragons were allowed to grow wherever the wind and birds planted the seeds. We can get the same effect at home. One $2.50 packet of snapdragons has over 14,000 seeds. That’s a lot of adorable low-care flowers to have throughout the garden.

And why do we want more flowers? My first impulse is because they’re just so pretty. But as I happened to read on the front page of our website this morning in big red letters:

“Remember, the more flowers a garden can offer throughout the year, the greater the number of bees and other pollinating insects it will attract and support.”


Gardens at Monticello

What We Gardeners Have in Common with Thomas Jefferson

by Sandy Swegel

This Presidents’ Day led me to researching about the gardens of the White House. I expected to write about the many “heirlooms” that Jefferson gathered and preserved for us. He grew 330 varieties of vegetables and 170 varieties of fruit! I found myself instead captivated by the gardening relationship he shared with his oldest granddaughter Ann. His letters to the teenager Ann have been preserved and give us great insight into these talented gardeners.

There isn’t much about gardening that has changed much since the early 19th century. These are some of the things we know we have in common with the third US President and his granddaughter Ann.

We all want more flowers.

Jefferson was famous for collecting seeds from distant lands in order to grow more varieties at home. He quickly saw the natural consequence of his love of variety — running out of garden space — for he writes Anne in 1806:

“I find that the limited number of our flower beds will too much restrain the variety of flowers in which we might wish to indulge, and therefore I have resumed an idea…of a winding walk surrounding the lawn before the house, with a narrow border of flowers on each side.”

We know how to care for young plants.

In this late winter time of year, we gardeners always start too many young plants too early to actually plant and then have to prepare for their movement from my sunny light shelf to the cold outdoors. Ann too reports how careful she was with the many treasures her grandfather sent her in the winter of 1806.

“The grass, fowls, and flowers arrived safely on Monday afternoon. I planted the former in a box of rich earth and covered it for a few nights until I thought it had taken root and then by degrees, for fear of rendering it too delicate, exposed it again. I shall plant Governor Lewis’s peas as soon as the danger of frost is over.”

We watch the weather

When Ann was only 12 years old, Jefferson in the White House relied on her to report on the weather and its effects on the garden. “How stands the fruit with you in the neighborhood and at Monticello, and particularly the peas, as they are what will be in season when I come home. The figs also, have they been hurt?

We are never finished.

After Jefferson retired to Monticello, he and Ann continued to design and redesign the gardens. Ann’s younger sister Ellen described the delight the garden gave the entire family.

. . . Then when the flowers were in bloom, and we were in ecstasies over the rich purple and crimson, or pure white, or delicate lilac, or pale yellow of the blossoms, how he would sympathize in our admiration, or discuss with my mother and elder sister new groupings and combinations and contrasts. Oh, these were happy moments for us and for him!”

Jefferson on Happiness
Jefferson planned many years for his retirement to Monticello. When at last he was able to retire to the gardens Ann had nurtured in his absence, he wrote:

“the total change of occupation from the house & writing-table to constant employment in the garden & farm has added wonderfully to my happiness. it is seldom & with great reluctance I ever take up a pen. I read some, but not much.”
Fortunately for us as a nation, most of his life was not spent in the garden, but he knew, as we do, how special and sacred our gardens are.
The story of Monticello with 330 varieties of vegetables and 170 of fruit is a grand story. You can find out more here: https://www.monticello.org/site/house-and-gardens/thomas-jeffersons-legacy-gardening-and-food

Photocredit
https://flowergardengirl.wordpress.com
http://www.marthastewart.com/945486/monticellos-vegetable-garden#933708
https://www.monticello.org

Seeds are the New Hollywood Celebrities

Seed Stories You Need to Check Out

By Sandy Swegel

Seeds are the New Hollywood Celebrities

The importance of seeds to life on Earth is growing in our consciousness. Have you noticed there are a number of new movies and other media about seeds? “Seeds” and “Sustainable Farming” are definitely “IN.” Many films are now available online for free and others are being screened in local communities.

Here are a few that I know about.

“Seeds of Time” 2013
SEEDS OF TIME follows agriculture pioneer Cary Fowler’s global journey to save the eroding foundation of our food supply in a new era of climate change. The reviews rave about great nature photography.
http://www.imdb.com/title/tt2962826/

“Open Sesame” 2013
This film tells the story of seeds by following the challenges and triumphs of some of their most tireless stewards and advocates.
http://www.imdb.com/title/tt2962826/

“Bitter Seeds” 2011
These are sad stories about farmers in India
http://www.imdb.com/title/tt2306473/

“Harvest of Fear”
A Nova, Frontline PBC special about the GMO debates.
http://www.pbs.org/wgbh/harvest/

“The Vanishing Seeds Film Project.”
about seeds and deforestation in Africa.
https://www.facebook.com/pages/Vanishing-Seeds-Film-Project/127333317308892


Here are a few of the TV Programs:

“Farm Kings” about farmers in Pittsburg
http://www.imdb.com/title/tt2962826/

A Reality TV program “The Farm” is popular in Europe.
http://en.wikipedia.org/wiki/The_Farm_(TV_series)

And the newest show, Chipotle has sponsored
“Farmed and Dangerous” on Hulu
http://www.imdb.com/title/tt2852872/

Photo credit:http://www.mindful.org/the-mindful-society/activism/sprouting-seeds-of-compassion

How to get your Neighbors & Friends Interested in Pollinators

Talking About Pollinators

by Sandy Swegel

You have finally come to understand how important pollinators are and why we need to protect them.  One of the challenges we who value pollinators face is how to educate other people to care and get your neighbors and friends interested in pollinators too.  Unfortunately, we’ll start to ramble about how bad chemicals are or how GMO crops harm the environment and if we pay attention we’ll notice our listeners’ eyes are glazing over and they’re looking for a quick exit.  Even with other people interested in the same topics, it’s not long till people get that bored “You’re preaching to the choir” look. When you’re passionate you want other people to be passionate too, and maybe take to the streets in pursuit of your cause…but that rarely happens.

So what can you do to educate others about protecting pollinators?  I’ve learned a lot from watching Niki, a member of our garden group, over the years.  Over time she had inspired many people to put in pollinator habitats or at least to stop pouring chemicals on their lawns.  And she did it without preaching.  So taking inspiration from her over the years, here’s an action list on how to gently inspire others to protect pollinators and the environment.

Make a demo garden in your front yard.  It was a slow start for Niki.  She lived in a typical suburban neighborhood and her decision to turn her front yard from perfect green grass to a xeric native habitat caused some upset in the ‘hood. At first, people thought she was bringing property values down with all those weeds.  But she kept the garden tidy and explained every plant she grew to anyone who stopped by.  She invited the kids over to watch butterflies.  She explained to people who asked why she was doing what she did.  Her friendly attitude and a “come pick out of my garden anytime” attitude built relationships.  Neighbors on their mowers noticed they were out doing yard work every weekend and she wasn’t.  Then she started to tell people how much money she was saving by not watering the lawn and using chemicals.  That changed a few people’s minds. She added in the info that you could protect your trees without the expensive sprays the tree companies wanted to do. Soon the whole neighborhood was just a little more pollinator friendly.

Teach the kids
Kids have open minds.  Have an inviting garden with butterflies everywhere, and kids will stop to look around.  They’ll ask questions and they’ll tell their families about the cool stuff they learned today.

Give away free stuff.
It’s pretty easy to collect seed from native plants or to put seed you have in little envelopes to give away.  People in the neighborhood learned they could get free seeds for lots of low-water flowering plants if they stopped at Niki’s.  They also learned they could get free plants.  She started seeds in her living room or dug up self-seeding plants and put them in tiny pots and gave them to anyone who would learn how to take care of them. Soon, that’s native food sources up and down the block.

Offer Free Public Classes
Soon the neighbors had all the free seeds and plants they could use.  So the next step was to offer free classes to the public. Our library offers meeting rooms for public groups for free so soon Niki was offering 2-hour Saturday classes on “Chemical-free gardening” or “Make your own natural cleaning products.” Another 2-hour Saturday project was the free Seed Swap in January which invited everyone to bring their extra seeds and swap with one another.  Gardeners meeting other gardeners is often all it takes.  Lots of people came to classes because they wanted to save money or have a safer environment for their kids.  They all left with that info and with an understanding of why chemicals can really hurt bees and other pollinators and how there’s an easier way to do things.  Not preachy…but well-researched information.  A heartfelt story about the impact of pesticides in Kansas on monarch butterflies all over the world helps people want to do the right thing.

Be generous with your time to talk to others
Soon gardeners and community members learned Niki and now her gardening circle friends would come to talk to their neighborhood association or school about native bees and butterflies.  Or they’d look at your suffering tomato plant and suggest a natural home-made remedy.  Everyone got on an email group together and ended up teaching each other about natural gardening and making homes for pollinators. Local media people saw the library classes and now had someone to call when they needed a radio show or newspaper article.

Photo Credits:

www.huffingtonpost.com

www.valleyviewfarms.blogspot.com


Pollinator flower mixes

Heirloom vegetable seed

Wildflower mixes


Name Your Garden!

Gardens Name Themselves

by Sandy Swegel

A friend told me years ago that everything should have a name, even inanimate objects. She was helping me garden one year and within just a couple of weeks, everything we might ever have a need to refer to had a name. The big orange wheelbarrow, of course, was “Pumpkin.” The red bargain shovel was “Scarlet.” My little hand shovel was “Scout.” Soon my old truck had a name (Zohar) and it just went on and on from there. Her premise was, that if you’ve named something, you take better care of it. This must be true because I lost my good pruners that season, most likely because they were anonymous.

I love gardens. In the past few months, I’ve become so infatuated with making my garden look as amazing as humanly possible, and I’ve even managed to get my friends doing the same. Just the other day a friend of mine had new composite fencing installed by Ecomposite, whose fences are made from recycled plastic and wood. However, out of all of my friends, none of them have the passion for gardens that I do, to the point where I even have names for the gardens that I see.

Gardens just begged to be named. They even name themselves. The wild area with the chokecherries and wild roses is “The Thicket.” A client’s garden that is full of lavender and has the best mountain view in town is “The Anti-Depression Garden.” The part of the yard with two apple trees and a cherry is “The Orchard.” My names aren’t particularly clever sometimes, but they either convey the essence of the garden to me or they are a convenient way to talk to other people. Or most other people. A gardener who happened to be an engineer left me a message once asking me to weed in the “Ovate” garden. The what? I said. But ovate was very clearly the proper technical name for the shape of the bed.

You get the idea. You can name your garden after the plants that live there or the shape of the bed or the emotion the garden evokes. Garden writer Lauren Springer coined the phrase “hell strip” years ago to describe the space between the sidewalk and the street. Everyone knows what you mean when you say “The Hell Strip.” For years a favorite area at the Denver Botanic Gardens was the Red Garden…every plant, every foliage and bloom, was red.

Other gardens I’ve named are the grassy area in the back where I threw the wildflower/grass mixture, “The Meadow.” The small bed near the entry door to my house is “The Nursery” where I heel in all the plants I acquire but don’t know where to put them. My very friend Rosemarie’s garden beds are very practical and organized like the busy engineer and supermom she is. Her favorite bed though is a small strip we named “The Diva Garden” where she can plant outrageous purples and reds and those “OMG I have to have that plant” purchases to nurture her wild side.

I think the plants in the named beds do thrive better. Maybe it’s because once garden areas have a name, I have a relationship with them and take better care of them. I named my new pruners “Snippy” so I won’t lose them so fast this time. Now if only there were a way to link them to the ICloud so I could just hit the button “Find my Pruners” and they’d ring until I found them.

It’s Always a New Beginning for Gardeners.

What To Start Now

Thinking about the beautiful creation stories explored in the services of the eve of Rosh Hashanah that our Jewish friends celebrated yesterday reminds me that for the gardener, things are never really at an end.  There’s always something new to begin in the endless cycles of life.  Whether it is Rosh Hashanah or the upcoming Autumn Equinox or any of the lunar celebrations, every culmination or harvest is also a time to begin something new.

The need to keep beginning is especially true for the food gardener, especially if you want to keep eating.  It’s always a new beginning for gardeners, so many foods are dependent on seasons – cool season, warm season.  It may seem with the great ripening of tomatoes that the vegetable garden is complete this year, but if you want to keep eating, you need to keep planting: cool season crops, lettuces, sturdy greens that you can eat on all winter.

Some of the things it is time to begin:

Begin a hoop house or cold frame.
If you haven’t already seeded fall greens or carrots and beets, make haste and do it right away.  They need to grow to a good size before winter, so you can harvest even through the snow.

Begin a leaf pile.
Are you ready for collecting fall leaves and beginning again (or adding to) your leaf mulch pile?  Leaves are going to fall….and if you’re ready, your neighbors will bring you all the leaves you want.  A simple sign in your driveway that says “Bagged Leaves Wanted”  will catch the attention of your neighbors who want an easy way to recycle.  Our neighborhood gets over 2000 bags a year that people drop off.  The first year was only about 300 bags….but each year it has grown till we quit counting after 1000 or so.

Begin to fertilize perennials.
If you fertilize with natural fertilizers like blood and bone meal, now is a good time to begin fertilizing perennials and shrubs.  Natural fertilizers break down slowly so Fall is the best time to put them (and compost) out around your plants so they have time to soak in all winter.  Synthetic fertilizers like Miracle-Gro should wait until Spring because they’d stimulate a growth spurt now when the plants should be shutting down.

Begin to clean up.
Start cleaning up diseased leaves and broken plant debris.  Your plants will be healthier next year.

One thing NOT to begin:  Don’t cut down green growing plants because you’re anxious to put the garden to bed.  Some minor experiments have proven to me, that plants that are allowed to die in place and get cut down in later winter or early spring have a better survival rate than plants that get cut down in Fall.  This is especially true for Agastache one gardener I know discovered.

Begin to plant a TREE!
A REALLY IMPORTANT THING TO BEGIN NOW:  Plant a tree.  There are often healthy trees on deep discounts at garden centers.  The best time to begin a tree in your garden is always RIGHT NOW.

How to Make Garden Friends

Seeds Bring People Together

by Sandy Swegel

Many of the ideas for this blog come from questions I hear from an email list of gardeners I belong to.  I introduced a new gardener to our group this week and she was so grateful to suddenly have a whole network of people she could turn to when she had a question.  She’ll soon realize what we all know:  that it is so cool to have so many plant-geek friends.

Our group started rather accidentally, but you can start your own low maintenance group of garden friends.  You’ll learn lots about gardening and many of your gardening buddies will turn into real friends because gardeners are really nice people.

Most of our group had gone once or twice to a local gardening club but didn’t really fit in because we were interested in growing food and the garden clubs here were more interested in flowers.  Our group started accidentally by one of us posting a note on the virtual bulletin board of one of those proper flower groups that said, “Tomato Seed Swap, Saturday. Email for details.”  We just wanted to try some new varieties of tomatoes without going broke by each person ordering 10 different packs of seeds. We’d just order seeds together.  Well, ten people showed up for that first meeting.  Then, of course, we had to trade emails so we could find out how everyone else’s seeds were doing.  Then someone brought up the topic of manure and if that made tomatoes grow better.  Soon one person took a truck to a local farm and we all showed up at his house with an empty bucket for manure.  Come harvest season, another person invited us to her place to see her tomatoes.  The key to us becoming a cohesive group was that Niki saw how much fun we were having and declared “We needed a name.” and She announced we were the “Boulder Culinary Gardeners.”  Soon we were having email discussions about zucchini and herbs and organic pest control.  Although we had all been gardening on our own and felt we didn’t know much,  collectively, we knew a lot about gardening.  Post a question on the list and one of our small group had an idea of the answer.  Since then 10 people has become 150 and we all know so much more now.  We haven’t saved much money on seeds though.  Turns out gardeners can never have enough seeds.  So we still share tomato seeds, but we take the money we saved on those to buy heirloom squash and watermelons and plants we had never heard of before like broccoli raab.

You can make new garden friends pretty easily using this method.  Or help others build a community of friends who grow food.  A friend belongs to an HOA where people didn’t know each other well but all of them belonged to an email list for HOA business.  My friend offered HOA members a  free Seed Starting class and Seed Swap. (Seed avarice seems to be the real secret to bringing gardeners together.) Five people showed up and now are making friendships across the high fences of the HOA.

Make some new friends today.  Everybody wants to grow food these days but don’t know for sure how to do it.  Just about everybody wishes they had more friends with similar interests and don’t really know how to do that.  Seeds can bring people together.