Many of us have tried our hands at the new Victory Gardens and are getting back to our roots in our community’s Grow Local movements. With the flow of garden produce increasing each minute, we have donated excess to the local Community Food Share programs and, we are beginning to be mildly panicked at the thought of all of that fresh produce going to waste solely because we can’t use it fast enough.
With our neighbors slamming their doors when they see us heading their way with an armload of our best organically grown zucchinis we find ourselves wishing the bounty could be spread out over the year and last well beyond the late summer flush. More and more people are turning to home food preservation as a way to keep the bounty of their hard-earned, organic, heirloom, non-genetically modified gardens coming.
Now is the time to start your research, before the tidal wave of tomatoes sweeps you away. The number of food preservation methods is exciting and a bit daunting. Drying foods is one of the oldest methods of preserving foods. Also, canning, freezing, pickling, curing and smoking, and fermenting are ways to keep your pantry full during the winter.
What could be more fulfilling than pulling out a sparkling jar of homemade salsa when the snowflakes are flying to bring back warm memories of those beautiful heirloom tomatoes growing on the vine? CSU Extension has a couple of great publications on how to dry vegetables and fruits with all that you need to know about nutritional values, methods and safety precautions.
Also in the extension’s Nutrition, Health and Food Safety publications, are fact sheets on smoking and curing meats and making pickles and sauerkraut and preserving without sugar or salt for special diets. Check out the one on safe practices for community gardens for tips on ensuring safe food for all gardeners.
With all of our efforts to ensure that we each have gotten the most nutritious value from our fresh produce, it would be prudent to search for the newest scientific research into home food preservation methods. We want to eat healthy fruits and vegetables even when they are not in season. The USDA encourages us to use safe canning methods. Scientific developments have changed recommendations over time. Always use up-to-date methods and do not just rely on the practices of past generations. A great place to start is by exploring the National Center for Home Food Preservation website from the University of Georgia.
Publications and resources are available at the center’s website with useful tips for proper preservation techniques. Also, not to be missed is an awesome, free, online self-study course called;
Principles of Home CanningIf you are new to canning you should definitely have this publication at hand.
Preserving homegrown food can be an economical and fulfilling way to enjoy quality, nutritional food from your garden all year long. So when your heirloom tomatoes, squash, onions, peppers, beans, garlic, beets, and turnips cover every surface in your home and garage and the refrigerator is brimming with more fragile produce, you will be fortified with the knowledge necessary to safely preserve the bounty for the time when the snowflakes will inevitably fly.
During the long cold winter months, fat is extremely important for many birds to survive. The species that especially love suet are woodpeckers and flickers, chickadees, wrens, goldfinches, juncos, cardinals, robins, jays, blackbirds and starlings. Be aware that raccoons, squirrels and mice are also attracted to suet balls so be prepared to use baffles or place mesh over the balls to deter them.
Suet is raw fat and has also been used to make candles and Christmas pudding. You can get it from your butcher and ask him to grind it for you. Then it needs to be melted and strained to remove any solids. If you want to avoid the “ick” factor, you can substitute l cup lard or shortening. The birds will eat it plain but many recipes call for adding seeds, dried fruit or even insects to the mix. Many pet food and birding stores sell pre-made suet cakes but it is so much more fun to make your own in various shapes and hang them outside. If you are getting only starlings, hang the balls with a mesh around all sides but the bottoms. This will make it possible for all of the woodpeckers to hang upside down and eat while the starlings are baffled and confused. Place them near where you already have feeders with plain birdseed and watch the fluttery show!
Here are some methods and recipes for making the suet cakes or balls:
1 cup crunchy peanut butter
1 cup lard
2 cups quick cook oats
2 cups cornmeal
1 cup flour
1/3 cup sugar
Melt the peanut butter and lard and add remaining ingredients and cool.
——————————————-
1 cup crunchy peanut butter
1cup shortening
1 cup flower
3 cups cornmeal
1 cup cracked corn
1 cup black oil sunflower seeds or mixed seeds
Melt the peanut butter and shortening, add remaining ingredients and cool.
————————————————
4 1/2 cups ground fresh suet
3/4 cup dried and finely ground bakery goods such as Whole-wheat or cracked-wheat bread or crackers
1/2 cup shelled sunflower seeds
1/4 cup millet
1/4 cup dried and chopped fruit such as cranberries, currants, raisins, or other berries
Melt suet in a saucepan over low heat.
Mix the rest of the ingredients together in a large bowl.
Allow the suet to cool until slightly thickened, then strain and stir into the mixture in the bowl. Mix thoroughly.
Pour or pack into forms or suet feeders or pack into pine cones.
———————————————————
1/2 lb. fresh ground suet
1/3 cup sunflower seed
2/3 cup wild bird seed mix
1/8 cup chopped peanuts
1/4 cup raisins
Melt suet in a saucepan over low heat. Allow it to cool thoroughly, then reheat it.
Mix the rest of the ingredients together in a large bowl.
Allow the suet to cool until slightly thickened, then stir it into the mixture in the bowl. Mix thoroughly.
Pour into pie pan or form, or pack into suet feeders.
Optional or substitute ingredients: millet (or other birdseed), cornmeal, cooked noodles, chopped berries, dried fruit.
00Engrid Winslowhttps://bbbseed.com/wp-content/uploads/2023/11/BBB-Seed-logo-with-tagline-2023.pngEngrid Winslow2018-12-11 05:00:482021-02-09 10:51:50MAKE YOUR OWN SUET BALLS FOR BIRDS
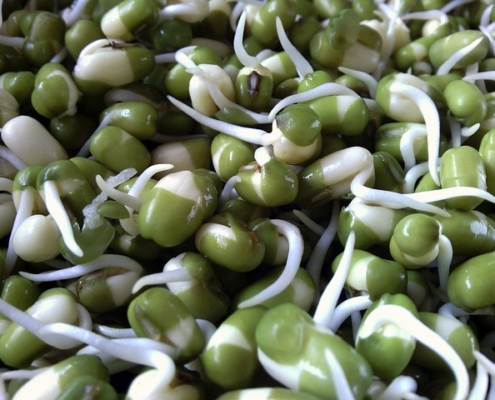
Sprouting seeds in a jar is easy and convenient. The first step when you grow your own sprouts is to make sure to choose a jar that is large enough to accommodate the seeds when sprouted. I find a quart jar with a wide mouth to work well. You will also need a mesh lid of some kind or thick cheesecloth to easily drain your sprouts after rinsing. Sprouting lids can be purchased at most health food stores, online or you can easily make your own.
Rinse and pick over your seeds
Carefully rinse and pick through your seeds removing any stones or debris.
Soak your seeds
Fill your jar about ¾ full with cool water. Soak your seeds overnight (8-12 hours). Soaking time will vary depending on the size of your seeds.
photo courtesy of pixabay
Drain your seeds
After soaking you will want to thoroughly drain your seeds. Tip your jar on its side and let it drain for several hours to be sure all liquid is removed.
Continue to rinse and drain
For the next 2-4 days, you will rinse and drain your seeds three times a day. Using cool water, gently rinse your seeds so you don’t damage any sprouts and drain well.
Final rinse and drain
When your seeds have sprouted and reached the desired length give them one final rinse and drain well. Enjoy in salads, on sandwiches or stirred into soups. Sprouts can be stored for several days in a tightly sealed container in the refrigerator.
https://bbbseed.com/wp-content/uploads/2023/11/BBB-Seed-logo-with-tagline-2023.png00Heather Stonehttps://bbbseed.com/wp-content/uploads/2023/11/BBB-Seed-logo-with-tagline-2023.pngHeather Stone2018-11-20 05:00:522021-02-09 11:00:49Grow Your Own Sprouts in 6 Easy Steps
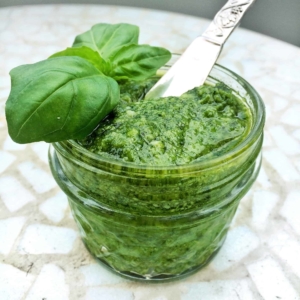
Already the bounty of vegetables and herbs from the summer garden are becoming a distant memory. It’s time to dig into the freezer and start to use up some of those precious flavors in the cold winter months.
Let’s start with the delicious pesto(s) you made and froze back in June [Pesto Secrets] which is so useful in so many more ways than pasta. Pesto pairs particularly well with such winter delights as frozen roasted or sundried cherry tomatoes [Summer Harvest] and creamy mozzarella or burrata cheese so think of ways to include those items in some of the ideas listed below. But let’s look at some special spins on pesto.
* Stir into softly scrambled eggs, or drizzle on top of a frittata
* Mix with mayonnaise and use as an aioli on bread, in sandwiches or as a dip with vegetables
* Spread it on a sandwich – especially a hot pressed sandwich like a Panini or grilled cheese
* Substitute for tomato sauce on a pizza
* Drizzle on soups such as Minestrone or Pasta e Fagioli
* Mix into salad dressing
* Toss with roasted veggies from potatoes to broccoli to eggplant
* Serve with grilled steak, chicken, pork or even fish
* Stir into the filling for a quiche
* Add to chicken salad
* Put it in a quesadilla or on pita bread sandwiches
* Top a turkey burger with it
* Stir into mashed potatoes or cauliflower
* Mix it in with quinoa, rice or other grains
* Add it to meatball, burger or meatloaf mixtures
* Bake it into puff pastry with feta cheese and tomatoes
Sweet, sour, fizzy, and funky; Kombucha (or ‘Booch” for those in the know ?) has been super trendy of late. This fermented tea drink is chock full of healthy probiotics, antioxidants, and good vibes!
The thing is, it is pretty pricey at the supermarket. Most bottles of kombucha are around $3 or $4 and can sometimes be as much as $8! We think this is criminal considering how easy, cheap, and rewarding it can to make your own kombucha at home.
Our guide will tell you everything you need; from getting your first SCOBY to making your booch effervescent and yummy!
Wait, What’s A SCOBY?
As you may know, Kombucha is a fermented product. Fermenting food brings us some of our tastiest flavors and textures. Sauerkraut, beer, miso, yogurt, and sourdough are all examples of amazing, delicious foods that would be impossible without fermentation.
Fermentation might sound gross at first, but it really is just a clever way humans have discovered to preserve foods and get a little bit of help from the beneficial bacteria all around us.
When we let these little microbes, like lactobacillus and yeast, do some of our digestion for us. Sometimes, these guys give off byproducts like alcohol or lactic acid that make it harder for anything else to eat that food, preserving it.
So, what is a SCOBY? The word SCOBY is an acronym for Symbiotic Colony Of Bacteria and Yeast. Sometimes called the “mushroom” or the “mother”, a SCOBY is what transforms your tea concentrate to the unique flavor profile of kombucha.
This colony (or more accurately, community) of various bacteria species and yeast (a single-celled fungus that makes bread and beer possible) works together to eat up most of the sugar and breaks down a lot of the complex nutrients present in the tea into their easier to digest components. The probiotics and available nutrients in kombucha is what makes it so healthy for you!
The SCOBY is usually somewhat gelatinous and tough and will float at the top of whatever container it’s stored in. They will grow to whatever size container they have and will usually have a hockey-puck shape (if it’s in a cylindrical container).
Okay, Where Do I Get A SCOBY
There are a few ways to get your first SCOBY, here are our favorites.
A Friend
Most likely, you have a friend or coworker who makes kombucha. The SCOBY naturally grows and layers into split-able discs. Most kombucha brewers have more SCOBY than they know what to do with and would be more than happy to spread the good word and help out a fledgling brewer like yourself!
Don’t forget about who gave you that SCOBY either, more than likely one of you will need a new SCOBY at some point and you might be needed to return the favor!
Order A Starter Culture
If you can’t find a ‘booch buddy’, you can always order a SCOBY online. There are plenty of reputable dealers available (we like the Fermentaholics SCOBY with starter tea).
When purchasing online, make sure that the SCOBY is packed in ‘starter tea’. This is the tea that has already been fermented by the SCOBY in a previous batch and is loaded with probiotics. Without this starter tea, your first fermentation will be slow, and it could allow mold to set in on your SCOBY.
Kombucha making is not a 100% proposal. If you see what could be mold growing on your SCOBY or anything weird going on in the liquid, it’s best to pitch the whole batch (SCOBY included) and start over. It stinks, but sometimes it needs to be done to stay safe!
Also, SCOBYs don’t like things getting switched on them. If they are in green tea when they start, only use green tea. If they start in black tea, only use black tea.
The First Fermentation
Equipment
1-gallon glass jar*
Wooden or plastic spoon for stirring
Cheesecloth
Kitchen twine
*Only use glass containers when making Kombucha. Metal will react with the acidity of the liquid and may impact SCOBY health and plastic can harbor unwanted bacteria.
Ingredients
5 quarts water*
8 bags of black or green tea (2 tbsps. of loose tea can be substituted)
1 cup white sugar
Minimum 8 oz. starter tea from the previous batch
1 SCOBY
*If you have hard tap water, use filtered water from the store. Kombucha does not like high mineral content in the water.
1. Sterilize
With all fermentation, you want to be careful to make sure you are only adding the good microbes to your kombucha. This means keeping a sterile environment. All utensils and containers used should be sterilized before use.
The easiest way to sterilize equipment is to boil it for at least 5 minutes. You can also use hot vinegar to sanitize equipment. Do NOT use any soap or chemicals, since they can kill your SCOBY. Make sure to not touch any surface that will come in contact with the kombucha, since your hands do harbor microbes that can ruin your batch. Similarly, be careful to avoid touching the SCOBY.
2. Make the Tea Concentrate
Heat the water to a boil and add the sugar water. Stir until all the sugar is dissolved and add the tea. You can let the tea steep for a minimum of 10-15 minutes or wait until the tea is completely cooled (between 68-85ºF).
This is extremely important. If the tea is too hot when you add the starter tea and SCOBY to the mixture it can kill them.
Once cooled, remove tea and pour the concentrate into the fermentation jar.
3. Start the Fermentation
Once the base tea is cooled and in the jar, you can add the starter tea and SCOBY. Again, make sure not to touch the SCOBY. Use a clean spoon or tongs if you are having trouble moving it.
Once everything is in the fermentation jar, cover the top with a breathable material. We like a tightly woven cheesecloth or muslin. You can also use a clean dishtowel or coffee filter.
Secure the covering with a rubber band or kitchen twine to prevent any dust, debris, or insects from finding their way inside.
Find a dark place that the kombucha can remain undisturbed at room temperature and let it sit for 7-30 days. Taste every 7 days until it is where you want it. The sooner you stop the ferment, the sweeter it’ll be. The later, the sourer and funkier.
The Second Fermentation
Once your kombucha is done fermenting, you can feel free to drink it right then! If you want the full kombucha experience though, you’ll have to do a second fermentation. This is the stage where you will flavor your kombucha and let it carbonate.
Equipment
6 16 oz. Fermentation grade swing-top bottles or 6. Pint-sized mason jars with lids and rings
Funnel
Ingredients (optional flavorings)*
1-2 cups chopped fruit
2-3 cups fruit juice
2 tbsp honey
2 tbsp flavored/herbal tea
While it isn’t necessary to add any flavors to your kombucha, it can be a fun, creative experience that can make some special flavors. If you want suggestions of what flavors go well together, check out this article.
1. Remove SCOBY
Once your Kombucha is where you like it, remove the SCOBY using clean utensils and place it on a clean plate. If the SCOBY is starting to layer (usually after about 4 brews) remove the older ‘mother’ from the bottom and save the ‘baby’.
Place the SCOBY in a clean, mason jar with at least 12 oz reserved starter tea. Store in the refrigerator until it’s time for your next brew.
2. Prepare flavorings
This is where you get to make the kombucha your own. Prepare your flavors, using the guidelines above, and split it evenly among your bottles. Be careful when using ingredients like honey. If too much sugar is added, you can over-ferment and cause your bottles to burst.
Using clean bottles and a clean funnel, split the flavoring between your bottles and then pour the kombucha in.
Leave a minimum of an inch of headspace in the bottles so they properly carbonate and don’t over pressurize. The headspace will also prevent the kombucha from spilling out when you open it.
4. Wait it out
Let the kombucha sit for 1-3 days at room temperature, depending on the temperature, and then move them into the fridge
5. Enjoy!
‘Nuf said!
https://bbbseed.com/wp-content/uploads/2023/11/BBB-Seed-logo-with-tagline-2023.png00Sam Dollhttps://bbbseed.com/wp-content/uploads/2023/11/BBB-Seed-logo-with-tagline-2023.pngSam Doll2018-11-02 09:13:402021-02-09 12:25:16An Easy Guide to Perfect Kombucha
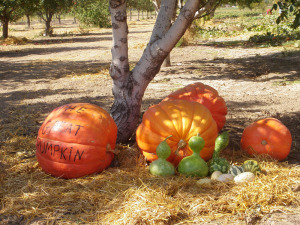
A happy Scarecrow with BBB Seed Pumpkins…Fall is in the air!
Yep, we can tell we are here in fall because THE place to be on the weekends is in the pumpkin patch! Here are a few of my favorite pumpkin recipes and a link to one for our furry companions who love to romp in falling leaves and go on walks with us in the crisp fall air!
Pumpkin Recipes
PUMPKIN APPLE BUTTER
Of the pumpkin recipes, this one makes a delicious combination of fall flavors into a creamy “butter” (which contains zero butter and is very low in sugar) which is delicious on toast, biscuits, and scones or packaged into a gift basket for friends and neighbors during the Holiday Season. The best pumpkins for making a butter or pie are the small sweet ones like Sugar Pie or Cinderella.
Makes about 4 ½ cups but can be doubled or tripled if you want more to share with friends and family
2 cups unsweetened applesauce (canned or homemade)
2 cups pureed pumpkin (canned or homemade – not pumpkin pie filling)
¼ cup apple cider
1/3 cup light brown sugar
3 TBL honey
1 tsp apple cider vinegar
¾ tsp ground cinnamon
½ tsp ground ginger
½ tsp sea salt
½ tsp grated fresh nutmeg
Heavy pinch of ground cloves
Combine all ingredients in a saucepan and bring to a simmer over medium heat, stirring often to make sure that sauce doesn’t scorch and sides of the saucepan stay clean until mixture is reduced by at least one third. It should also darken in color to a caramel brown with an orange tinge. Process using water bath canning, which will keep for about 6 months [www.freshpreserving.com/canning-101-getting-started.html] or place in the refrigerator to use within 2 months or freeze for up to 12 months.
PUMPKIN BOLOGNESE
Serves at least 4
When you replace tomato with pumpkin you create a delicious and meltingly mellow version of traditional Italian Bolognese. Use lots of black pepper to temper the richness of this sauce.
2 lbs pumpkin, unpeeled and cut into large wedges with seeds scraped out
Brush the pumpkins with olive oil and place them on a foil-lined sheet pan to roast at 400 degrees for about 30 minutes. Let cool and then scrape flesh into a food processor and puree until smooth. Transfer to a saucepan and cook down at medium heat, stirring often until the pumpkin has reduced and is the thickness of tomato paste. This step will take about 20 minutes.
In a large Dutch oven heat 3 Tbl olive oil and add ½ lb ground pork and 1 lb ground beef over medium-high heat. Stir and break up chinks so that the meat is no longer pink. Just lightly brown it – we don’t want a crust on the meat. Remove and set aside. Add 1 cup finely chopped carrot, ½ cup finely chopped celery and 1/2 cup finely chopped onion to Dutch oven and season with 1 tsp salt and lots of fresh ground pepper. When the vegetables start to look like they are browning, reduce the heat to medium-low but keep cooking, stirring until they are fragrant and softened but not browned – about 10 more minutes.
Return meat to the pan and add 1 cup dry white wine and simmer until wine is reduced and almost completely gone – about 10 minutes. Fold in the pumpkin puree and 1 cup milk. Add more salt and pepper to taste and reduce heat to a low simmer for 45 minutes to one hour.
Serve with cooked Tagliatelle pasta and grated Parmigiano Romano
Pumpkin Dog Treats
And here’s a link to some amazing dog treats that my dogs have been enjoying for years:
https://bbbseed.com/wp-content/uploads/2023/11/BBB-Seed-logo-with-tagline-2023.png00Engrid Winslowhttps://bbbseed.com/wp-content/uploads/2023/11/BBB-Seed-logo-with-tagline-2023.pngEngrid Winslow2018-10-09 05:00:272021-02-09 13:52:46FALL IN LOVE WITH PUMPKINS
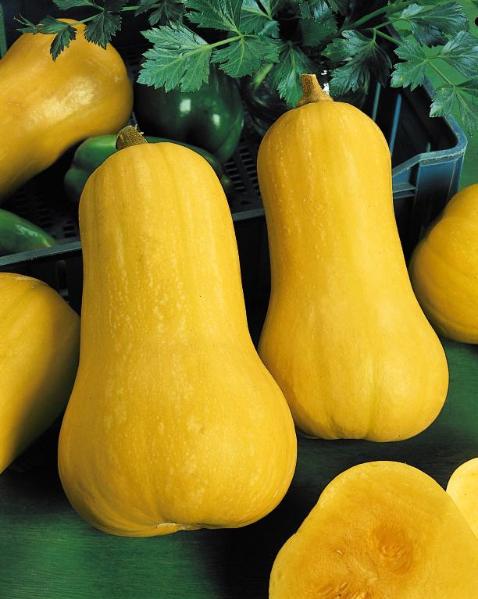
Now that the nip of fall is finally in the air it is time to celebrate the coming harvest of winter squash. Winter squash varieties include the beloved Butternut as well as Sweet Dumpling, Delicata, Spaghetti, Hubbard, Long Island Cheese, Pumpkins and so many more varieties. The squash should be harvested before the first hard freeze but a light frost will actually sweeten the sugars in the squash fruit. The stems should be fairly dry and the fruit unblemished. If there are any squishy spots, just eat those right away but the others can be stored for up to six months. The fruit should feel heavy and dense and your fingernail should not pierce the flesh when pressed against it. Cut the winter squash from the vine so that there is at least a 2” stem and then let them cure at room temperature for a week or two. After they have cured they should be stored in a cool dry place such as a basement or garage where they will not freeze.
Winter Squashes are rich in fiber and vitamins and low in calories but they are also so hearty that they are great for meatless meals. To my mind, the best way to eat most of them is roasted with olive oil, salt and pepper but let’s not forget pies and casseroles with warm winter spices like cinnamon and nutmeg. The seeds can also be roasted for a delicious and nutritious snack.
Many years ago this recipe for Butternut Squash Risotto in Cooks Illustrated Italian Favorites that I have tweaked and played with to come up with one of my most beloved recipes. It gets the center starring role at least once a month during the winter season for its comforting warmth. It seems like a lot of work but this is one that is worth every minute.
BUTTERNUT SQUASH RISOTTO
Serves 4-6
Adapted from Cooks Illustrated Italian Favorites 2009
2 TBL olive oil
6 TBL butter
2 LB butternut squash, peeled, de-seeded and cut into ½” cubes which should yield 3-4 cups
NOTE: Reserve seeds, fibers, peels and any extra bits of squash for use later
4 cups chicken stock
1 cup water
1-2 small onions, minced
2 cups Arborio (Carnaroli can be substituted)
1 ½ cups white wine such as Pinot Grigio that you will also drink with your dinner
1 cup grated Parmesano-Reggiano
2 cloves garlic, minced
2 TBL minced fresh sage leaves
¼ tsp grated nutmeg
Salt and pepper to taste
In a large non-stick skillet, sauté the squash over medium-high heat with olive oil until cubes are nicely browned. Season with salt and pepper, remove from pan and set aside. Add reserved squash peels, seeds, etc. to pan and cook, stirring to break up the fibers as much as possible until brown. Place chicken stock and water in a saucepan with reserved, cooked bits of squash, bring to a low boil and reduce heat to a bare simmer.
Place 4 tablespoons of butter in the empty skillet over medium heat and let melt before adding onion, garlic and additional salt and pepper. Cook and stir often until onions are softened. Add rice and stir until grains are a bit translucent around the edges (about 3-4 minutes). Add white wine and cook, stirring until it is fully absorbed. Add 3 cups of liquid (avoiding stems and other bits – Strain if desired but press the solids to get as much flavor from them as possible) and a half of the cubed squash to the pan. After the liquid is completely absorbed and the pan is nearly dry, continue adding liquid about 1/2 cup at a time, stirring constantly until liquid is absorbed before adding another ½ cup. Taste the rice for al dente and then stir in the rest of the squash, sage, nutmeg, parmesan and remaining 2 tablespoons of butter. Add additional liquid if you prefer a looser risotto and sprinkle additional parmesan on the top. Serve with the same white wine you used to cook your risotto.
You can add other things such as spinach, sweet peas and cooked chicken to this recipe if desired.
https://bbbseed.com/wp-content/uploads/2023/11/BBB-Seed-logo-with-tagline-2023.png00Engrid Winslowhttps://bbbseed.com/wp-content/uploads/2023/11/BBB-Seed-logo-with-tagline-2023.pngEngrid Winslow2018-09-28 12:23:182021-02-09 14:15:14Give Winter Squash Some Love
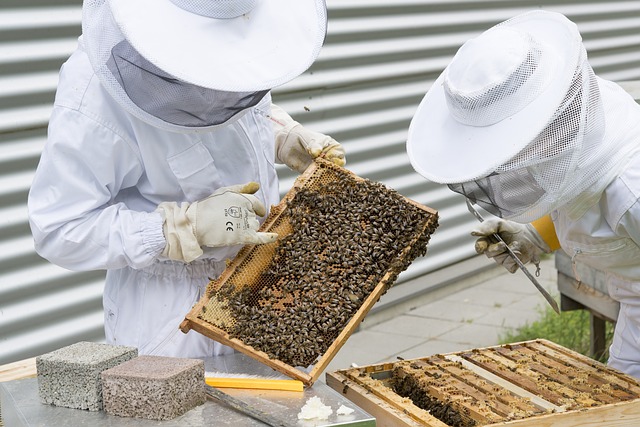
Have you ever wondered what beekeepers actually do? Did you think that they just put hives in fields and then visit to collect honey every once in a while? Well in Hive Happenings, we are going to take you inside the duties of a beekeeper in the first of a series of articles explaining what the bees are up to and how a beekeeper helps them to survive and thrive.
photo courtesy of pixabay – fancycrave1
Honeybees are the only bees that overwinter as a colony and cold weather can be stressful enough that many colonies will not survive without some help from a beekeeper. Even with that help, a hive that is weak or doesn’t have enough food stored or suffers from a mite infestation will not make it through. Each colony has worked very hard all spring and summer collecting honey and pollen to feed the new brood that the queen spends all day (and night!) laying. They are also storing extra honey and pollen to make it through the winter when there is very little forage (in most parts of the country). Every colony needs 60-90 pounds of honey to survive the cold season. A responsible beekeeper only harvests whatever extra honey has been stored by the hive. Beekeepers watch their hives grow during the season and add “honey supers” on top of a two-deep hive colony with a “queen excluder” between the hive and the supers. Some hives will produce many of these supers that hold the excess honey – it varies by the colony and by the amount of forage available during the season. The excluder ensures that no brood is laid in the supers. In the early fall, beekeepers check to make sure that the honey stores are capped with wax and proceed to harvest the honey in a variety of ways ranging from using a “capping scratcher” with the frames set over a bucket to using electric or manual extracting machines.
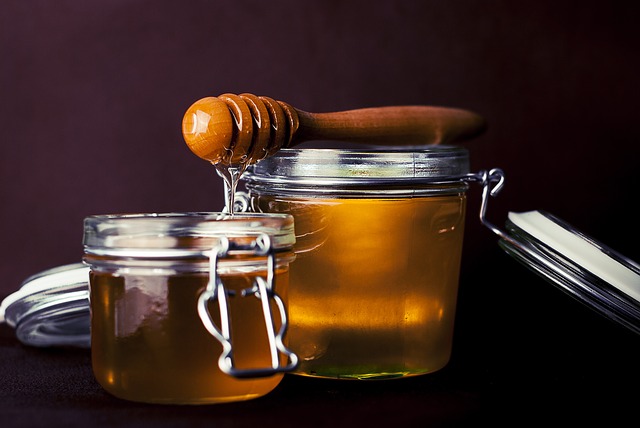
Honey is a marvelous thing to have for personal use, to sell or to give to friends and family as gifts. The National Honey Board website has numerous recipes for all types of dishes using honey as an ingredient. Check them out at National Honey Board.
There are many other duties for the beekeeper to take care of as the weather cools and, concurrently, the hive is also preparing itself for winter. The queen slows down her egg laying, drones are evicted from the hive and the colony shrinks to a size that can huddle together when it’s cold outside. I’ll share more of this information in my next blog about honeybees.
https://bbbseed.com/wp-content/uploads/2023/11/BBB-Seed-logo-with-tagline-2023.png00Engrid Winslowhttps://bbbseed.com/wp-content/uploads/2023/11/BBB-Seed-logo-with-tagline-2023.pngEngrid Winslow2018-09-04 05:00:312021-02-22 13:07:09HIVE HAPPENINGS IN SEPTEMBER
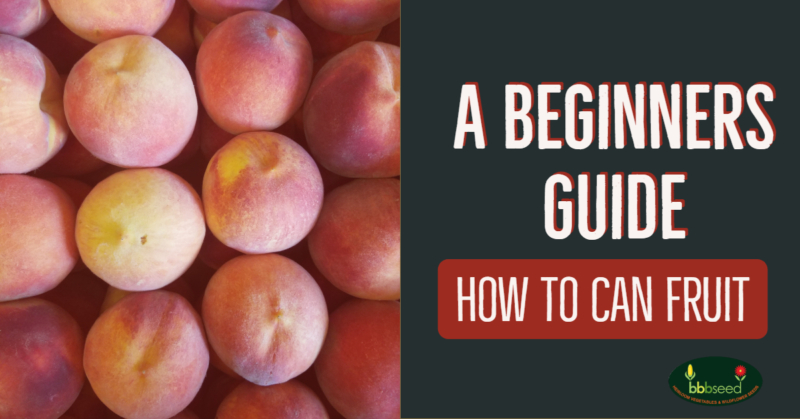
Summer is the perfect time to enjoy fresh, local fruit. Whether it’s plump, Maine blueberries or sweet, Colorado peaches, every part of the country is offering up a local bounty of great unique fruits.
The only problem is that it is hard to make these harvests last! Maybe want to save a local treat for winter or you just have more than you know what to do with? Well, the best way to preserve your local fruit harvest is to can them!
Here is our beginners guide to canning fruit at home.
*Important Note*
Whenever you are canning, make sure to strictly follow a tested recipe from a trusted source. Canning is safe when done properly, but improperly canned food can harbor dangerous pathogens.
Also, if you are above 1,000 ft, make sure to adjust the processing time on your recipe for altitude!
Equipment
Water-Bath Canning Kit
Most fruits are naturally acidic foods, which means you should be able to process your canned fruit using a water-bath canning kit. For non-acidic foods, you will need to use a pressure canner, which can heat foods to higher temperatures than water-bath canners can.
*Processing is just the step of heating the jars for a certain period to kill off all dangerous bacteria.
A canning kit usually consists of the following
A large metal pot with a lid
A rack to keep the jars off the bottom of the pot and for lifting jars in and out of the bath.
A magnetic wand for retrieving lids and rings
A jar lifter
A canning funnel
A paddle to check fluid height and for removing bubbles
If you don’t want to use a kit, you can always assemble a makeshift water-bath canner out of your normal kitchenware. Just make sure that there is enough headspace to cover the jars with at least an inch of water and that you can place some sort of rack in the bottom of it to prevent the jars from touching and breaking from the direct heat.
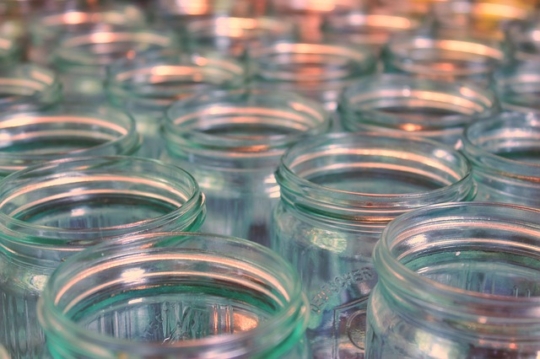
Canning Jars and Lids
photo courtesy of Pixabay – Lolame
Equally important as the water-bath canner, having the proper containers is essential for successful home canning.
Make sure you are using clean, canning grade jars designed for home canning. These mason jars are sturdier and safer than commercial glass jars and their availability makes them easy to replace and get lids for.
While the lid rings can be reused, make sure only to use new canning lids when preserving food. Old lids will not seal properly and can lead to improperly processed food.
Choosing and Preparing your Fruit
As always, the best ingredients make the best, finished product. This is especially true when trying to preserve fruit. Fruit needs to be fresh and sturdy to keep their color and shape throughout the canning process.
Fresh, firm fruits will do best for canning. Don’t wait until the fruit is at peak ripeness, because the heat from the processing will soften them. If they are too soft to start with, your end product will be mushy.
Thoroughly and gently wash your fruit to remove any dirt and debris. Bacteria can hide and survive in dirt, so do your best to make sure that all your fruit is cleaned.
If you want to preserve your fruit peeled, you can either use a vegetable peeler for hardier fruits, like apples, or you can use the blanching method for stone fruit like peaches or even tomatoes.
For the canning process to actually work its magic and properly preserve your food, there needs to be a liquid that can transfer the heat from the bath and sides of your jars to the food. There are a variety of different liquids that you can pack your fruit in: water, juices, and syrups are most common.
Water and juices are useful for hardier fruits that don’t need much to preserve the shape, color, and texture of the fruit. Apples, pears, and peaches can all be packed in water.
Syrups are more common and are a great way to preserve the fruits shape, color, and flavor. You can pack all fruit in syrups from very light to very heavy. However, heavier syrups are better for fruits that are tart or sour, while very light syrups do well for naturally very sweet fruits.
Packing is the step right before processing your fruit. Packing is, very simply, how you package your fruit into the jars.
Hot Packing
Hot packing is the more preferred method to pack your fruits when water-bath canning. It often involves heating the fruit to a boil in the packing liquid and then packing them into the clean jars before processing.
Some very juicy fruits can be heated without packing liquid to cook out their juices, and then packed into the jars with that fluid.
Since hot packed fruit have already been cooked, you do not have to worry about them shrinking during processing.
Cold or Raw Packing
Cold packing is when you tightly pack cold fruit into the jars and then pour the hot packing liquid over them before processing. This is not as recommended as hot packing since the fruit will shrink and release fluid during processing and it is not the most efficient use of jar space.
Processing
After packing your jars, use a plastic spatula or paddle to remove any bubbles trapped in the fruit by sliding it down the sides of the jar. Check your headspace and, if necessary, add more packing fluid (headspace is dependent on the type of jar you have).
Wipe the rim with a damp cloth to remove any debris or residue and ensure a clean seal.
Gently screw on a new, clean lid and rim until it is finger tight. Do not over tighten!
Bring the water bath to a simmer (~180° F) for hot packing or ~140° F for cold packing.
Keeping the jars straight up and down, lift the jars and slowly lower them into the bath. A jar lifter can be helpful here, so you don’t burn yourself.
Make sure there is at least an inch of water above the lids. If not, heat water to a boil and fill the bath to the proper level before moving on.
Bring the bath to a full boil. Once the bath has reached a rolling boil, place the lid on the bath and start the processing timer according to your recipe.
Once the timer has finished, remove the lid and turn the heat off. Wait 5 minutes before removing jars.
Remove jars and place them on a towel or rack. Make sure to keep them upright. Wait for 12 to 24 hours before checking if the jars sealed properly. Do not touch the lids!
After letting them sit, check the seal by pushing down lightly on the center of the lid. If it is firm and doesn’t move or “pop”, they should be ready to be cleaned and labeled.
https://bbbseed.com/wp-content/uploads/2023/11/BBB-Seed-logo-with-tagline-2023.png00Sam Dollhttps://bbbseed.com/wp-content/uploads/2023/11/BBB-Seed-logo-with-tagline-2023.pngSam Doll2018-08-31 05:00:362021-02-22 13:08:44How To Can Fruit: A Beginners Guide
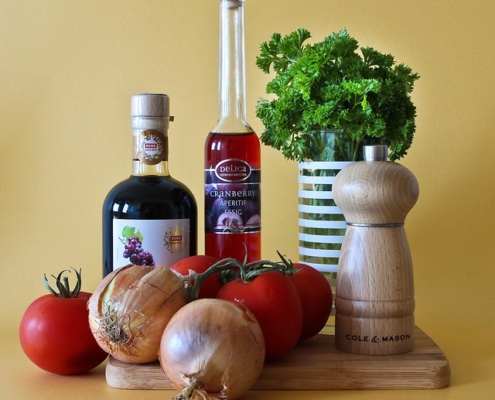
Last week we talked about drying as an easy way to preserve your herb harvest. This week we are going to dive into infusing herbs in vinegar. There is lots of room for creativity when making infused vinegars. You can infuse single herbs, a combination of herbs, herbs with flowers and don’t forget fruit. The possibilities are endless.
The end product can be used in a number of ways including; salad dressings, marinades, rubs, sauces, beverages and more. Beautifully bottled vinegars also make great gifts.
First, you will need to choose your vinegar. There are many varieties of vinegar including white, apple cider, rice, champagne and wine vinegars. Milder tasting vinegars are well suited for delicate herbs and flowers. Your more robust herbs do best in wine vinegar. Really it’s up to you and what you like best.
Begin by sanitizing the jar or bottle you have chosen. For instructions- https://bit.ly/2nQfRng
Wash and gently pat dry your herbs. Make sure you are using the best quality leaves and flowers, leaving behind those that are bruised, brown or have been nibbled on.
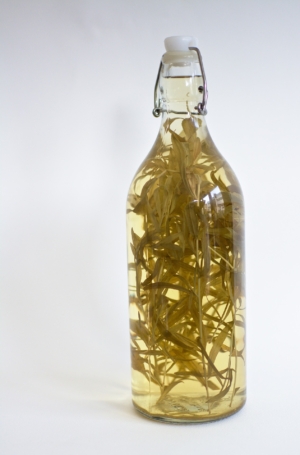
Place three to four sprigs of fresh herbs or 3-4 tablespoons of dried herbs per pint of vinegar.
Cover your container tightly with a non-metallic lid and place it in a cool, dark place to infuse. Allow it to steep for 2-4 weeks, giving it an occasional shake.
Once your vinegar has reached your desired flavor, remove the herbs and place the vinegar into a sterilized jar or bottle. Don’t forget to label and date your vinegars! Stored in a cool, dark place your vinegar should last 4-5 months. Refrigerate for longer storage.
Photo courtesy of TanteTati / pixabay
Some of my favorites include:
Photo courtesy of mammela / pixabay
French tarragon in apple cider vinegar
Chive blossoms in rice vinegar- the beautiful blossoms turn the vinegar a beautiful shade of pink
Violets in white wine vinegar- this vinegar turns an amazing shade of purple
We may request cookies to be set on your device. We use cookies to let us know when you visit our websites, how you interact with us, to enrich your user experience, and to customize your relationship with our website.
Click on the different category headings to find out more. You can also change some of your preferences. Note that blocking some types of cookies may impact your experience on our websites and the services we are able to offer.
Essential Website Cookies
These cookies are strictly necessary to provide you with services available through our website and to use some of its features.
Because these cookies are strictly necessary to deliver the website, refusing them will have impact how our site functions. You always can block or delete cookies by changing your browser settings and force blocking all cookies on this website. But this will always prompt you to accept/refuse cookies when revisiting our site.
We fully respect if you want to refuse cookies but to avoid asking you again and again kindly allow us to store a cookie for that. You are free to opt out any time or opt in for other cookies to get a better experience. If you refuse cookies we will remove all set cookies in our domain.
We provide you with a list of stored cookies on your computer in our domain so you can check what we stored. Due to security reasons we are not able to show or modify cookies from other domains. You can check these in your browser security settings.
Google Analytics Cookies
These cookies collect information that is used either in aggregate form to help us understand how our website is being used or how effective our marketing campaigns are, or to help us customize our website and application for you in order to enhance your experience.
If you do not want that we track your visit to our site you can disable tracking in your browser here:
Other external services
We also use different external services like Google Webfonts, Google Maps, and external Video providers. Since these providers may collect personal data like your IP address we allow you to block them here. Please be aware that this might heavily reduce the functionality and appearance of our site. Changes will take effect once you reload the page.
Google Webfont Settings:
Google Map Settings:
Google reCaptcha Settings:
Vimeo and Youtube video embeds:
Other cookies
The following cookies are also needed - You can choose if you want to allow them:
Privacy Policy
You can read about our cookies and privacy settings in detail on our Privacy Policy Page.