Great Techniques for a Weed-Free Garden

It is so easy to be discouraged when faced with a garden that is being overtaken by weeds.  Keep your garden productive and relatively weed-free by cleaning out the weeds every so often.  Cleaning your garden by weeding is one of the keys to keeping your crops productive and your enthusiasm strong. Here are some great weed-prevention strategies, and simple techniques for a relatively weed-free garden.
1. Starting at the beginning, don’t deeply-till the garden. Plowing or deep tilling buries weed seeds that are lying on the surface and then brings them back up. Let buried seeds stay buried. Most seeds germinate only in the top two inches of soil.  Before you plant a new garden, till the soil shallowly to encourage the surface weed seeds to sprout, then water the area if the soil is dry. The combination of air, moisture, and exposure to light will stimulate weed-seed germination. Wait a week after tilling and then hoe or till shallowly again to eradicate all the newly germinated weed seedlings before you plant. The more times you repeat this pre-plant weed-reduction technique, the fewer dormant weed seeds you will have lurking in your garden beds. Once the upper-layer weed seeds are exhausted (it takes a number of years, so be patient), very few new weeds will appear unless you bring them up from below… or let weeds mature and drop new seeds.
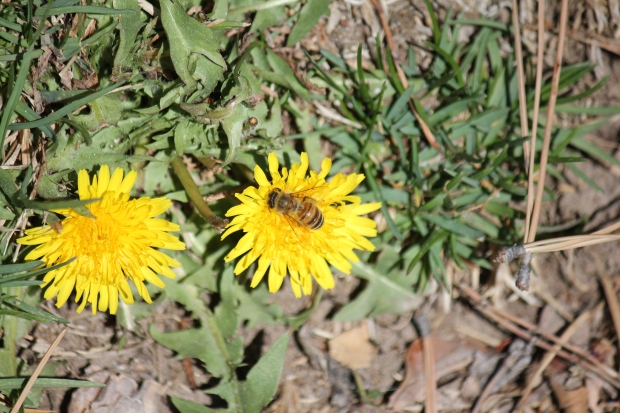
2. Don’t allow weeds to go to seed. Nature is prolific. Each plant can produce an enormous number of seeds. There is an old saying “One year’s seeding means seven years’ weeding” and it holds true. Weeds produce an abundance of seeds and the results of this carelessness are exponential.  The more seeds you have, the more weeds you will have. But the results of a little weed control also are cumulative.  If weed plants are removed from the garden before they go to, seed, their thousands of seeds won’t be added to the garden. No more seeds, no more weeds. And, as the years go by, fewer and fewer seeds will be left in the garden to germinate.
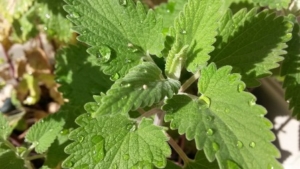
3. Eradicate weeds while they are small. Tiny, newly germinated weeds are the easiest to kill. A sharp hoe, lightly scraping the soil surface is the most effective way to control small weeds.  This allows you to work shallowly and not disturb the roots of the plants you want to thrive.  That minimum effort yields a maximum benefit, curing the weed problem, while making a tidy garden. And a well-kept garden may motivate you to spend more caretaking time there.  Larger weeds can be hand-pulled and left to dry out on the soil surface.  Any weeds that are going to seed should be destroyed or thrown away.  To make the job easier, pull weeds after a good rain or watering.  Try to keep the area surrounding your garden weed-free by tilling a path or mulching a path around the planting zones.
Keep your sharp hoe in or near the garden and use it for a few minutes each time you are there to keep your crops weed-free and your garden a place you will enjoy.

What's Bugging Your Garden

What’s Bugging Your Garden


Less Toxic Pests Remedies

By Engrid Winslow

Getting rid of garden pests.

Image by André Santana from Pixabay

What’s bugging your garden? Mysterious holes in the leaves of your favorite rose? Earwigs buried deep in the leaves of your lettuce? Flea beetles mangling your perennials and vegetables? Most people are averse to creepy crawlies in their gardens but, please, BEFORE you reach for the chemicals to blast them into the stratosphere, consider that all of the insects are essential to having a healthy garden and planet. So here are a few suggestions for less toxic remedies of getting rid of garden pests to try in your garden.

Slugs – small saucers of beer tucked under leaves will attract them and they will fall in and drown. Slugs aren’t picky so don’t waste a craft brew on them – Coors works just fine.

Earwigs – There are a couple of things you can try for these and one is a small saucer of soy sauce with a little bit of vegetable oil and you’ll get the same results as with the slugs, above. You can also roll up several sheets of newspaper and get them fairly wet. Slide them under your plants in the evening and throw them away in the morning.

Aphids – These are a very weak, soft-bodied insect that feed on tender new foliage and buds. You can bet that if you have aphids, you will soon have a host of ladybugs feasting on them. If you can’t wait, then use soapy water with a few drops of oil and spray or dab on the foliage. You can also use garlic spray.

Cartoon drawing of an aphid.

Photo courtesy of pixabay.

Flea and other beetles – Diatomaceous earth is a mineral composed of the skeletal remains of tiny sea creatures. It has edges that are sharp and will pierce the bodies of beetles and cause them to dry out. It will harm beneficial insects and earthworms, so use sparingly. Also, don’t breathe it into your lungs.

Other insects – Use a lightweight row cover to protect young plants and the ones that are being chomped on the most.

There are other products available at most garden centers now that gardeners are more aware of the consequences of the use of most pesticides to insects, animals, fish and even people. Some of the best tools in your arsenal are: (1) creating biodiversity and selecting plants that attract pollinators and (2) nurturing the soil by using products such as compost and nettle teas. Recognize that most pests run their course if you are patient and wait for their predators to show up.

June Garden Chore List

Gardening Tips

By Heather Stone

Here are some June garden chores to keep your veggies and flowers going strong.

Buckets and gardening tools lined up along a fence.

Photo courtesy of pixabay

  1. Cage or trellis any vining vegetables such as cucumbers, beans and tomatoes. By training these vegetables to grow up you are saving precious garden space and keeping the fruit off of the ground and away from critters. Click here for trellis ideas!


  1. Continue watering your vegetable and perennial beds. Try to keep water close to the roots and off of leaves. Checked potted plants often, they tend to dry out faster.


  1. Keep up with the weeds! This can start to feel like a never-ending battle at this time of year, but keeping the weeds under control means more nutrients, water and sunlight for your vegetables and flowers.


  1. Mulch around vegetables to help conserve water.


  1. Side dress with compost for a mid-season boost.
An oldfashioned wooden wheel barrow..

photo courtesy of pixabay

  1. Begin replacing cool season crops that have begun to wind done or have bolted from heat.


  1. Plant successive crops of summer greens like collards, kale, chard and lettuce (Protect them from hot afternoon sun).


  1. Transplant any remaining warm season vegetable starts.


  1. Plant your squash, melon and cucumber seeds if you haven’t already.


  1. Keep an eye out for pests.


  1. Keep your birdbaths full and clean.


  1. Plant a new patch of bush beans every couple of weeks.


  1. Pinch out suckers on your tomatoes.


  1. Keep deadheading perennials for continued bloom.


  1. Sit back, relax and enjoy your garden.

7 Plants to Keep the Mosquitos Away

Gardening Tips

by Heather Stone

Purple lavender flowers attracting honey bees.

photo courtesy of pixabay


The long, warm days of summer are meant to be enjoyed. Sitting poolside, bar-b-queuing with friends or just relaxing in the garden. But sometimes pesky mosquitoes have a way of taking the fun right out of our outdoor activities. Instead of dousing yourself and your loved ones in chemical bug sprays try planting some of these mosquito repellent plants around your garden and patio to help keep the bugs at bay.


  1. Lemongrass-

    Lemongrass is an ingredient in citronella oil and its strong lemon scent is a proven mosquito repellant. This tropical grass is best grown in pots as an annual or brought indoors during the winter months.

  2. Marigolds-

    The strongly scented flowers of marigolds repel mosquitos, flies and even rabbits. These beauties come in an array of colors that will brighten up any spot. Keep pots of marigolds near seating areas and doorways to deter mosquitos. In the vegetable garden, marigolds repel many of the insects that attack tomato plants.

    Bright orange marigold bloom.

    photo courtesy of pixabay

  3. Lavender

    The aromatic, purple flower spikes of lavender not only repel mosquitoes but moths, flies and fleas too. Use the fresh or dried flowers directly on the skin or dry them and hang them indoors to repel moths and flies inside. Don’t forget, the bees love lavender!

  4. Basil

    Who doesn’t enjoy the smell and taste of fresh basil? Mosquitos, it seems. Unlike many of the other mosquito repellant plants, you don’t have to crush the leaves or flowers of basil to receive the mosquito deterring properties.

  5. Catmint-

    Catnip and many other plants in the mint family are excellent at keeping the mosquitos at bay with their strong scent. Ticks and biting flies also avoid catmint. You can rub the leaves and flowers directly on your skin for added protection. Catmints are easy to grow plants that do well in sunny and dry spots in the garden. The lavender-blue flowers bloom all season and attract a wide array of pollinators.

    Fuzzy green catmint leaves.

    photo courtesy of pixabay.

  6. Rosemary-

    Cooking out? Toss a few sprigs of rosemary on the grill and let the aromatic smoke drive the mosquitos away.

  7. Peppermint

    – the strong scent of peppermint deters flies and mosquitos. Keep a few plants in pots on your patio to deter insects and enjoy the fresh leaves in your iced tea.

    Blue flowering rosemary plant.

    Photo courtesy of pixabay.

All these mosquito repellent plants deserve a place in your garden or on your patio not just because they deter pesky insects, but for their beauty, fragrance and attractiveness to our pollinator friends.


Here is a simple herbal mosquito repellent recipe you can make at home using essential oils (“eo”).

  • ½ witch hazel
  • ½ cup of water
  • 20 drops Eucalyptus eo
  • 30 drops Citronella eo
  • 10 drops Rosemary eo
  • 20 drops Lavender eo
  • 20 drops Tea tree eo

If you don’t have one of these simply leave it out or substitute with another. A few other essential oils that will work include lemongrass, catnip, clove, mint and geranium.


YELLOWJACKET TRAPS, THEN PANSIES

Spring Solutions for Yellow Jackets

By: Sandy Swegel

Is Spring about to happen in your neighborhood? Before you start getting pansies or collecting daffodils, stop and put out your yellow jacket traps…if yellow jackets are a problem for you in the summer.

The yellow jacket life cycle is pretty simple. Almost all the yellow jackets die off in winter. Single queens that already “mated” go into winter hibernation…in the ground, or your shed, or woodpile. Once warm weather starts in the Spring the queen wakes up, builds a new nest and starts laying eggs for this year’s yellow jackets. One little queen easily lays 500 eggs. Conservatively, every queen you catch now means hundreds fewer yellow jackets gathering at your picnics in the yard this summer. It is so much easier to catch one queen now than to tackle nests full of angry yellow jackets under your picnic table in July.

A simple pheromone trap works great…it lures the queen to those yellow plastic hanging traps. This is no time for simple soapy water. You’ll be glad you spent the $5 for the pheromone lure refills. And the lure doesn’t affect honeybees.

Catching the queens isn’t always predictable. I put up more than one trap. Last year the trap by the BBQ grill caught ten queens. And a trap under a tree caught two. It seems to differ every year. But I will be grateful come summer.

It’s definitely the time in this warm March we’re having in Colorado. It was 80 degrees today…I got stung cleaning up debris in the perennial bed. The queen rolled over from her winter nap and sunk her stinger into me as revenge. Ouch. Yellow jackets hurt so much more than other wasps. If you don’t go outside in the summer, then let the yellow jackets live. But since they don’t play well with others, I believe in a strong birth prevention policy.

Photocredits:
www.rescue.com/bug/yellowjackets
greenbugpestandlawn.com/learning-center/flying-pest

Give your House Plants a Spa Day

House Plant Care

By: Sandy Swegel

Right about this time of year is when your indoor plants are all stressed out. It’s been months of winter and dry heated air. Outdoors in nature, wild plants are enjoying spring rains that clean off their leaves and freshen their soil.

Once again, we plant lovers know to mimic nature if we want our plant friends to thrive in the odd conditions we try to grow them in. Growing plants under a roof without moving air or overhead moisture is definitely odd.

The plants I’m wintering over are the most stressed. The hibiscus has aphids. White fly that I thought I eradicated shows up in the sunroom. Scale is appearing on the underside of waxy leaves.

Time to give your house plants a Spa Day.

Take any plants that are moveable and bring them into your shower. Don’t forget a good drain catch…you don’t need perlite in your sewer pipes. Bring in the non-buggy plants first. You don’t need to spread pests and disease. Clean off dead or diseased leaves and give the whole plant a good overhead shower. Use the hand sprayer to get the underside of leaves.

Pretend you are a spring thunderstorm and really soak the soil so that water runs out the bottom taking away some of the built up salts. Use soapy water to treat any soft-bodied pests. Use your fingernail or a Q-tip with alcohol to remove scale sacs.

After the bathing and dripping dry, add a layer of clean compost — earthworm castings work great. Then douse the soil with a good natural liquid fertilizer—I like seaweed based fertilizers because then everything smells ocean fresh.

Your plants will be grateful for their Spa Day and perk right up from all that moisture and a good meal.

Of course, you might need your own Spa Day after you finish cleaning up the mess. But we all enjoy a good Spring shower.


Photos:
www.ourhouseplants.com/guides/cleaning-your-plants
www.thesmallgarden.com.au/blogpages/how-to-holiday-proof-your-garden-this-summer


Attract Chickadees to Your Garden

All About Chickadees

by Sandy Swegel

Chickadees are out and about on warm winter days.  They are the tiny white birds with black heads that are flittering and chirping vocally on sunny January days.  I often see them in the top branches of evergreens.

Chickadees are small birds that don’t migrate but hunker down in tree cavities to survive the winter despite their tiny bodies.  You can have lots of chickadees in your garden if you keep a simple tube feeder with seeds (they love black sunflower seeds.). You can also feed them with your garden by leaving the seed heads on all the plants for the chickadees to sit on or hunt and peck for.  Chickadees need a lot of food …. the eat about a third of their body weight per day.


And that is why you want them to live in your garden.  They may rely on seeds in winter but come early spring and mating time, they get about 80% of their diet from insects.  They eat so many insects, some wildlife fans call them the pest exterminator of the forest.  And their favorite insect?  Aphids!  Tiny aphids are the perfect food for tiny chickadee beaks.  The birds are very systematic and will cling to a plant stem eating one aphid after another until they clear the entire stem. In spring before your plants are even sending up new stalks, the chickadees will pick in leaf litter finding the baby aphids just as they hatch or even just eating the yummy aphid eggs.


Photo credits

https://www.nwf.org/News-and-Magazines/National-Wildlife/Gardening/Archives/2016/Help-Birds-Stay-Warm.aspx


http://www.audubon.org/field-guide/bird/black-capped-chickadee


Apples

All About Apples

by Sandy Swegel

Two things I learned about apples this year.

Reduce codling moths in your trees.

A few years ago, I started following the advice of a local organic farmer to pick up the bad apples under my apple trees. I’ve always left them there to compost in place or waited until they were all down to pick them up. My delicious McIntosh apple tree had lots of codling moths which left unappealing frass in the apples as well as the occasional worm. The tree was too tall to spray clay and I didn’t want to use anything toxic. So I did start religiously picking up the apples as they fell. Now, some five years later, I’ve noticed that while codling moths still attack the apples, they are MUCH fewer in number affecting maybe only 10-20% of the apples. What a difference sanitation made.


Bake awesomely easy gluten-free Apple Crisp

The second thing I learned came from the new “problem” of what to do with so many apples. If you pick up the apples soon after they fall from the tree, then you notice the apples are in pretty good shape if you cut out the bad parts right away. So now I had a surplus of apples. The freezer was full of sauce and still, the apples came. Fortunately, I gave the apples to a baker friend who made a gluten-free apple crisp that was better than anything I had ever had. And that’s when she taught me a professional secret. You have to bake the apples first before you put the crisp topping on. When you just layer apple pieces in a pan and sprinkle with your crisp mixture, you can end up with apples that are too crunchy and/or a burnt crisp top.

So here’s the basic recipe:

Cut up apples into pan. Bake until mostly soft.

Crisp topping:
Oats, cinnamon, nuts (almond meal, tiny pecan pieces) Optional: butter, brown sugar.
Sprinkle topping on baked apples. Put the pan back in the oven until the crisp is browned and crispy. Twice-baked apples melt in your mouth (without lots of extra sugar) and the topping is crispy delicious. The perfect foil for vanilla ice cream.

So now I spend more time working to clean up apples…..but am rewarded with more apple crisp!

Photos:

http://utahpests.usu.edu/ipm/htm/fruits/fruit-insect-disease/apple-pear-control03
http://allrecipes.com/recipe/229088/apple-crisp-with-oat-topping/

Stop the Powdery Mildew Cycle this Fall

Gardening Tips

by Sandy Swegel

Powdery mildew had a grand time in my garden this year. I often have a nonchalant attitude to it growing on a few leaves and don’t mind a little bit. But it started early this year on roses, then showed up on the bee balms and finished out the season inundating the sweet peas and squashes. By the time I paid attention, it was out of control.

But now it’s Fall and my inner lazy gardener says…ah well this season is over. Next year it will be different. But if we want to make progress against disease in our gardens, now is the time to act.


Do you Want Less Disease in your garden next year? Then take these steps now:

In the Vegetable Garden
As your squash and cucumbers and pea plants are dying back, remove those leaves and put them in the trash. Not in the compost pile. Don’t let them overwinter and deal with it in the Spring. Fungus and disease spores are sitting passively on the backs of those leaves, just waiting for rebirth next Spring. They do not reliably die in home compost piles. Powdery mildew will survive the winter by forming minute fruiting bodies called cleistothecia And tomatoes? I put the whole plants in the trash after frost. There are just too many diseases on them to risk.

In the perennial beds, leaves infected with powdery mildew like rose or phlox or bee balm often drop before Fall. Before the big tree leaf fall, I use the blower to blow the diseased leaves out of the bed and PUT THEM IN THE TRASH.

This vigorous sanitation is a good idea for all pests too. If you had bean beetles…get rid of those leaves that might have next year’s eggs.

But don’t be too clean.
That’s the important lesson here. In the non-diseased parts of the garden, ladybugs and lacewings and lots of beneficial insects are going to lay eggs and overwinter. We want them. I learned last year especially to let willow leaves be…there were dozens of beneficial babies at the base of willow plants last spring.


And next year…be attentive to the powdery mildew. I now promise to treat early and often with something gentle but effective such as horticultural oil or a baking soda. I lost a lot of production in my vegetables this year because I let the powdery mildew have its way. And the roses and phlox really took a hit. I’ll do better next year. I promise.

Photos:
ipm.ucanr.edu/PMG/PESTNOTES/pn7406.html
startorganic.org/tips-for-treating-powdery-mildew/

Natural Weed and Pest Control

Alternatives to Poisons

by Jessica of TheBeesWaggle.com

Honey Bee on Dandylion

Weeds do have value to pollinators, as most produce blooms that carry highly nutritious contents for pollinators.  However, they can be overwhelming in their growing power, and we need ways to control them without poisoning the soil and the things that feed on them.  I would like to begin by saying I pull each and every weed that I do not want growing in specific places.  I never use chemicals, not even vinegar and salt.  I would like to urge you to do the same, but I am providing you with some choices that are nontoxic.

  1.  Boiling water.  Pouring boiling water over weeds cooks them, and kills them.  Water is only water, so it’s okay for it to get into the soil and groundwater.
  2. Spray straight White Vinegar on the leaves of weeds being careful not to go overboard.  Too much vinegar in the soil isn’t good for the pH of the soil so it will affect the balance of the existing underground ecosystem if it is applied excessively.
  3. Spray a mixture of salt and vinegar…and then maybe pull them, roast them, and eat them?  Just a joke.  The recipe is 1 cup of salt into 1 gallon of vinegar

Wasps, hornets, and yellow jackets are the other most popular topic of seasonal pests.  I don’t consider them much of a  pest because they eat other insects, which makes them a very important part of the food chain.  So, instead of finding ways to kill them, I find ways to coexist.  They do not like peppermint oil, lavender oil, or eucalyptus oil.  So, the best prevention is to spray a mixture of these oils with water around the areas you’d rather them not set up shop.  The recipe is as follows:  1 tsp of peppermint oil; 1/2 tsp lavender oil; 1/2 tsp eucalyptus oil into 2 cups of water.  Use a good spray bottle to apply this mixture anywhere you do not want them present.  I suggest daily application, and the smell is pleasant, at least I think so.

Bald Faced Hornet

Remember that every living thing has a purpose, so frugally controlling them is in our best interest! I hope you all are having a wonderful summer so far! Thank you for being part of this very important movement to save our bees!

Jessica

Here are a couple of links to steps to control pests using non-chemical controls and least toxic methods, and a link to a great video from BeyondPesticides.org website.

Manage Safe

Organic Land Managment Practical Tools and Techniques