Two Ways to Guarantee Your Outdoor Seeds Grow

Seed Starting

by Sandy SwegelPre-sprouting seeds

The next few weeks are crucial for new gardeners. Every year in Spring, first-time gardeners buy some seeds and dig up a garden on the first really warm weekend and sprinkle the seeds out. Then they wait. For some, within the month, weather conditions will be good and they’ll have their first garden seedlings and they will be totally hooked on the magic of gardening.

For others, something bad happens that the newbies don’t know about. They don’t realize they have to water. Or a couple of hot days come and burn the new seedlings to a crisp. Maybe the neighborhood crows watch you plant and come to eat every last pea. Sometimes the soil is cold and it’s just too early to germinate seeds. These newbie gardeners lose hope and say they just have a black thumb and give up gardening.

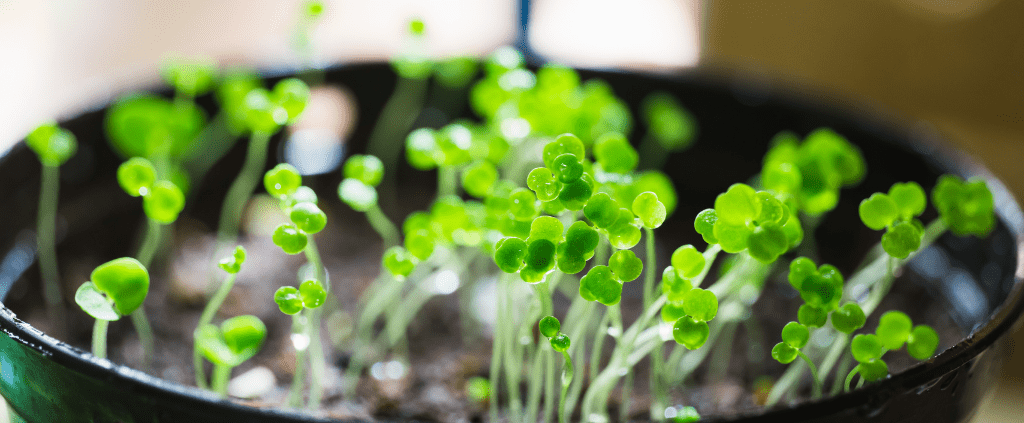
If you’ve had failures but are still willing to give a garden from seed a try, I have two techniques that virtually guarantee your seeds will germinate outdoors. These are especially good ideas if you’ve given up trying to grow some things because they never work for you. For years I just thought I was broccoli-impaired until I tried these hints.

First of course, you have to start your garden bed.

HOW TO START A GARDEN BED.

You can till and/or turn the soil by hand but you don’t have too if the soil is not solid concrete.
Dig out the weeds. Get the roots if you can.
Take a rake and make the soil level and a bit smoothed out.
Water soil with a soft sprayer if the soil is dry.
Sprinkle seed over the soil. How much seed and how far apart is written in the little print on the packet.
Pat the seed lightly with your hands so there is contact between the seed and the soil. Bury the seed slightly if the packet says so.

If you live in someplace humid and warm, that’s enough. Your seeds should come up.

If you live someplace dry or with fluctuating temperature or you’ve had failures in the past, try these two success techniques:

Sprouts

#1 ROW COVER

Lay a sheet of row cover loosely over the seeded bed. You want it nice and loose so the plants can grow and the row cover lifts with them. I use some heavy rocks to hold down the row cover so it doesn’t blow away. The row cover helps the seeds stay moist enough to germinate and raises the soil temperature a few degrees so the seeds germinate faster.

Water with the soft sprayer. Note….I water right on top of the row cover. You don’t have to lift it to water underneath often causing the seeds to float away. It’s permeable so the water makes its way through.

#2 PRE-SOAK AND PRE-GERMINATE the difficult seeds.

Pea sproutsSeeds like peas or carrots respond well if soak them in warm water in a bowl overnight, drain them, then plant. The soaking activates the enzymes that break the seed coat and speeds up germination. If it’s a seed you really have trouble with, you can put the seeds on a wet paper towel in a baggie and wait a few days until you see the sprouts.

These two shortcuts…pre-germination and row cover…work for me all the time. And I get better germination which means I get more plants per packet of seeds and save even more money.

Now go out and grow some food and flowers!


Photo credits:
http://daphnesdandelions.blogspot.com/2010_09_01_archive.html
http://learningandyearning.com/tag/pre-sprouting/

Kelp: A Gardener’s Best Friend

Why to Use Kelp in Your Garden

by Sandy Swegel

Our local garden club invited a rose expert from Jackson and Perkins to give us some winter inspiration this week. Rose growers are like tomato growers….they have their own little secrets and rituals to make their roses the best and the biggest. Our expert showed us pictures from his own garden that made me a believer in kelp. His plants treated with kelp and fertilizer were bigger and more robust than plants treated with just fertilizer If you are going to use soil amendments in your garden, kelp should be at the top of the list right after organic fertilizer.

So what does kelp offer?

Sea Minerals.
Kelp and other seaweeds are good sources of trace minerals that are often deficient in ordinary garden soil. So kelp is a good ingredient as a fertilizer…but not a substitute for your regular fertilizer.

Plant Growth Hormones.
OK, this is the real reason gardeners love kelp. Its natural plant growth hormones (cytokinins) stimulate extra growth in our plants and in our soil microbes. This is the “secret weapon” part of using kelp in your garden. Kelp stimulates roots, plant growth, flower production by virtue of the hormones even more than because of the vitamins and minerals.

Plant Health and Resilience.
Plants treated with kelp showed more drought resistance and bug resistance. Aphids, in particular, don’t like the taste of kelp and avoided kelp sprayed leaves. Anecdotally, I have found that a kelp foliage spray reduces powdery mildew.

How to Use Kelp

Kelp comes as kelp meal and as a liquid. An interesting thing about kelp is that when you apply kelp changes what kelp does for your plant. If you want sturdier roots, add kelp meal when planting to stimulate root growth. If you want more flowers on roses or tomatoes, apply it as a spray when your plants were budding. (Thanks researchers from the marijuana industry for these studies.) Some tomato growers use kelp weekly once tomatoes start to flower. If you are trying to improve your soil, apply meal or liquid to the soil once soil temperatures are above 60 or so when soil microbes are active. I like to use a weak kelp liquid spray weekly during hot spells in summer and spray all over the tops and undersides of leaves. It perks the plants up and gives the garden a lovely ocean smell. Plants absorb kelp better through leaves than through roots.

How Not to Use Kelp

More kelp isn’t better than small amounts of kelp. Don’t just throw it on your garden thinking more is better. Think about what effect you want. Do you want more tomatoes? Then applying kelp when the tomato is growing leaves but not making flowers yet will give you more leafy growth, not more tomatoes. On the other hand, a little kelp spray on your greens will increase the number and vitality of leaves.

Do Your Own Experiment
If you are going to add kelp to your repertoire, try a science experiment. Select a plant that you give kelp to and one a little further away that doesn’t get kelp. Do they behave differently?

Cabbage and Clover Husbandry

Cover Crop Seeds

by Sandy Swegel

St Patrick’s Day is this week…a traditional day for planting peas. But you know that….so get ready to plant your peas. This year I’m thinking about Ireland and two plants usually associated with Ireland: cabbage and clover (not necessarily the four-leaf variety.) A little internet browsing led to an interesting connection to these two plants. One…they both like to grow in cool humidity like Spring and Fall. Cabbage is a cool season crop. Two… old country wisdom and modern science show that cabbage and clover are excellent companion crops.

Books in England dating back to the 1700s recommend cabbage “Husbandry” the old word for farming. Cabbage was highly regarded because it lasted well as a stored food for winter and because cows and sheep that ate cabbage in the winter made sweeter milk than those that ate turnips. Standard practice in England in the olden days was to plant a clover cover crop and follow that with cabbage or potatoes. Turns out that cabbage that grows in clover or where clover had been grown and tilled under are larger and have significantly fewer pests included the cabbage looper. Cabbage moths are still the bane of cabbage growers. Modern no-till farmers have adopted this centuries-old wisdom to plant cabbage right into a field of clover.


Besides being good for cows and sheep, cabbage is healthy for us and a staple in many cuisines. I am particularly fond of the red cabbages because they are pretty! Here are a few tips to grow cabbage:

It’s a cool season crop.
That means you have to get it in early. Or plant it in mid-summer for fall harvest.

They do well from transplants.
Start seeds indoors or in a cold frame 8 weeks before last Spring frost. Then transplant it about 2-4 weeks before last Spring frost. Cabbage is a “heavy feeder” so you need good soil or extra fertilization and regular irrigation.

Watch out for pests.
Cutworms and cabbage loopers love cabbage too…but they are pretty easy to pick off if you stay after them. Little paper collars protect transplants from the cutworms. If you don’t like to pick off the worms, it is good organic control.

Cabbage makes great microgreens.

Cabbage germinates in about two days in your warm kitchen. Another superfood from the brassica family.


For more on the science of winter-sowing clover and cabbage and other brassicas
http://www.ctahr.hawaii.edu/oc/freepubs/pdf/IP-27.pdf
http://www.modernvictorygarden.com/apps/blog/show/2015631-in-praise-of-cabbages
http://microgardening.newearthmicrogreens.com/red-cabbage-microgreens-vitamins/

Jumpstart your Lettuce Garden

Heirloom Vegetable Seeds

Our new tricolor blend of romaine lettuces has me itching to get my salad garden started. I like Romaines because they are especially nutritious, comparable to kale. And I like this blend because it’s shiny and colorful. There’s a lovely gloss to the colorful Romaines that looks beautiful in the garden and on the plate. I want my food pretty!

OrgLettuceRoamaineTri_BBB

It’s pretty easy to get lettuce ready to eat earlier than your standard growing season. If you’re either busy or lazy (or both as I often am) there are some almost no work ways to get your salad growing.

Almost No Extra Work: Row Cover

Direct seed as usual into your garden. Put a layer of row cover loosely over the area. Secure with anchors or with heavy rocks which will also capture a tiny bit of extra heat. The row cover alone will speed germinate the seeds if you have a spell of warmer weather. The row cover then will protect it if the warm weather is followed by frigid temps.

A Little Bit of Extra Work: Pots

Want to have lettuce even sooner? My friend Cathy seeds her lettuce in lightweight pots and brings them inside at night or when the weather is extreme. It’s easy for her because she has a south-facing sliding glass door and moving the pots in means sliding open the door and moving the pots two feet in or out. She has the extra satisfaction of going to the Farmer’s Market in April where market farmers are selling similar pots for $25.

Invest Work for the Future: Cold Frames

Cold frames are an awesome way of having more of your own fresh food. They do take some time and money….but you will quickly make up that investment with what you save on fresh greens.

Work like a Farmer for Lots of Lettuce: Plugs

Growing your own lettuce plugs is one way to get a garden of lettuce without thinning or empty spots. Start your seeds under lights in plug trays that you can plant out when it’s a bit warmer. Very satisfying to have a full evenly-space plot of lettuce plants in the hour or so it will take you to plant out the entire plug tray (100-200 plants).

http://wcfcourier.com/lifestyles/home-and-garden/gardening/lettuce-plant-some-frilly-fun-veggie-can-be-grown-in/article_2a856188-c725-5af2-960d-9fd1d89f4896.html

http://thefoxplot.com/tag/beekeeping/

How to Grow Watercress Indoors

Grow Watercress Indoors

How to Grow Watercress Indoors

by Sandy Swegel

Watercress is another one of those unassuming, almost weedy, plants that is a superfood for humans. In the brassica family of heirloom vegetables, watercress (Nasturtium officianale) is rich in vitamins, minerals (especially calcium) and sulfides. It’s not just for watercress sandwiches and tea. It is a great addition to salads as either sprouts or leaves, excellent juiced or added to juices and makes a lovely pureed spring soup. And pretty yummy just for nibbling.

Watercress is a great plant to start at the beginning of the growing season, but you can also grow watercress indoors during winter. We’ll teach you how.


Sprouts

Watercress sprouts easily and you can grow it in a jar just like you do alfalfa seeds. Its spicy kick is great on sandwiches and salads.

Plants

Seeds are pretty easy to germinate. The biggest challenge to grow watercress indoors is that it needs to always be moist, especially during germination. You can accomplish this by starting the seeds in a small pot of clean potting mix and then setting the pot in a saucer of water. Misting is great or put a plastic cover over the seed mix if your air is dry. Someplace slightly warm like the top of the frig is a great germination spot. They don’t need light to germinate.


Once the seeds are growing, you just need to be sure the plants are moist with fresh water. Think about their ideal natural habitat in Europe: slow-moving creek edges in bright shade. Some people grow them in water tanks with aerators if you want to get fancy.

One secret to tasty watercress is to keep the growing plant cool and out of hot sun and to harvest it before it flowers. After flowering, the leaves become more bitter.


To grow watercress indoors in late winter is such a promise of Spring. But it doesn’t need to be an indoor plant. After your weather warms to above freezing, you can plant your watercress outside if you have a place that stays pretty moist. (Learn more about Zones and Frost Dates). If you have a pond or fountain the watercress is thrilled living in a pot in about an inch or two of water along the edge. I’ve seen it in a shade pot with impatiens and it was pretty happy.

And once you have nice succulent leaves, watercress, slivers of cold cucumber and butter on thin white bread is actually pretty awesome.


Not sure what heirloom vegetables are or why you should grow them? Read more from Gardening Know How.

De-weeding the Compost Pile

by Sandy Swegel

Playing in the dirt is, of course, the most fun reason to garden. This week I’ve been playing in the compost which is doubly fun because I get to play with the earthworms too.

What to do with Compost Weeds

My compost style is very passive. I keep three big bins going. Starting the bin is easy. I make sure there’s a couple of inches of finished compost at the bottom to inoculate the pile. Every week I clean up something in the garden and throw it on top of the compost. I generally don’t put in sticks unless I feel like cutting them up into smaller pieces. The most important addition to the pile is vegetable scraps and greens like grass clippings. I put those in the middle and tuck them down under the dried up spent foliage. The vegetable and green scraps invite earthworms in so my pile is breaking down in the traditional way that browns and greens break down and earthworms are doing their thing at the same time. Sometimes if there’s too much organic matter, I throw in a shovel or two of soil. I water the pile if we haven’t had rain. In Fall I throw some leaves on but also have separate bins for straight leaf mulch.


This is Cold (or Warm) Composting. This is not the fancy layering and turning that extension services advise composters do to kill all the seeds and disease. The pile gets hot in the middle, but without the regular turning and fine-tuning of ratios of browns and greens, my weed seeds don’t all get killed. I don’t put diseased foliage into the pile. But with a minimum of work, I get a lot of compost.

So what do I do about the weed seeds?
Basically, I get them to germinate then cut their heads off. De-weeding the compost pile.

Sometime in August or September, I scrape off the completely uncomposted material and put them into another bin. Then I vigorously turn my pile and mix it together. It’s about 80% finished. I leave it alone except to water it if needed. Each week all the weed seeds germinate into little green plants and I shovel up that top two inches of little weeds, breaking their necks and put them back into the compost pile. The next week, more seeds have germinated and I break them up too. Usually, after about three weeks, the weed seeds have mostly all grown out and the compost is ready to get spread on the garden after the soil freezes.

Easy and not much work.


http://sarasota.ifas.ufl.edu/compost-info/tutorial/methods.shtml
http://tncns.com/winter-time-composting

Fall Pruning: Don’t Do It

Why Not to Fall Prune

by Sandy Swegel

September is the time of year I like to tell you to quit working. I want you to leave some leaves and debris on the beds to give ladybugs and lacewings a place to overwinter. I want you to have seed heads for birds to eat. And I want you to enjoy the “winter interest” of an abundant garden of grasses and flowers frozen in place.

Another big don’t do it is Fall Pruning, especially for those of us in colder climates. It is so tempting to tidy up the garden by doing the pruning you didn’t get around to in the Spring, but for most plants, it’s better to wait until they are dormant or just emerging next Spring. Studies have shown than Fall Pruning can reduce winter hardiness in plants. If you cut the plants now, they are going to put their energy into vigorously regrowing instead of just settling into dormancy.

What Not to Prune Now
Spring Bloomers. If you prune lilacs or azaleas or forsythia now, you’ll be cutting off flowers buds that have already set for next year.

Rose Canes. I know the rose garden can look unruly and untidy in winter. But winter always kills back the canes at least a little. Better to have the canes die back from five feet high than from one foot high.

Trees. The National Arbor Day Foundation advises specifically against fall pruning: “Because decay fungi spread their spores profusely in the fall and healing of wounds seems to be slower in fall on cuts, this is a good time to leave your pruning tools in storage.”

Winter will be here soon enough. Some nice warmish winter day once the trees are dormant, you can get out and prune.

Sure, if a limb is dead or broken you can cut it . . . but only into the dead wood for now.


Photocredits
https://www.pinterest.com/pin/254594185160021955/
http://www.denverpost.com/ci_23047059/tight-spaces-or-dry-places-shrubs-become-garden

Feed the Tomatoes and Veggies

Heirloom Vegetable Seeds

By Sandy Swegel

So more of them will feed you.  Last week we talked about being on the home stretch for the vegetable garden (at least here in Zone 5.)  Lots of plants are super stressed this year by early rains and now intense heat.  In Colorado, some farmers are only now getting their first tomatoes.  But unless your tomato plants already have too many tomatoes on them, this is a great time to feed the tomatoes and veggies by boosting their final production with a good liquid organic fertilizer…either a balanced nitrogen-phosphorus mix, a bloom, or kelp.  There’s still time to get more tomatoes and bigger tomatoes, so give the plants a reward for making it so far. I even fertilized the zucchini…our delayed season means even the zucchini are slow.

We’ve had blistering heat that has sun-scalded our basil and some greens.  I’m doing a light feed to these plants too as compensation for all the suffering they’ve had to go through this year.  Some people throw some row cover over greens when the sun is intense to give a little protection.

But tomatoes don’t need any protection from the sun as long as they have consistent water.


One other tomato season task:  Do a taste test while the tomatoes are at their peak.  It’s amazing how differently the same variety will taste from year to year….and sometimes you’re the one who has changed and you find you like some flavors more than others.  Organize a testing with friends who bring their varieties, and you’ll have a fine summer party.  So far Black Krim is still my favorite (in big tomatoes; Red Cherries are still my favorite eat off the vine taste.


Photo credit

https://goingtoseed.files.wordpress.com/

http://centerofthewebb.ecrater.com/

Stay the Course: End of Season Gardening Tips.

Gardening Tips

by Sandy Swegel

It may still be blistering hot, but gardeners, especially in Zone 5, are on the home stretch. Days are getting noticeably shorter. Much of the work of the year culminates in the next month as it’s time to bring the harvest home so here are some end of season gardening tips. You have to pay extra attention in the next few weeks so you get the best harvest possible.

Keep the water steady.
This is not the time to skip watering for several days. Here’s the bad cycle. You forget to water for a day or two. Then you go out and put the water on for hours to compensate. This is a sure recipe for split fruit, especially tomatoes, and reduced fruit production.


Stay after the powdery mildew.
The mildew can be crazy on the squash and melons this time of year. Don’t let the whole vine turn to mildew. At the least, pull off the badly diseased leaves to keep the disease from spreading to the whole plant. Those squash, pumpkins and melons can still put out a lot of good fruit if they have some healthy leaves to photosynthesize.

Keep harvesting.
The more you harvest, the more your plants keep putting out new fruit. Don’t lose courage now just because your kitchen is overflowing with food to be processed or given away. Keep things in a cool area if needed till you get to it.

Consider a light fertilizing.
Some plants have really been putting out and spending themselves for you. I sometimes do a light foliar feed of kelp or other liquid organic fertilizers to keep the plants’ spirits up on these stressful long work days. I think the kelp helps with resisting disease too.

The season may have a long way to go…don’t get distracted by school startups and thoughts of Fall. Your garden’s glory days are here.


Photo credit:
www.rosalindcreasy.com/edible-garden-how-to/
smallimperfectgarden.wordpress.com/2014/09/15/picking-tomatoes-shouldnt-be-this-challenging/


Why Won’t my Garden do What I Say?

Tips for Garden Frustration

by Sandy Swegel

That’s the kind of questions I’m hearing these days.  Why won’t my plant bloom?  Why aren’t my tomatoes red? Why does my garden look so bad? Why is my tree dying?  Let’s tackle a few of these questions so you can figure out why it seems your garden is disobedient?

Why won’t my pineapple sage bloom?  It’s so beautiful in the magazines. Salvia elegans or pineapple sage smells deliciously of pineapple and hummingbirds flock to it.  Alas, what I discovered after a season of coaxing and fertilizing is that it will never look so beautiful in Colorado as it does in the Sunset magazine pictures of California.  It’s one of those plants that bloom according to day length and short days to stimulate blooming.  So no matter what we do, it simply is not going to put out blooms till late August.  Since our first frost can be in September, this is a very unsatisfying plant to grow in a northern area with long summer days.

The second part of this question is “Why did all the other fancy hybrid flowers I bought in Spring quit blooming?”  Some may be day length sensitive like the pineapple sage.  Most have issues with our hot dry summer heat.  If you keep deadheading as soon as the weather starts to cool, the blooms will restart.  And there’s no changing Nature’s mind with more fertilizer or water.

“Why won’t my watermelon plants get big?” a friend asked over afternoon tea.  The answer to most questions is to put my finger in the soil. It was dry, dry, dry.  There was one drip tube on the plant but that’s not nearly enough for a watermelon which needs lots of water.  I looked up. The garden was right next to a big spruce tree. The tree was on the north side so the plant had lots of sun, but the sneaky tree roots ran all through the garden sucking up irrigation water. If you’re going to grow a plant with a name like “water” melon…you have to put a lot of water in the system.

The second most-asked question is “Why do I have so many weeds?” The answer is, alas, because you didn’t spend enough time in July keeping after them.  Who wants to weed in the heat of summer?  And summer weeds grow really fast and tall.  You can’t even blink.

The most-asked question, of course, is “Why won’t my tomatoes turn red?”  This year everybody has lots of green tomatoes but not nearly enough red tomatoes. The truthful answer is “D***d if I know. I wish mine would turn red.”  A Google search shows thousands of people ask this question.  People who answer have all kinds of pet theories about leaves and fertilizer and pruning the plant etc. I’m just learning to wait and making a note to grow more early tomatoes next year.

Nature just doesn’t work the way we want sometimes.

Photo Credit: http://eugenebirds.blogspot.com/2010_11_01_archive.html