CONTAINER GARDENING
Growing a Garden in a Container
Planning ahead-
Take a moment to look at the locations where you want to place your containers. Consider such things as sunlight (strength and time) and wind. If you have pots with sun/heat-loving plants, arrange them to shade your pots with those plants that need less sun and heat. Tall plants or plants that vine can be trellised to grow vertically and provide a natural barrier for tender plants. Make sure to anchor trellises and containers with tall plants, to keep them from getting blown over. If you plan to place your containers on a covered porch or balcony or any place that receives limited sunshine, you should select vegetables and flowers that don’t require as much. Leafy greens, snap peas, Chinese mustards, and kale will do quite well in these conditions, but tomatoes, and peppers, probably not.
When growing your garden in containers rather than a garden plot, it is just as important to choose varieties that will be able to reach maturity in your growing season. If you have a short growing season, check the maturity dates on the packages and plan to start some seedlings in the warmth of the indoors to get a jump on the growing season.
These varieties are not practical for container gardening due to their size or length of growing season (At the end is a list of vegetables/plants that will do well in containers.):
Watermelon and most cantaloupes (although there are some midget varieties that can do well)
Large Pumpkins and winter squash
Corn
Head cabbage (except as microgreens)
Mammoth sunflowers (except as sprouts or micro greens)
Beefsteak type tomatoes
Garlic bulbs/full sized Onions
Make sure to prepare your containers and pots properly, to give your veggies the best chance possible. You will be surprised by how much those little seedlings will expand, and there is as much growth below the soil as there is above the soil, so don’t squeeze them into tiny containers. Any type of vessel can be used, just keep in mind the size of the plants and the location. Terra cotta pots are inexpensive but dry out more quickly than others, metal tends to get quite hot in the sun, and plastic is versatile and lightweight.
………………………………………………………………………………..
Getting started-
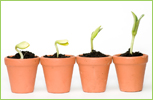 For Container Gardening, start your long-season varieties, indoors, in good quality starting soil or soilless mixture. Seedlings should be kept consistently moist (not wet) and exposed to fairly strong light, sunlight, or florescent, for at least 10 – 12 hours each day as soon as sprouts appear. This will keep them from getting leggy and looking for light. Seedlings that are sown more closely together can show more vigor as their roots symbiotically help each other extract nutrients from the soil. As the first true leaves appear, choose the strongest seedling starts that you will need for your containers and clip off the remaining which gives the strong ones some space to expand. Transplant to pots and containers shortly after the first true leaves appear. When transplanting to your containers and pots, make sure to space the seedlings according to the package directions for each type of vegetable.
Here are some plants that do not like to be transplanted. Instead, start them in individual moss starter cubes or use homemade newspaper pots or toilet paper tubes that can just be set into your containers at the appropriate spacing.
Beans Squash Burnet
Chinese Cabbage Borage Chervil
Cucumbers Caraway Pumpkins
Melons Coriander Dill
Root crops (except beets, turnips, and celeriac)
Make sure that your container has drainage holes in the bottom. Place a couple of layers of newspaper in the bottom of the pot to keep soil from falling through the holes, then place a 1-inch layer of moss on top of the newspaper. If you don’t have a source for sphagnum moss, coarse gravel will work. Fill the container with good, rich pre-moistened, potting soil, leaving room at the top. Pat it down firmly to fill in the spaces but do not pack hard. Take your young transplants (holding by the leaves or root ball, not the tender stem) or degradable seedling pots, one at a time, placing each on the top of the soil. Spread out the roots, and sprinkle more pre-moistened soil over the roots, covering them completely. Use enough soil to bring the level up to just under the first leaves for most seedlings. Do not cover the crown on plants such as lettuce. The plant’s first leaves should be at the level of the top of the container. Pat the soil gently, firming it over the roots and young stems.
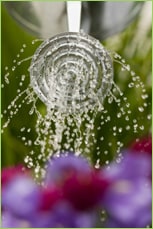 Water your containers when the soil feels dry in the top few inches. Continuously wet soil suffocates the roots and encourages bacteria and fungi to grow. Usually, we water when we have time or are home, but watering when needed instead of on a schedule is usually best. Avoid wetting the leaves as much as possible. Try to use tepid water and if you are using chlorinated tap water, allow it to sit overnight exposed to air to dissipate the chlorine which can damage plants and kill beneficial soil bacteria.
Fertilize with low doses of good quality organic fertilizer every 7-10 days.
Don’t be shy about removing plants that are past prime or are beginning to bolt. Removing these will leave spaces where you can plant another round of short-season varieties and ones that prefer to mature in the cooler weather of fall. Lettuces and other leafy greens are good for this, maybe another round of snap peas, beets or radishes, arugula, and bunching onions. Mustards and kales and fennel love the cool days of fall
………………………………………………………………………………..
Design – Container Gardening can be beautiful
Create groupings with your pots and experiment with variations in height, by placing some containers on concrete blocks or other empty containers turned upside down. This adds visual appeal and at the same time maximizes the space available. Groupings also help to make the job of watering a bit easier. Pick a particularly spectacular container plant to be the visual focus and arrange other not-so-pretty container plants around.
Make your containers a bit more decorative by planting different varieties together in one pot. Use the spaces under taller plants to place smaller herbs and leafy greens. Some vegetables live in harmony with one another, some are actually beneficial to each other and some hate each other. Mix colors and textures and think about including edible flowers tucked in around the edges. See the article, Flavorful Flowers.  Check each variety on our website to see if your combinations will work together. Here are some examples:
• Lettuce does well with beets, bush beans, pole beans, cabbage, carrots, cucumbers, onions, radishes, and strawberries. You can also plant your lettuce at the base of young sunflowers for a little shade.
•Celery, dill, onions, and potatoes are great companion plants for cabbage. Planting clover with your cabbage will keep insects away and chamomile will improve the flavor. Cabbage does not like strawberries, tomatoes, peppers, eggplant, rue, grapes, or pole beans.
•Cauliflower is compatible with basil, beans, dill, garlic, hyssop, lettuce, mint, onion, rosemary, sage, and thyme. It does not like grapes and rue.
•Plant your peas with bush beans, pole beans, carrots, celery, cucumber, eggplant, parsley, radish, spinach, strawberry, sweet pepper, tomatoes and turnips. Keep your peas away from chives, and onions.
•Tomatoes grow well with asparagus, basil, beans, carrots, celery, chives, cucumber, garlic, head lettuce, marigold, mint, nasturtium, onion, parsley, peas, peppers and marigold. Basil will repel flies and mosquitoes from your tomato plants while also improving their growth and flavor. Beebalm, chives, and mint will improve the health and flavor of your tomatoes. Keep potatoes, fennel, dill, cabbage, and cauliflower away from your tomato plants.
………………………………………………………………………………..
VEGETABLES/PLANTS THAT DO WELL FOR CONTAINER GARDENING:
Beans (Pole and Bush types)
Direct sow into containers when night temperatures reach 60 degrees F, 6“ minimum soil depth, full sun, and harvest in mid-late summer, Provide a trellis or climbing structure
Beets – Direct sow into containers in early spring and late summer, 6” minimum soil depth, full sun to partial shade, harvest early summer and again in fall
Carrots (Nantes, Round, or Finger-type are best for containers) – Direct sow into containers when night temperatures reach 60 degrees F, 8” minimum soil depth, full sun, harvest in summer through fall.
Cucumbers (vine or bush-types) – Direct sow into containers when the day temperatures reach 70 degrees F or start indoors and transplant, 10” minimum soil depth, full sun, harvest in summer, Provide a trellis or climbing structure for vine-types.
Eggplant – Start inside 8 weeks before temperatures usually reach 80 degrees F for your area, then transplant to your container, 10” minimum soil depth, full sun, and harvest late summer.
Leafy Greens (Swiss chards, Collards, Kales, Mustards, Asian Greens, Pak Choy) – Direct sow into containers when the nighttime temperatures are above freezing, or, start indoors 3-4 weeks before and transplant, 8” minimum soil depth, full sun to partial shade, harvest late spring through winter.
Lettuces and Salad greens – Direct sow into containers after Spring’s last frost date, or start indoors 4 weeks before and transplant after hardening off when about 2 “ tall, sow seed again in early fall, 6” minimum soil depth, full sun to partial shade, harvest spring through early summer and again in fall.
Onions, Garlic, Leeks – Direct sow into containers after Spring’s last frost date, 6” minimum soil depth for bunching onions and young (green) garlic, 8” for Leeks, full sun, harvest summer to fall. Mounding soil up around the base of bunching onions and leeks will encourage long white stalks. Grow garlic in containers to use the green shoots and any small bulb growth.
Peas – Direct sow into containers when the soil is no longer frozen, Soaking the seeds overnight will speed up germination, use an inoculant (a beneficial bacteria that enables the roots to use the nitrogen pulled from the atmosphere and stored in nodules on the roots), especially when planting into containers with new potting soil. 8” minimum soil depth, full sun, harvest in late spring to early summer with secondary fall crops possible, Provide trellising for vine-types or cages to support bush-types.
Peppers – Plant seeds indoors, keeping at 80 degrees F for about 2 weeks, starting 10 weeks before nighttime temperatures remain above 55 degrees and daytime temps reach at least 70 degrees. Transplant into containers after hardening off, 8” minimum soil depth, full sun, and harvest in late summer.
Potatoes – Plant disease-free seed potatoes in a large container (30” deep, 20” across) filled 1/3 full of potting soil, 5-6 “ apart, and cover with 2 inches of soil, When plants are about 6” tall cover the bottom half with potting soil, continue doing this as the plant grows until reaching the top of the pot. Full sun, harvest summer to fall.
Radishes – Direct sow into containers when the soil is no longer frozen and every other week till late spring, 4” minimum soil depth, full sun to light shade, harvest all spring and second harvest in fall.
Spinach – Direct sow into containers when the soil is no longer frozen, replant first of August for fall, 6” minimum soil depth, full sun to partial shade, harvest in spring, early summer, and fall.
Squash (zucchini, yellow summer, yellow crookneck, patty pan, mini pumpkins) – Plant seeds indoors 2-3 weeks before the spring last frost date, transplant into sunny, warm containers, and cover with a row cover for several days, 10” minimum soil depth, full sun, harvest summer to early fall, pick when young and small, provide trellis and support for vines.
Tomatoes – Plant seeds indoors keeping them at 75 degrees F for about 2 weeks, starting 6-8 weeks before Spring’s last frost date, transplant at least once to another larger pot when they have 3 sets of true leaves burying them up to the first set of true leaves, keep in good light, 12” minimum soil depth, full sun, harvest late summer and fall.
Herbs – Herbs are mostly perfect plants for container gardens, being small and not fussy.
Guide to Pea Harvesting: When and How to Harvest Your Garden Grown Peas
Harvesting Peas
by Sam Doll
How do you know it’s “officially” summer? Is it when the pool opens back up or your neighbors start grilling? For me, it doesn’t REALLY feel like summer until I can walk into my garden and eat a sweet snap pea off the vine!
While those pea pods are pretty tasty from the start, how do you know when the perfect time to pick them is? What if you want shelled peas, peas for stir fry, or even microgreens? We’ll help you figure out how and when to harvest your peas here in our Guide to Pea Harvesting.
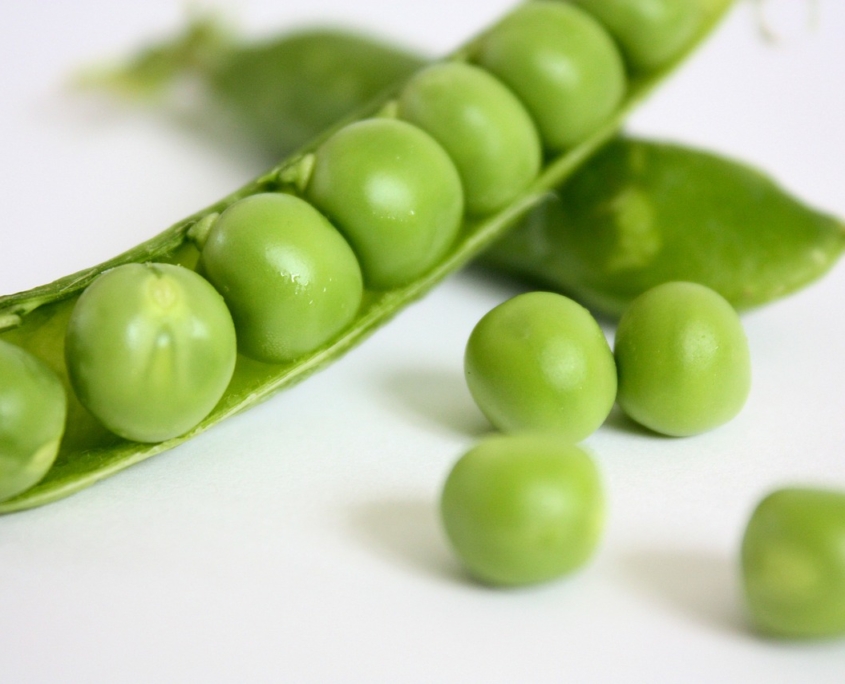
Garden Peas
Garden peas, also known as English or sweet peas, are the classic pea, great for side dishes or soups. While this pea can be eaten whole when it is young and tender, it shines brightest when shelled.
When harvesting garden peas to be shelled, check for the pod to be bright green and rounded. It should be slightly shiny and have no visible bumps. If the pods have bumps from the peas getting too large, the peas may be over-ripe and could be too starchy or mealy in texture.
We recommend our Green Arrow variety of garden peas. They have a high yield (8-11 peas per pod) and are good tender as well.
Snow Peas
Snow peas are recognizable for having flat pods with very small peas inside. They are mild and sweet and are almost exclusively eaten whole. Great eaten fresh or in stir fry, snow peas can be some of the most delightful crops in your garden.
Since snow peas are meant to be eaten whole, it is better to err on the early side when harvesting. The peas should be small and a little loose in the pod. If they go too long, the pods will become fibrous and the crop will lose most of its sweetness.
Snow peas are also great for growing microgreens due to their quick germination. The shoots are sweet, crunchy and delicious. Harvest them when they are about 2″ long and use them as a garnish, add them to sandwiches, or mix them in salads and soups.
The Oregon Sugar Pod II (long name, great plant) is the perfect sugar pod for everything from microgreens to stir-fry.
Snap Peas
Snap peas, or sugar snap peas, have a plump, edible pod that makes for a classic summer snack. A cross between garden peas and snow peas, snap peas are best as a sweet, light snack but can also be shelled or lightly cooked.
Like snow peas, they can be harvested as early as you want to and as long as the pods are rounded and shiny. If they lose their shine or the pod begins to bulge where the peas are, they have gone too long to eat whole, but can still be shelled and enjoyed!
The Sugar Ann is our favorite variety of snap pea
Some Notes
The more you pick, the more you get. It is best to keep harvesting peas as long as possible so you can get the maximum yield for your hard work.
When harvesting, use two hands to pick: one to hold the plant and the other to harvest. Peas are delicate plants and rough harvesting can do more harm than good.
Peas fix nitrogen in the soil which makes them best buds with corn. You can also plant your peas with bush beans, pole beans, carrots, celery, chicory, cucumber, eggplant, parsley, early potato, radish, spinach, strawberry, sweet pepper, tomatoes and turnips. Keep your peas away from chives, grapes, late potatoes and onions.
Oh, Sunflowers!
More About Sunflowers
By Engrid Winslow

Gorgeous Sunflower Photo Courtesy of Christy Short
Sunflowers (Helianthus sp.) are such a great annual for so many reasons. First of all, they are so darn cheerful with their big, bright blooms during the hottest part of the summer. They are also easy to grow. Just poke them into the ground and keep them well-watered until they germinate and then stand back because they thrive in rich soil and heat. The pollen is loved by bees and the seeds are attractive to birds. Sunflowers come in so many varieties with sizes ranging from 12” to 15‘ tall and the colors vary from pale lemon yellow to bright yellow, orange, red and bronze. The petals can be single, double or in fluffy multiple layers (check out Teddy Bear Sunflower).

It can be fun to watch the birds eat the seeds or you can make a fun project out of roasting them. To do this: soak the seeds in salted water for 24 hours, then roast in a single layer on a baking sheet lined with parchment paper at 350 for 35 minutes, stirring frequently. Let them cool and store in an airtight container. If you want to serve them warm after roasting toss them with a bit of melted butter for a delicious treat. Sunflower seeds are high in vitamin C, E and are high in fiber which supports digestion, they also contain antioxidants, magnesium (for bone health) and can help lower cholesterol.
The roots of sunflowers have an allopathic quality which inhibits the ability of other plants nearby to grow properly. This makes them a great choice for weed suppression but keep them away from other flowers that you love.

Half Awake Sunflower (Photo Courtesy of Christy Short)
GARDEN DESIGN 101
Guide to Landscaping
By Engrid Winslow
There are lots of professional landscape designers out there who can help you put together beautiful flower beds but most of us are on a budget that won’t accommodate such wonderful swaths of elegant beds. So, for the rest of us, here is, garden design 101, a few basics to consider when planning your spaces for lots of color for as long as possible.
Tall in Back, Short in Front
This is one of the three basic rules in landscape design that you should consider when deciding what to plant where. This stems from the traditional English Cottage Garden look with Hollyhocks, tall grasses and climbing roses in the back and shorter flowers, (such as poppies) in the middles and even shorter ones (think thyme or even trailing plants like nasturtium), closer to the front.
Color Combinations
Get out that school color wheel for some great ideas of combinations that are either across or next to each other. Some personal favorites are the unexpected ones, like orange and purple next to each other. If you prefer pastels, then pinks and pale blues and yellows are the way to go. Don’t neglect white because you don’t think that it is a real color. It highlights and adds accent next to some colors (such as red) and adds softness to blues and pinks.
Bloom Time
If you want color in your flower beds all year long you have to think about when they bloom. Some of the earliest flowers can be provided by Hellebores, Snowdrops, Crocus, Iris and early Daffodils (there are a huge range of choices in bulbs from Daffodils that will begin in early March and continue into late April and the same goes for some of the more “wild” or “species tulips”) and the later ones being Sunflowers, asters and repeating roses. There are options for all season bloomers such as pincushion flowers and the Frikartii Asters. In the heat of July you can depend on Hummingbird Mint, Coneflowers, and Rudbeckia to provide cheerful blooms. Don’t forget to include grasses which can also range in the times when their inflorescences are at their peak depending on whether they are cool or warm season “bloomers”. Grasses also create interest in the garden during the winter and provide food for small birds.
A Couple of Other Suggestions
- Consider planting in groups of odd numbers rather than just one plant which creates swaths and clumps of color.
- Repeat some of these groups several times in several places throughout the garden to give a sense of continuity.
- Use a larger perennial, some half-buried rocks or a shrub to anchor the scene.
- Add some annual flowers such as sunflowers, zinnias and annual poppies which bloom for a long time in bright, vibrant colors.
FarmHer
Women Farming Show
By Sandy Swegel
OMG, I found the best show to binge watch! No not a zillion episodes of an old sitcom from my youth. FarmHer is an internet-based show about women farming! There are beautiful landscapes of Midwestern farms and silly scenes of baby goats climbing all over the farmher. Farmhers with good topsoil ground into the creases and wrinkles in their hands. Young urban farmhers in crowded cities. This show is a delight and inspiration to anyone who has dreamed about farming or just growing a few vegetables in their yard.
Women have always been hard-working farmers. No one female or male, old or young, lives on a farm without working…there’s just too much to be done. But women’s importance on the farm has often been hidden. In my extended family, second cousins had a dairy farm in Wisconsin. The family joke was that the husband spent all day sitting in the air-conditioned tractor with stereo while the wife grew all the family food, raised the chickens and the children, did all the preserving and the bookkeeping.
FarmHer is a nonprofit online community devoted to highlighting women in agriculture and helping them connect to each other and to their communities. FarmHer especially does this with beautiful photos and video episodes and a blog. You’ll love watching the dynamos who are growing your food.
New episodes come out Friday evenings at 8:30 C on RFD-TV. https://www.farmher-episodes.com
Photocredits
ILLITERATE GARDEN
Garden Problems We All Have
By: Sandy Swegel
“My garden is illiterate. It didn’t read the book about what it can’t do.”
That was the wisecracking opening remark at a gardening talk I attended recently. We all laughed and during the break we started talking about some of the stupidest plants we know.
Looking at wild plants, we laughed about orchids native to cold, arid Colorado. But the most illiterate plants are the ones we humans planted because we didn’t know better.
The plants that don’t know they can’t survive in Zone 5.
Pineapple sage don’t you know anything? You like living in semi-tropics. What are you doing living another year in the Colorado clay soil iris garden with 70 mph winds?
The plants that don’t know that being an annual means can’t live longer than one year.
Yep Verbena bonariensis I’m talking about you. The books say you are an annual but I’ve watched you survive for three years in a row. Ditto snapdragons…I have trees younger than you.
Plants that don’t know they are supposed to be invasive.
I’m waiting for you, bamboo. Any day now you’re supposed to fill in that entire border between my yard and my neighbor’s ugly garage. Sure, four years ago I saw one runner into the grass…but what have you done lately?
Codependent plants.
These are the plants that not only don’t know they can’t survive but also put up with terrible abuse. Don’t be sweet-talking me Japanese Maple. You know who you are. You croaked all those times I planted you in protected areas and nurtured you with extra mulch in winter and water in summer. But the year I put you, a tree, in a pot with six other plants on a third-floor deck without protection from the cold and without winter watering…that’s the year you survive?
If it were up to humans, we’d never have surprises in the garden or tulips blooming in July or scabiosa blooming in December literally under the snow. Or the gallardia that blooms in my driveway. We won’t even mention the weed that seeded and bloomed in my truck bumper the December I was driving around Louisiana.
What a relief that our plants are so darn illiterate.
Photocredits:
fullycoolpix.blogspot.com/2014/08/plants-live-everywhere.html
www.boredpanda.com/plants-flowers-versus-concrete-asphalt-pavement/
February Plant of the Month – Carrots
Plant of the Month
February 2017
Common Name:
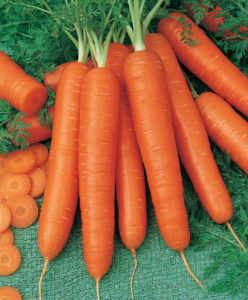
Scarlet Nantes Carrot
Scientific Name:
Dacus carota var. sativus
Native Range:
Mediterranean Region
Hardiness Zone:
4 to 10
Days to Maturity:
65-75
General Description:
Scarlet Nantes Carrot is a standard market carrot that has a long, cylindrical shape and a rich reddish-orange color. The flavor is sweet and delicious. Roots are fine-grained, containing almost no core. High moisture content makes this variety perfect for juicing. Carrots can reach up to 7 inches long. To prevent diseases, rotate planting location every season.
Site Requirements:
- Light: Full sun. Will tolerate very light shade.
- Water: Moderate moisture. Crusted soil can suppress germinated sprouts.
- Soil: Well-drained soil with organic matter. The area needs to be free of stones.
Seeding:
This cool-weather crop is easily over-planted due to its fine seeds. Sow seeds directly into loose soil in early spring 2-3 weeks before last frost date. Carrots are slow to germinate, emerging in 2-4 weeks. Cover seeds with a ¼ inch of soil—no more than ½ an inch. Lightly water seeds every day for best germination. Once sprouts emerge thinning is critical to reducing competition. Thin seedlings to 1/2 – 1-inch spacing. Best time for thinning is when soil is damp. Plant seeds every 2-3 weeks throughout midsummer for continuous harvest.
Harvest Time:
Start harvesting as soon as carrots have reached the desired size (up to 7 inches). Try pulling up one at a time to check the size. Watering the area before harvest can make pulling by hand easier. Harvest by mid-September to avoid pest damage.
Fun Facts:
- Carrots are a great source of fiber, potassium and vitamin A.
- Carrot greens can be used in soup stock, pesto, curries or tea.
- Common pest: carrot rust fly
- British gardeners plant sage around the area to repel the carrot fly
February Plant of the Month – Beets
Plant of the Month
February 2017
Common Name:
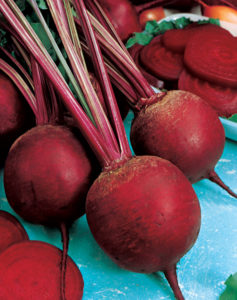
Detroit Dark Red Beet
Scientific Name:
Beta vulgaris var. crassa
Native Range:
Europe & Asia
Hardiness Zone:
2-7. For zones 8-11 grow as a fall crop
Days to Maturity:
55-65
General Description:
The Detroit Dark Red Beet is the most popular all-purpose red beet. It is globe-shaped, tender with blood-red flesh that is sweet and delicious. Beets are easy to grow and tolerate a wide range of climates. Beets prefer cool weather; in zones 8-11 where summers can be hot, grow them as a fall, winter or early spring crop.
Site Requirements:
- Light: Full sun to part shade
- Water: Consistent moisture
- Soil: Well-drained, sandy loam soil high in organic matter. Avoid acidic soil areas.
Seeding:
Sow seeds directly into soil in early spring as soon as soil can be worked. Beets tend to have spotty germination. Presoaking seeds for 1-2 hours will soften seed coat and speed germination. Plant seeds ½ inch deep and 1 inch apart. Seeds need close contact with the soil; it is best practice to press down on soil after planting. Sprouts will emerge in 10-20 days. Thin seedlings when they reach 4-5 inch to 3 inches apart.
Harvest Time:
Pull up plants when exposed root tops are 2 inches across.
Fun Facts:
- Reddish green leaves make a great addition to summer salads
- Planting garlic and mint with your beets will improve the growth and flavor
- Beets are very sensitive to toxic substances in the soil and may not germinate if planted near walnut trees or soils containing herbicides
A Working Garden Club
Finding a Garden Community
by Sandy Swegel
There are lots of garden clubs around. I personally belong to three and follow another two email-only groups online. When I first started gardening as an adult, I didn’t think I’d ever be a garden-club-kinda girl. Growing up in a Southern Big City, garden clubs to me meant you had to wear your best dress and go to a lovely tea with people of a certain social class in a beautifully manicured rose garden. That was just my own prejudices showing through because the love of gardening knows no class lines. However, I didn’t think I’d ever get my fingernails clean enough to go to one of those parties. With age and experience comes some wisdom and now I do go to one of those formal groups with officers and Robert’s Rules of order and I admire the community of members who have known each other for decades and who are so wise about local gardening.
I belong to another scruffier group that is especially interested in “culinary gardening” – gardens with lots of edibles. We mostly meet through email because there are quite a few market farmers and community garden volunteers so people don’t have time to meet with all the work they have to do…but any questions you ever have can be answered on our email list. We also order seeds and roots and greenhouse supplies together in bulk to save a lot of money. Every once in a while I meet someone who says they belong to this group and I have to ask their email address before I recognize them. We do have a heck of a delicious holiday party once the season ends.
A third occasional club I meet with has one primary task…to maintain a public rose garden a few times a year. So we are a kind of working group. We don’t all know each other well, but we know and love our roses.
I was at a small town garden tour yesterday and met people from a different kind of gardening club. They are a small (fewer than ten members) club who is a real WORKING group. No sitting around chatting about plants or looking at slide shows for them. Regularly they meet in one member’s garden and work for a good two hours on a garden project of the member’s choice. Naturally, this is followed by cold drinks and good food. They have met for years and welcome anyone…as long as they are willing to work to their ability. I admire this group because their gardens and knowledge have steadily improved over the years but they have also become a close-knit community based on their love of the earth and growing plants. They share in each other’s lives too and tend each others’ gardens or bring supper if someone is sick. They freely welcome newcomers to their group…if they’re willing to work.
I’m fond of saying that gardening is like the new church. Good people with shared values coming together and supporting one another in many ways and having a good time. Everyone clearly loves plants but there’s not a lot of doctrine. (well not counting opinions on pesticides.)
If I ever moved to a new town, the first thing I’d do is join a garden club. That’s the way to make true blue friends AND get more free plants.
Photo credits
http://www.dailyherald.com/article/20160204/entlife/160209489/
http://www.shorelinetimes.com/articles/2013/04/09/opinion/doc516475b154574110166725.txt
https://vitalandwell.files.wordpress.com/2012/04/garden-club-kids-2012.jpg